Getting Started
Welcome to Apparel Prestashop 1.7 Theme! We would like to thank you for purchasing Apparel Prestashop 1.7 Theme! We are very pleased you have chosen Apparel Prestashop 1.7 Theme for your website, you will be never disappointed! Before you get started, please be sure to always check out this documentation.
Compatible with Prestashop:
Prestashop 1.7.x
Prestashop 1.7 Help:
Prestashop at stackoverflow.com
Video Tutorials
Introduction
Apparel is a responsive, clean and modern Prestashop 1.7 theme which will be a perfect match for your online store.
Apparel is fully responsive Prestashop Theme dedicated for all stores selling clothes, furniture, watches, Jewelry, food ,etc. It has many attractive animations, modern and attractive design.
This Prestashop 1.7 theme has advanced features which will make your website becomes more professional with clean and classy layouts. It is fully responsive and looks stunning on all types of screens and devices.
Announcement:
Now all our themes comes with 5+ Booster Addons .
All our themes are compitable with PrestaShop 1.7.7 version.
Highlighted Features
- Mobile-first Optimized
- New & Sale Product Label
- Unique Block Design
- Cross Browser Comparability
- Auto Demo Content Install
- Multi-Language Support
- WhatsApp Chat Pro
- Sales Countdown Timer Pro
- Ultra-powerful Mega Menu Pro
- Product Custom Tabs Pro
- Product Remaining Stock Pro
- Category Slider Pro
- Banner Slider Pro
- Sticky Add to Cart Pro
- Instagram Slider Pro
- Newsletter Popup Pro
- Shipping Time Estimator Pro
- Product Image Flip effect Pro
- Multi-Store Support Pro
- Super High Performance Pro
- Facebook Chat Pro
- Ready Made CMS Pages Pro
- Search Engine Optimized Pro
- Unlimited Color Pro
- Login/Create Account Page Design Pro
- Category Page Product Column Option Pro
- Well Documented Pro
- Optimized for Speed Pro
- Powerful Backend Configuration Pro
- Dedicated Customer Support Pro
Theme Installation
To install the theme follow the instructions below:
Prepare InstallationWe recommend you to duplicate your live store on a development store and try installation on it in advance.
Backup Prestashop 1.7 files and the store database.
Disable all cache related section that you have in your Prestashop 1.7.
If you need help for installing Prestashop, follow the instructions in Prestashop Doc Guide..
Note: We recommend to use this theme on a new, clean installation or existing shops without custom core modifications.
PHP configurationmemory_limit = 128M
max_execution_time = 300
max_input_time = -1
upload_max_filesize = 25M
post_max_size = 20M
max_input_vars = 10000
allow_url_fopen = On
register_globals = disabled
Files & Folders PermissionPermissions for all files should be set to "664"
Permissions for all folders should be set to "755"
Note: If you don't know how to check these requirements, ask your hosting provider.
Theme Installation1. Download theme package of your purchased theme and extract it.
2. Now Go to theme-files folder where you will find the zip (your-theme.zip) file.
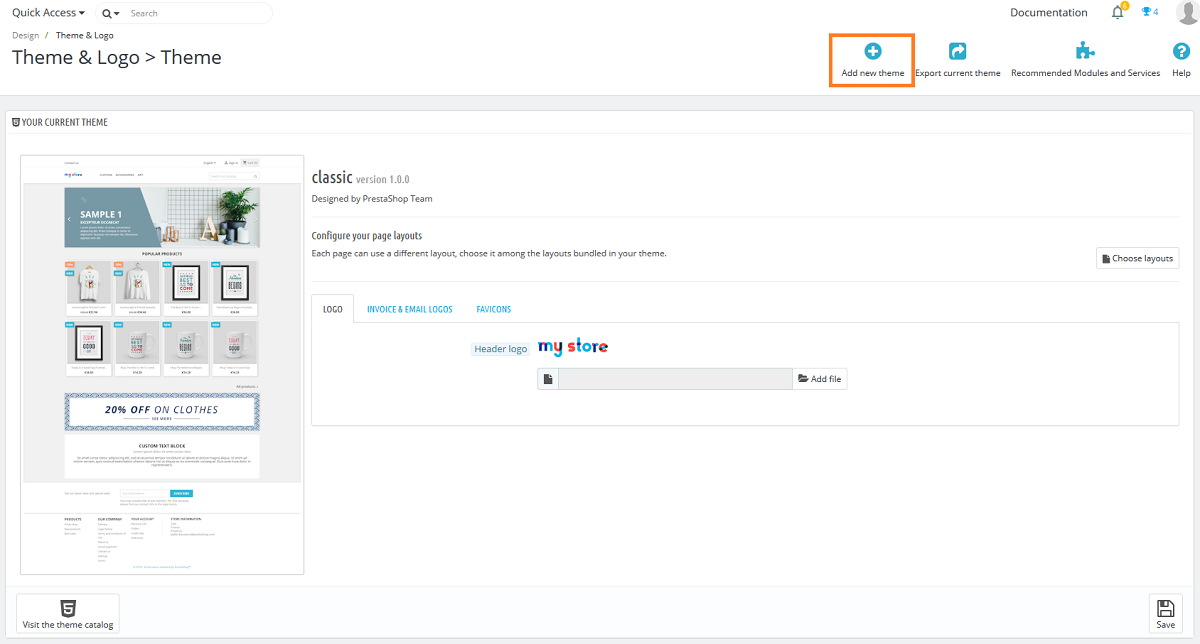
3. Now login to your Prestashop backend panel and navigate to Design > Theme & Logo
4. Now click on Add new theme button at top right corner.
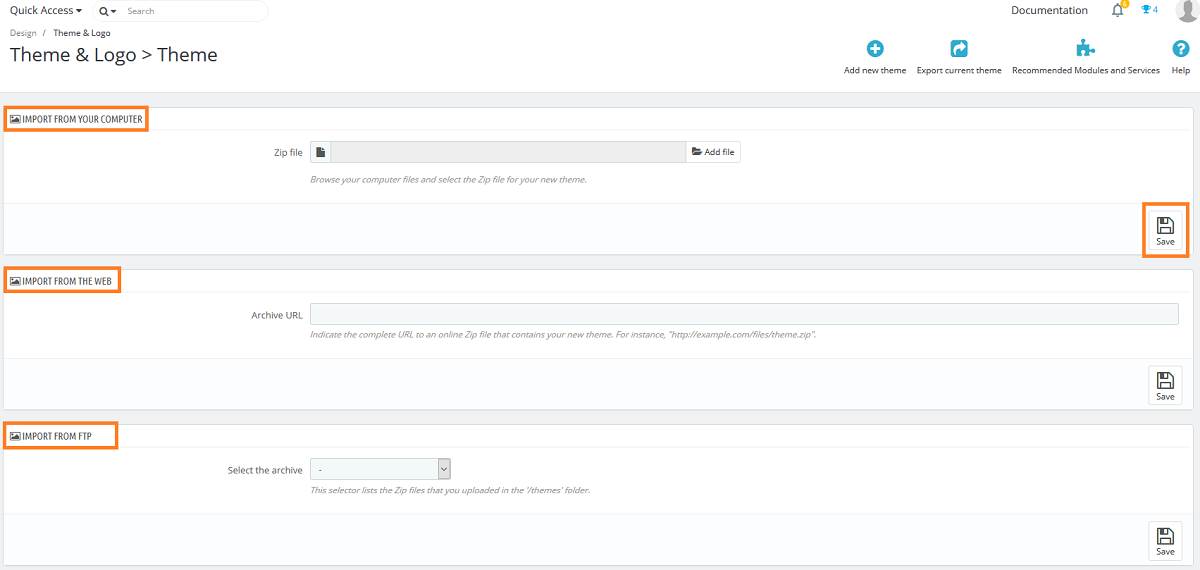
5. Here, You will have three choice to install theme :
-
Import from your computer
In this option, Click on the Add File button and select the theme package from theme-package > theme-files > your-theme.zip
Once you select theme, click on Save button.
-
Import from the web
In this option, here you have to enter the URL where the ZIP file is available.
Now click on Save button.
-
Import from FTP
In this option, You have to upload Theme File Package to your themes/ directory of your prestashop setup.
Now select the ZIP file which you have uploaded at themes/ directory.
Now click on Save button.
6. Now click on Use this theme button for activate new theme.
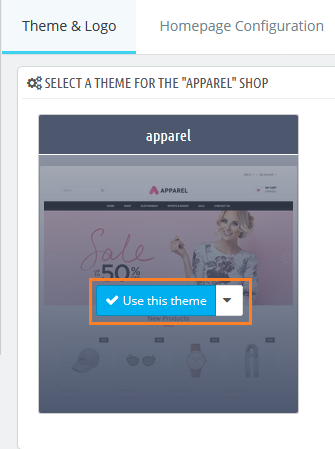
7. Your theme is now installed and ready for work.
Note: Once you installed this theme, all the static blocks and pages shown in live demo will be installed automatically to your Prestashop 1.7 setup.
In order to add the demo images used inside the theme, upload all static images (theme-images > img > cms) on your server in /[your prestashop root directory]/img/cms/ directory using FTP or Cpanel.
Settings Panel
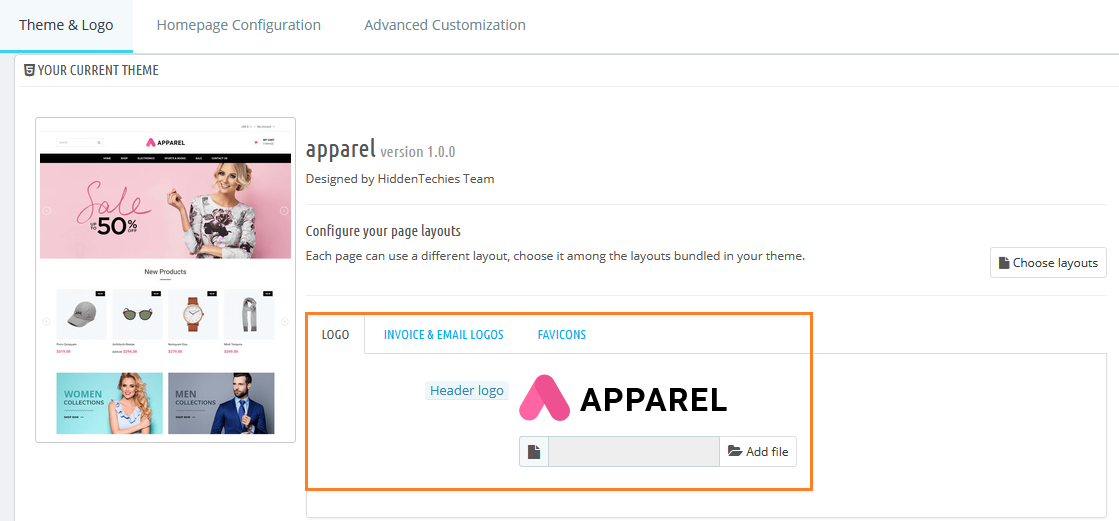
Add Your LogoLogin to your PrestaShop backend panel and navigate to Design > Theme & Logo.
 Setup Image Dimensions
Inside Prestashop backend panel navigate to Design > Image Settings.
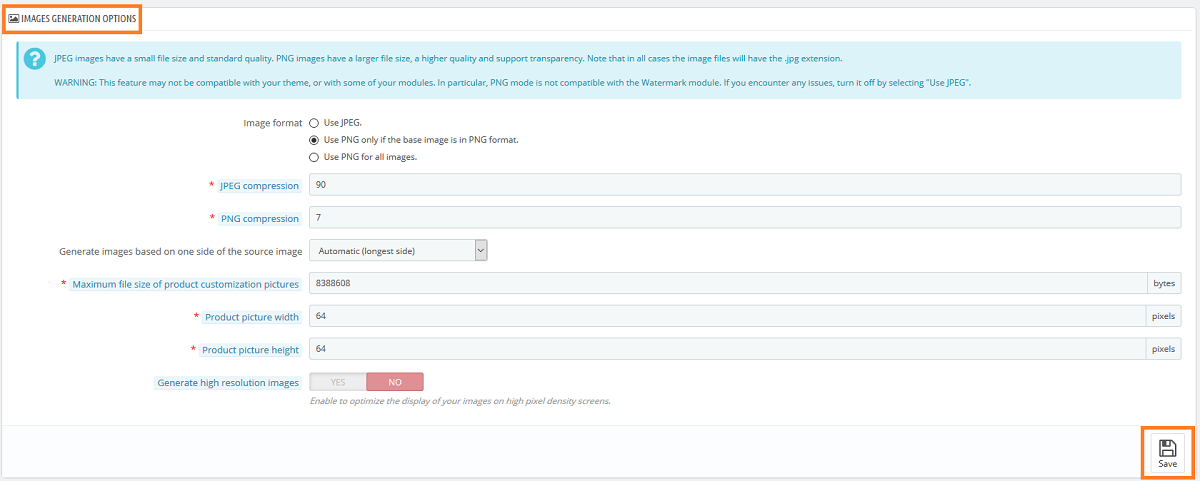
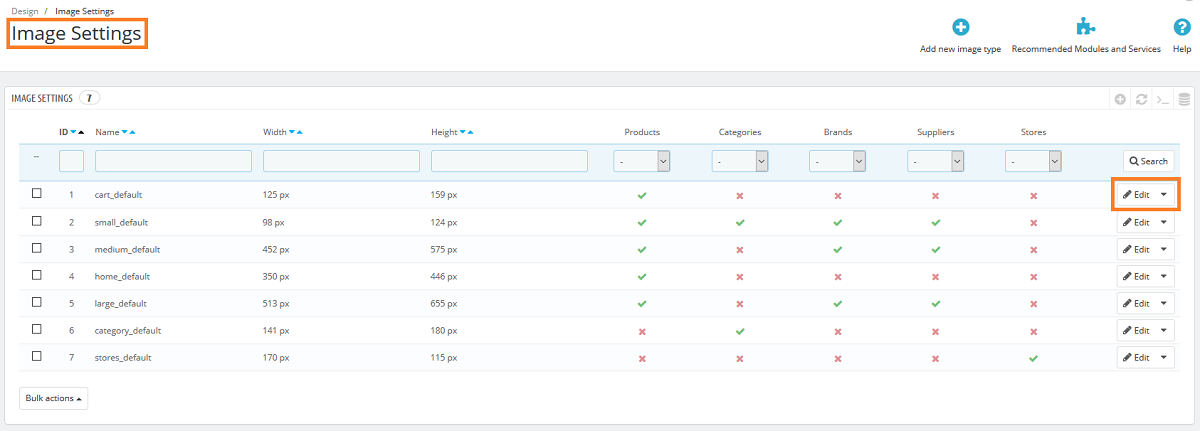 Image quality
At Design > Image Settings this location, Set image quality as per your requirement.
 Regenerate thumbnails
In order to see the changes after you update the image sizes, image quality. You must have to re-generate the images is using in your site.
Select option then click button Regenerate thumbnails
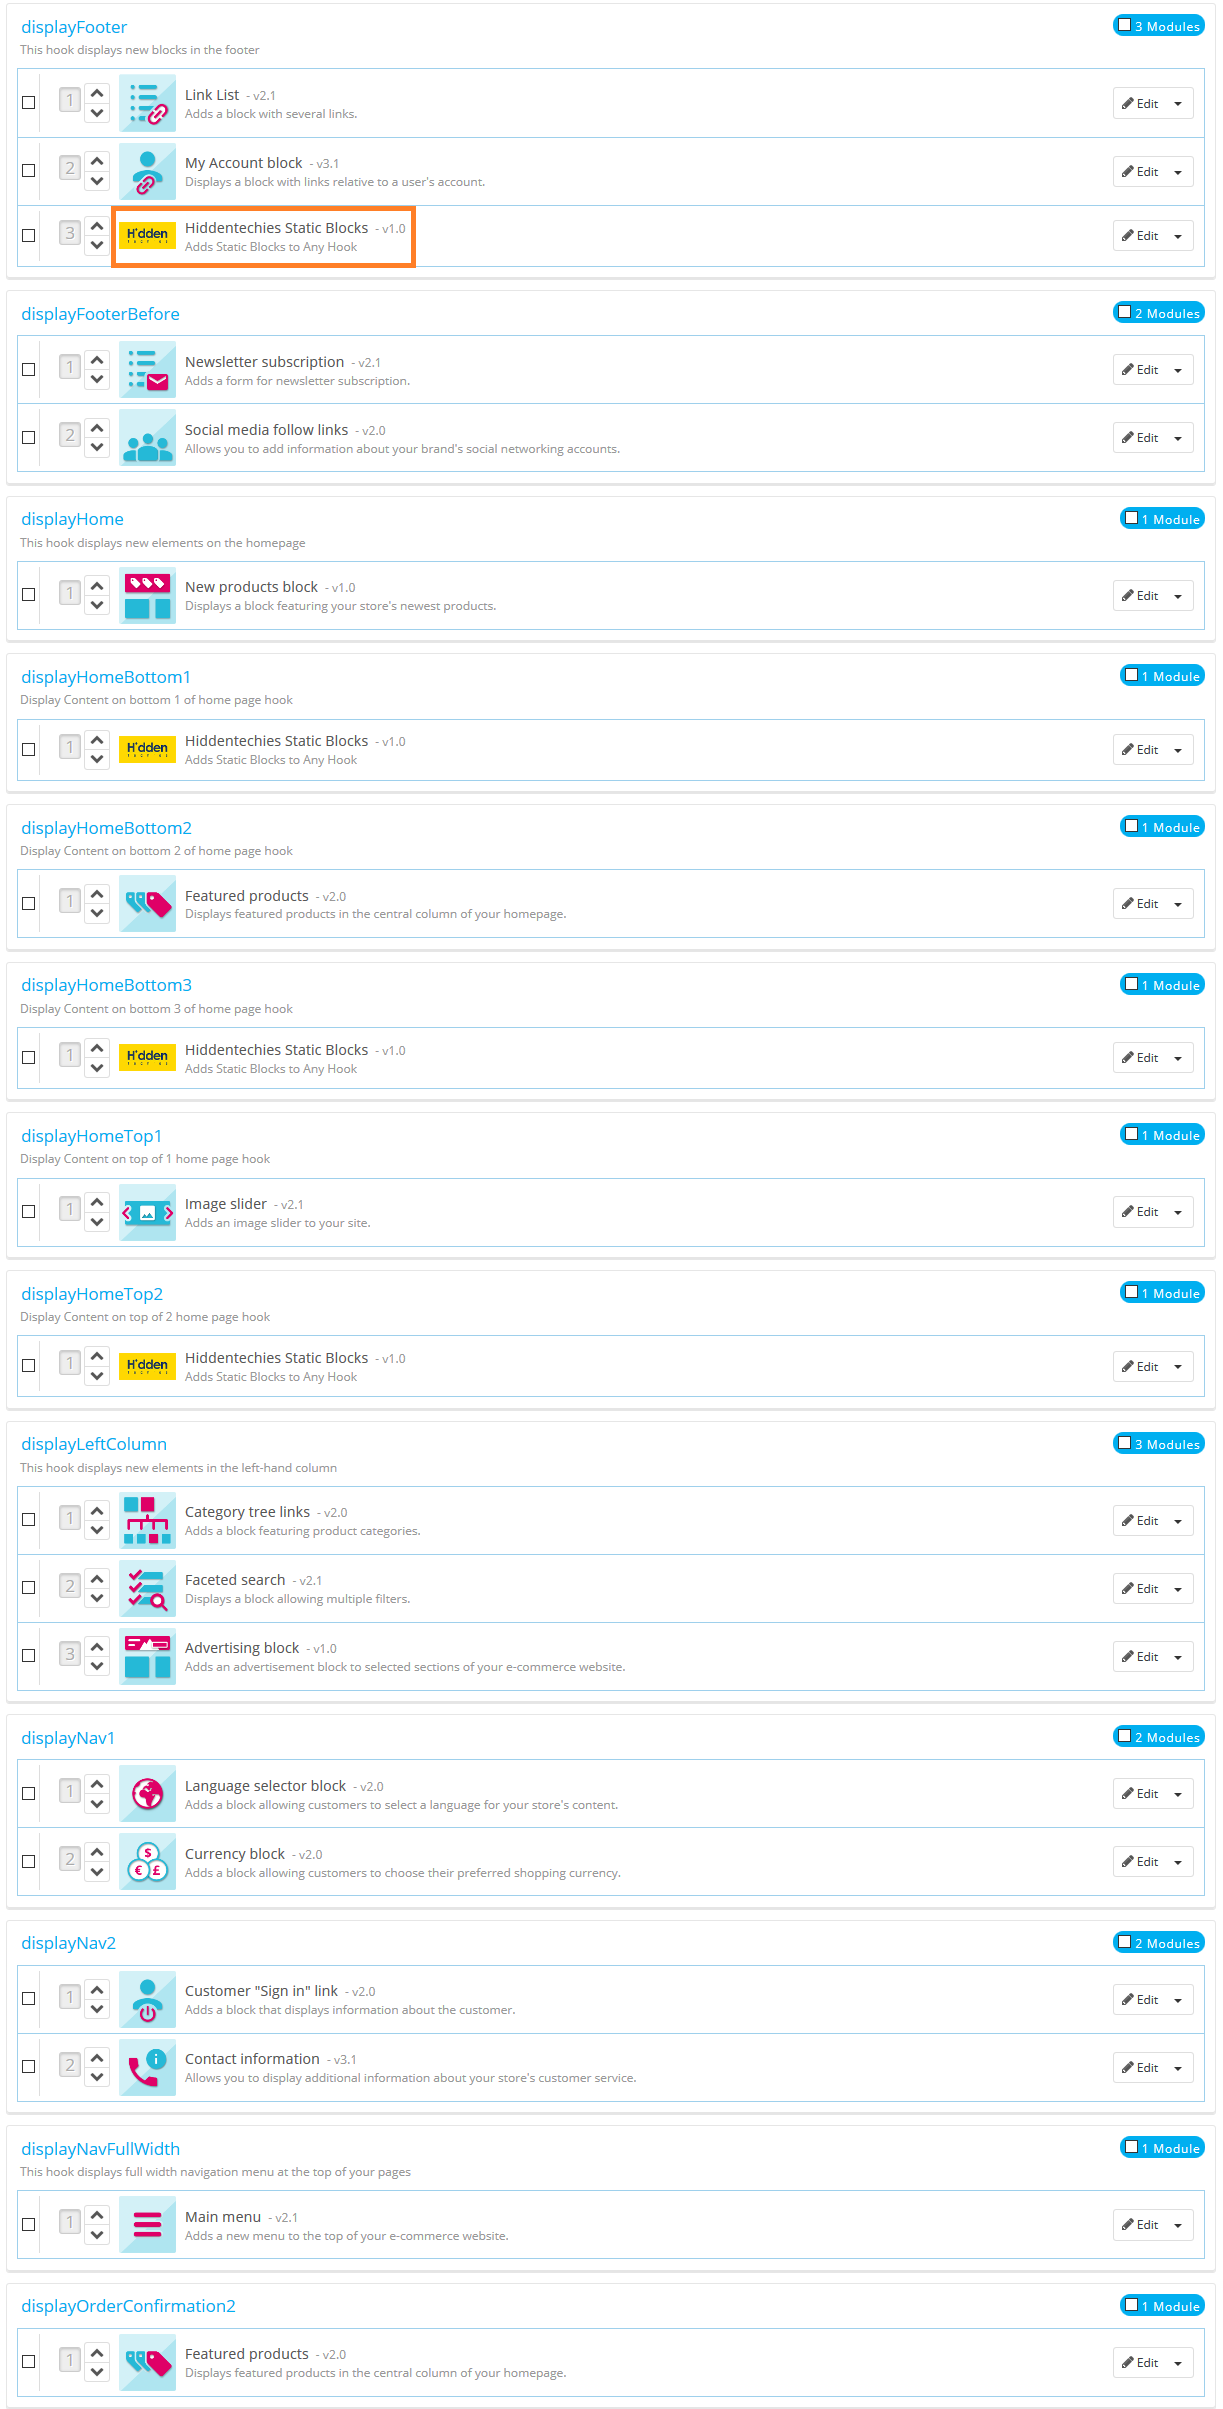
 Position of Modules
Inside Prestashop backend panel navigate to Design > Positions.
Check below image to see the example position of modules.
Module Configuration
In this section, you will learn how to configure theme module easily.
Theme Static Blocks
How to add new block in Hiddentechies Static Blocks Module ?
Go to: Back-Office > Modules > Module manager/Installed Modules > Search 'Hiddentechies Static Blocks'
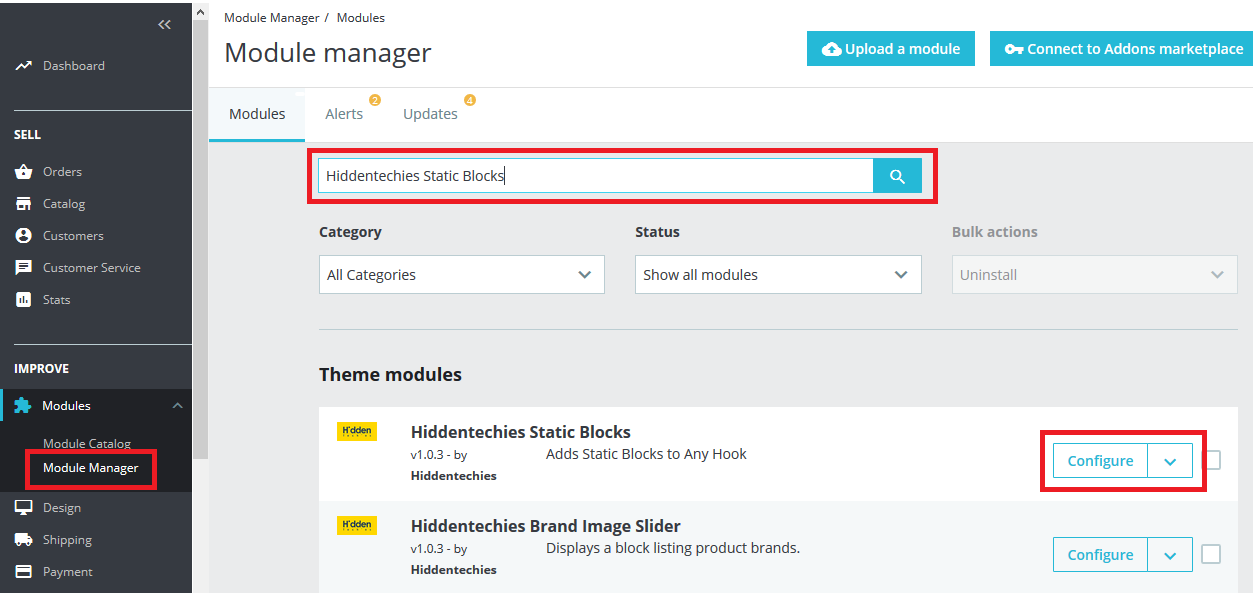
Hiddentechies Static Blocks will be shown. Now click on Configure button.

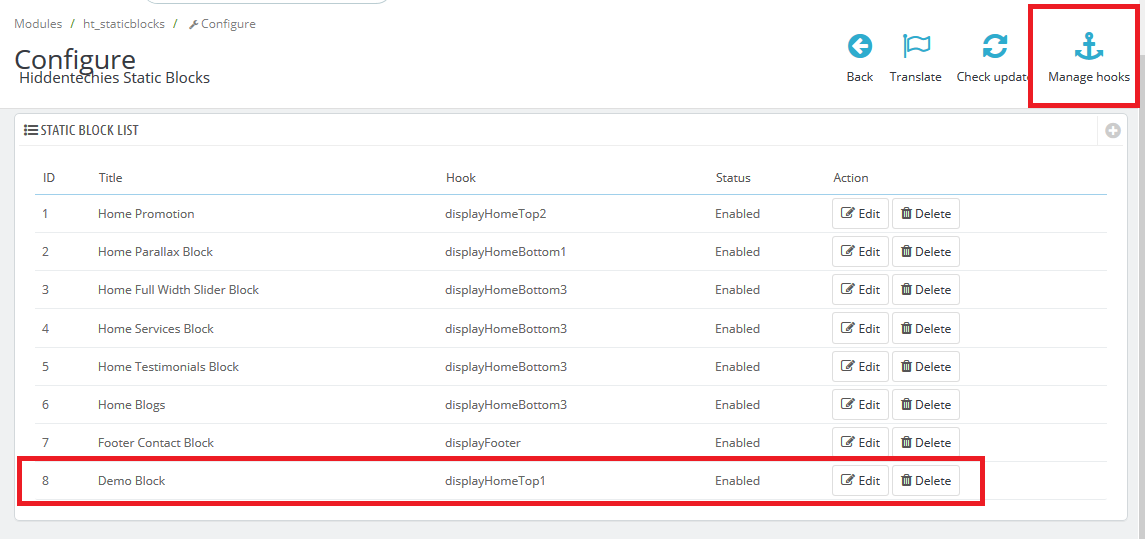
Now configuration page will be open. Click on + button to add new block.
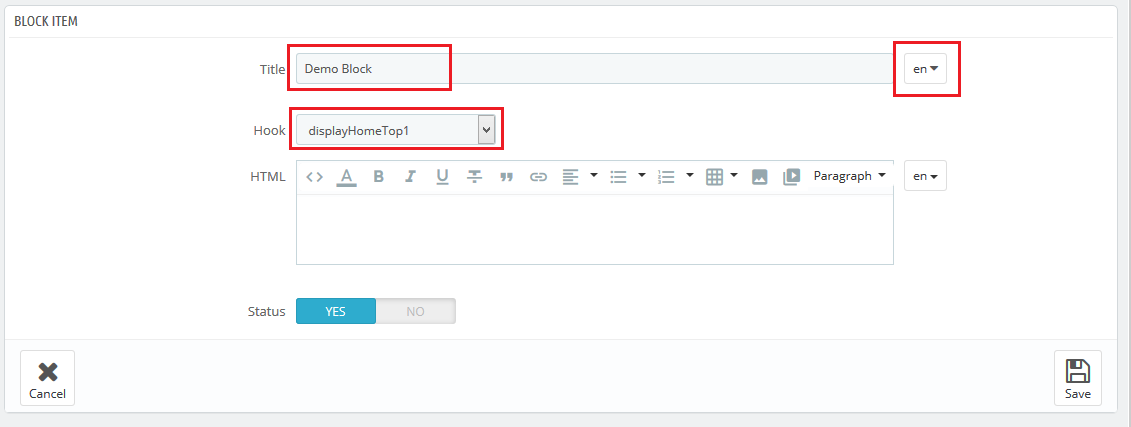
Now add your block Title here and select the language. If you have enabled multiple languages then you must have to add title in all language also.
Now set the hook in which you want to display this block on front-office.
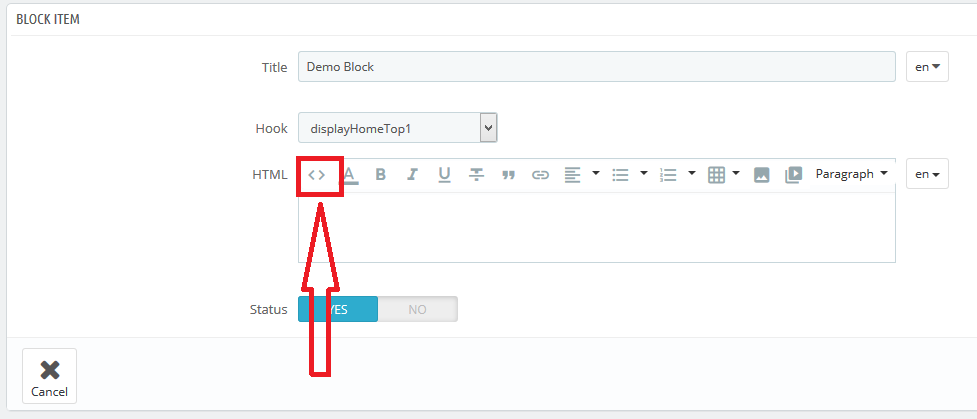
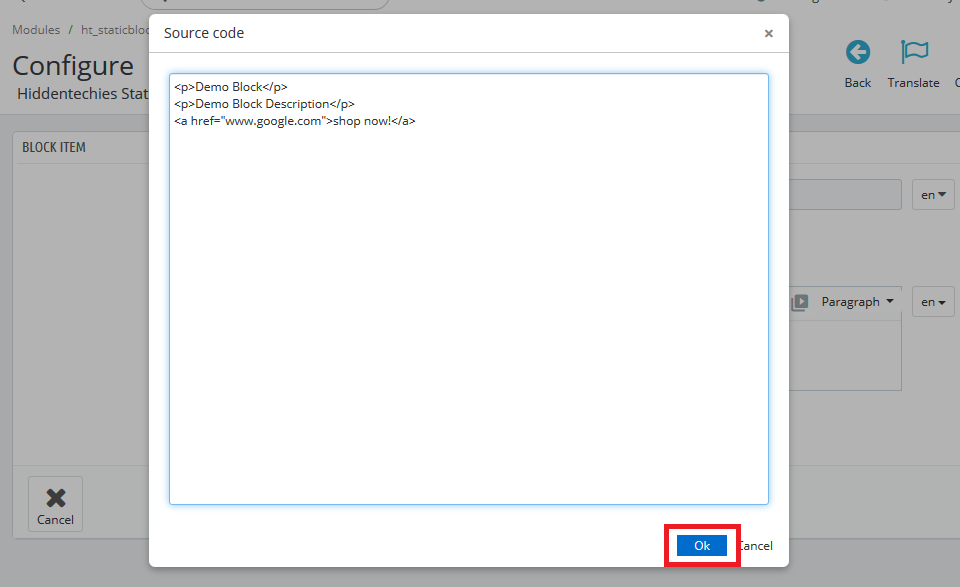
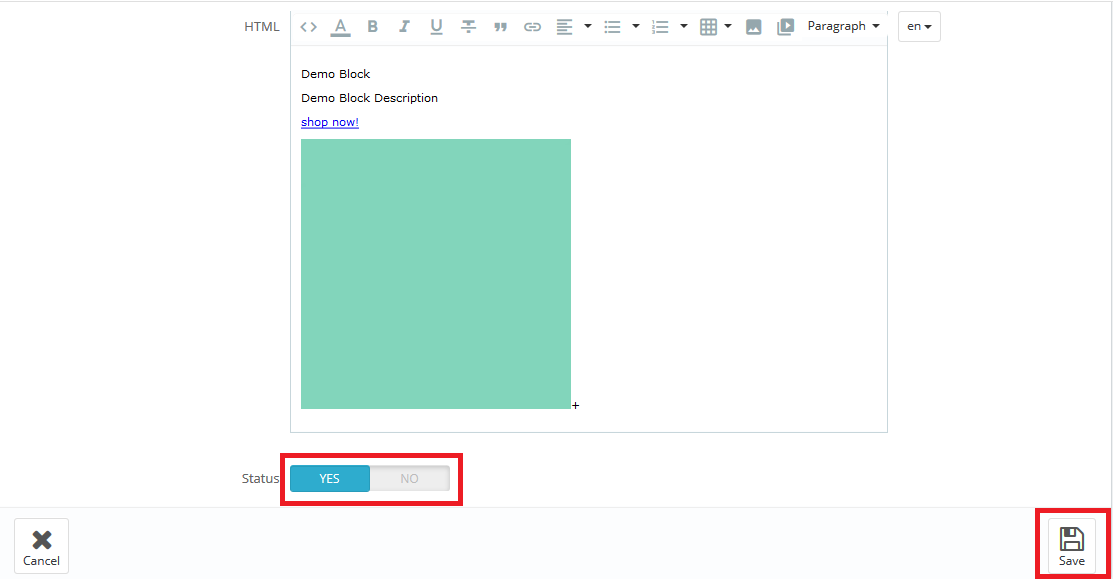
To add the content in this block click on '<>' (Source code) button and place your HTML code in opened source code modal. Then click on Ok button.
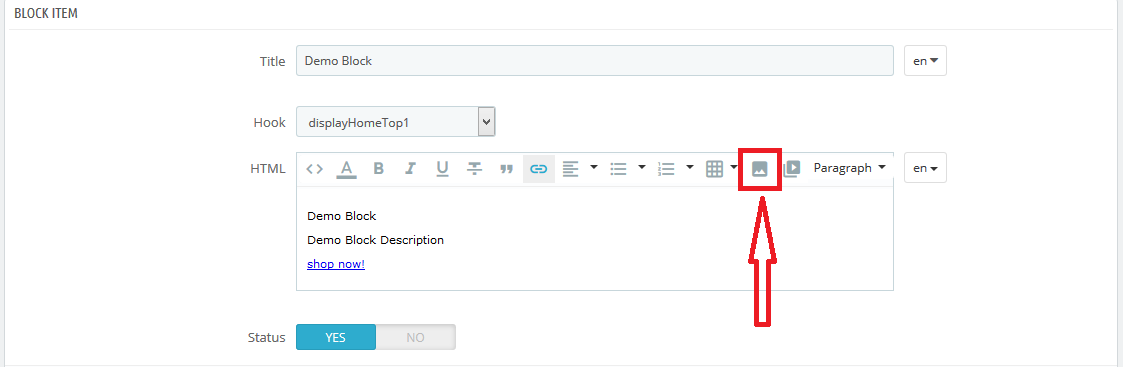
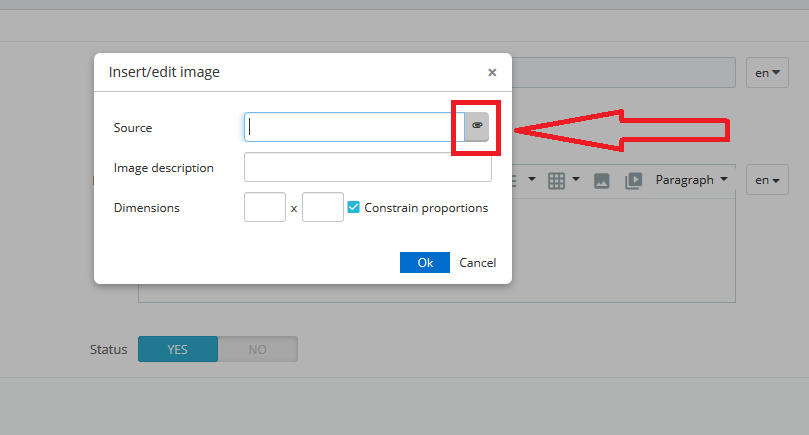
If you want to insert the images then click on Insert/edit image button.
Now click on Source icon.
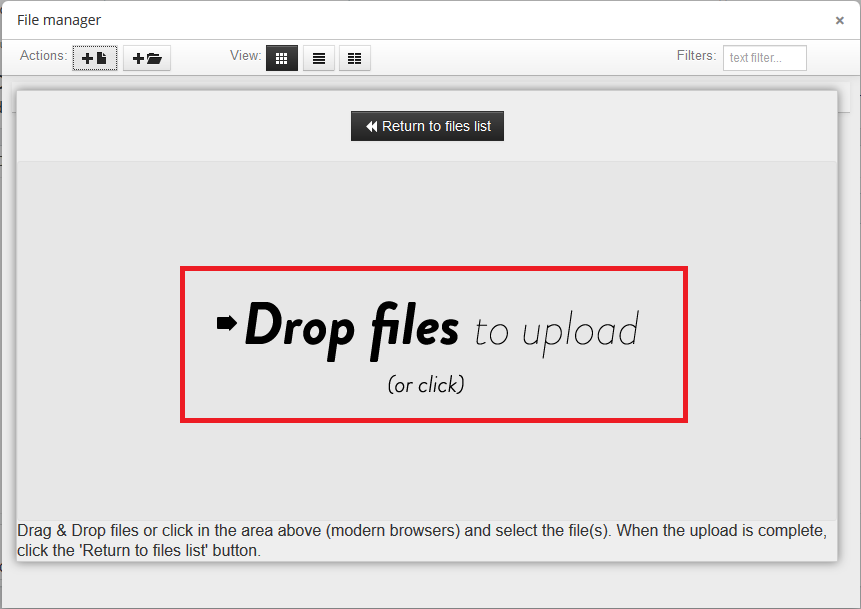
Now click on Upload button at the top.

Now drop your image files here. and click on Return to files list.
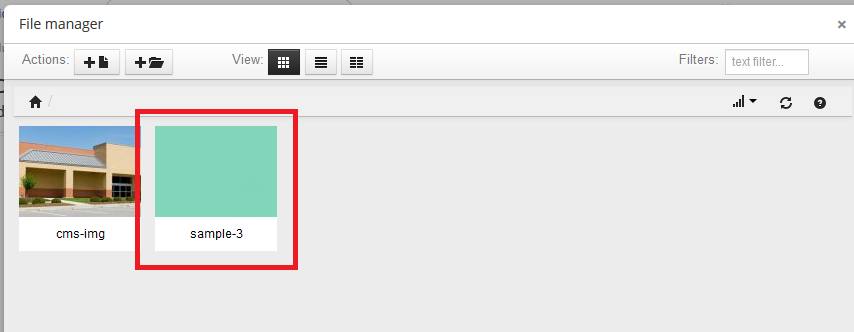
Now click on your uploaded image.
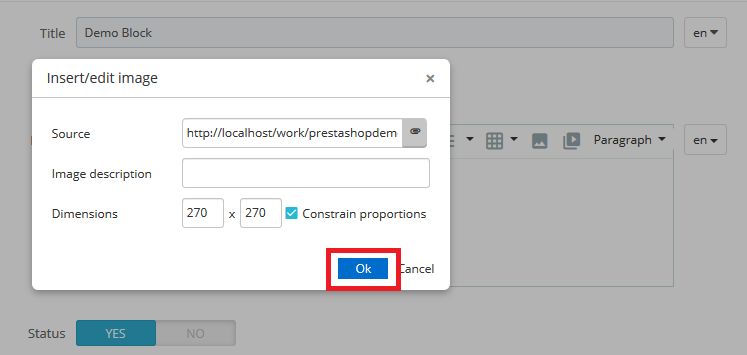
URL path will be shown in source field. Now click on Ok button.
Your image will be shown in HTML field. Now select the status of block to Yes to enable it and the click on Save button.
In order to set the position of block Click on Manage hooks button.
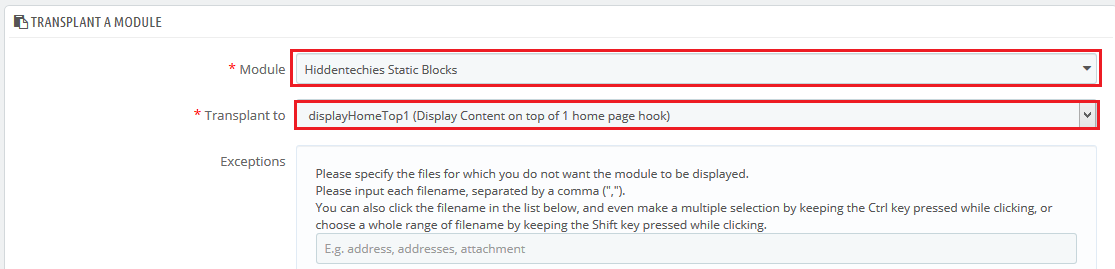
Click on Transplant a module.

Now select the module and hook which is you have selected earlier and then click on Save button at the bottom of page.
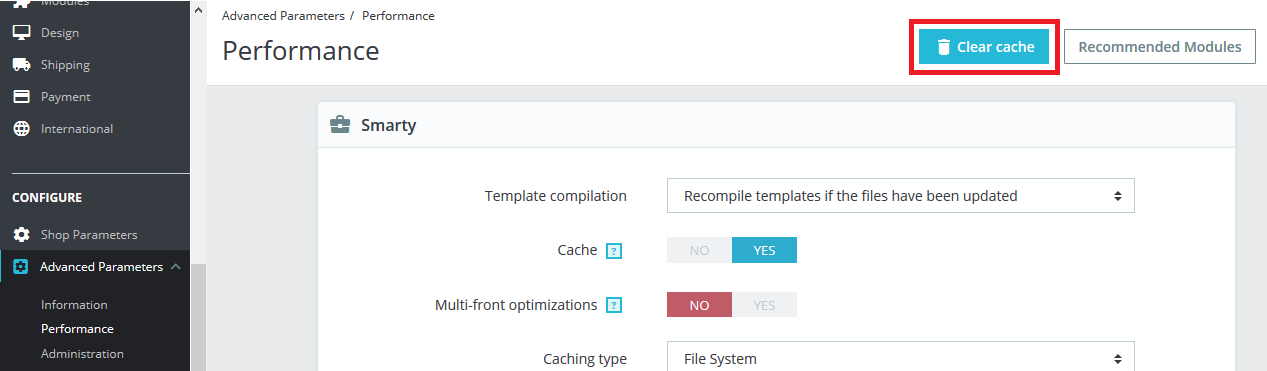
In order to see this block on front-office, you must have to clear the cache. To clear the cache Go to : Back-Office > Advanced Parameters > Preference.
Click on Clear cache button.
That's all. Now, You will be see your changes on front-office.
Brand Image Slider
Inside Prestashop backend panel navigate to Modules > Modules and Services and than select Installed modules.
Search Hiddentechies, here you will see Hiddentechies Brand Image Slider module.
Click on Configure.
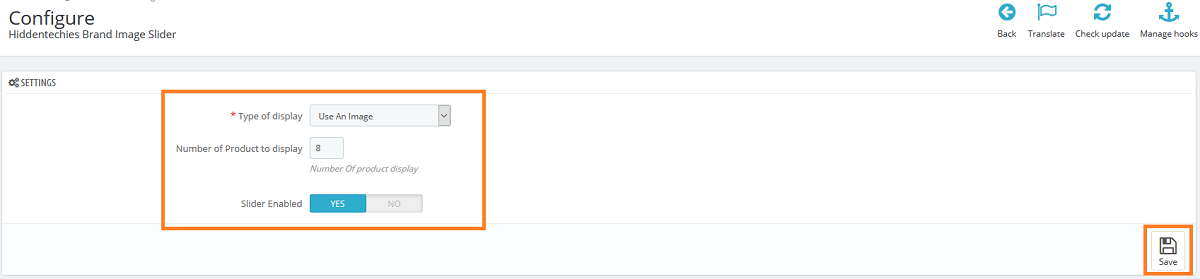
This is how you can configure the brand image slider using this module.
Useful Technical Blogs
- How to Install a New Theme in PrestaShop
- How to Add a Product Feature in PrestaShop
- How to Create a Category in PrestaShop
- How to Create a Cart Rule in PrestaShop
- How to Configure Page Layouts in PrestaShop
- How to Add a New CMS Page in PrestaShop
- How to Import Categories in PrestaShop
- How to import products in PrestaShop
- How to add new store in PrestaShop
- How to add live chat code in PrestaShop 1.7?
FAQs
Theme Translations
Let see how to add Theme Translations.
How to add Theme Translations to translate strings?Step 1: First login to your store back office.
( Example: {theme_name} = Consider your Purchase HiddenTechies theme.)
Step 2: On left side navigation panel select 'International -> Translation', You will see 'Modify translations' section.
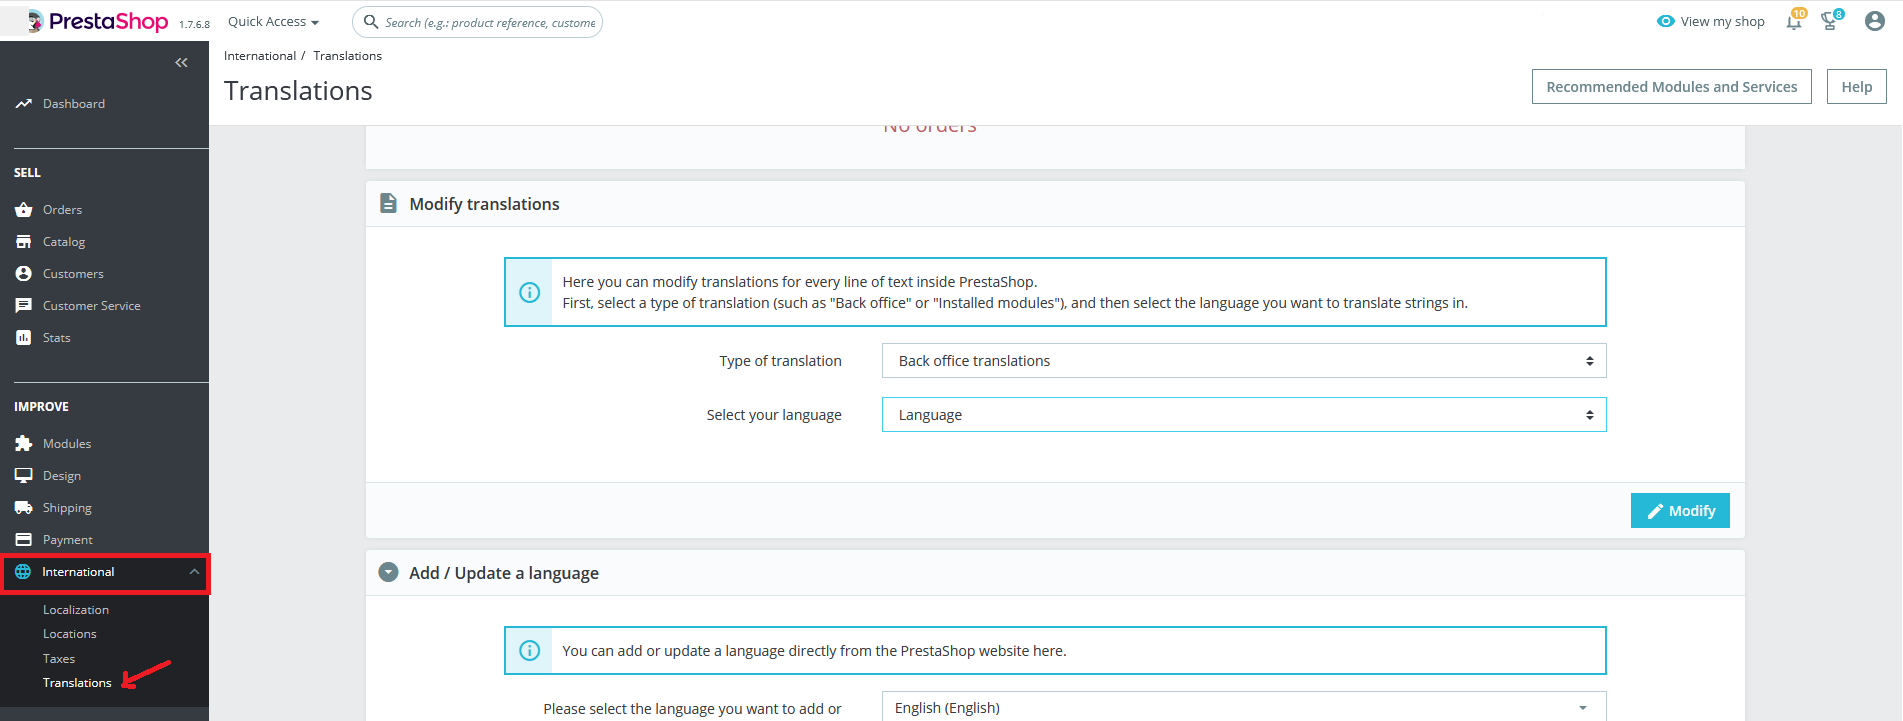
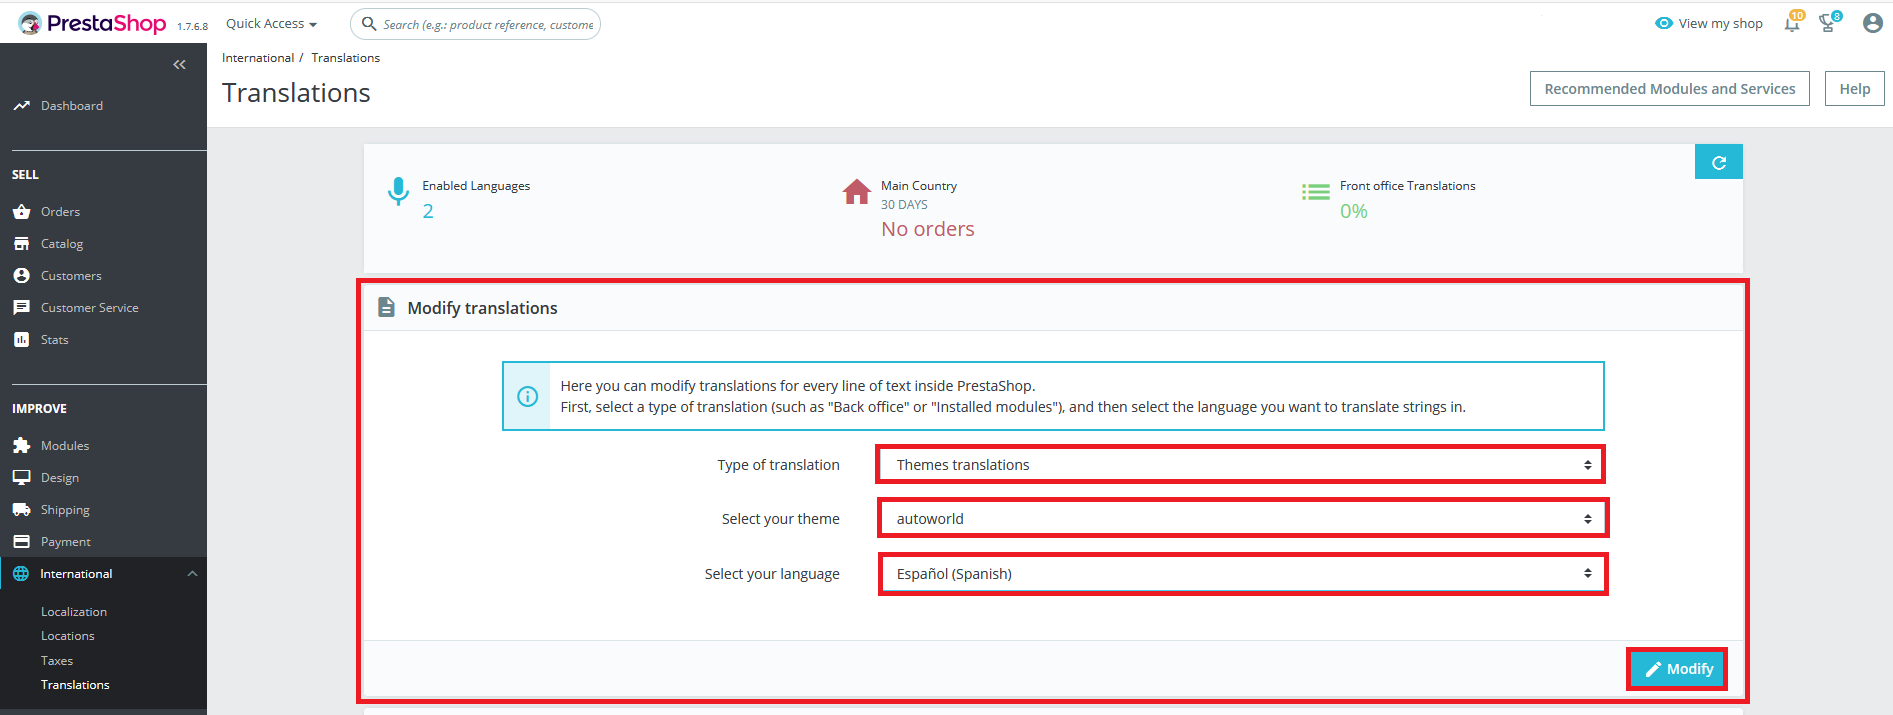
Step 3: Then, select 'Type of translation' from dropdown > 'Theme translation' .
Step 4: Then, select 'Select your theme' from dropdown > '(Your_Theme)' .
Step 5: Then choose your targeted language 'Select your language' from dropdown > '(Your Language)' .
Step 6: Click on Modify Button.
Step 7: Search for your desire text to translate. You can then modify existing translations.
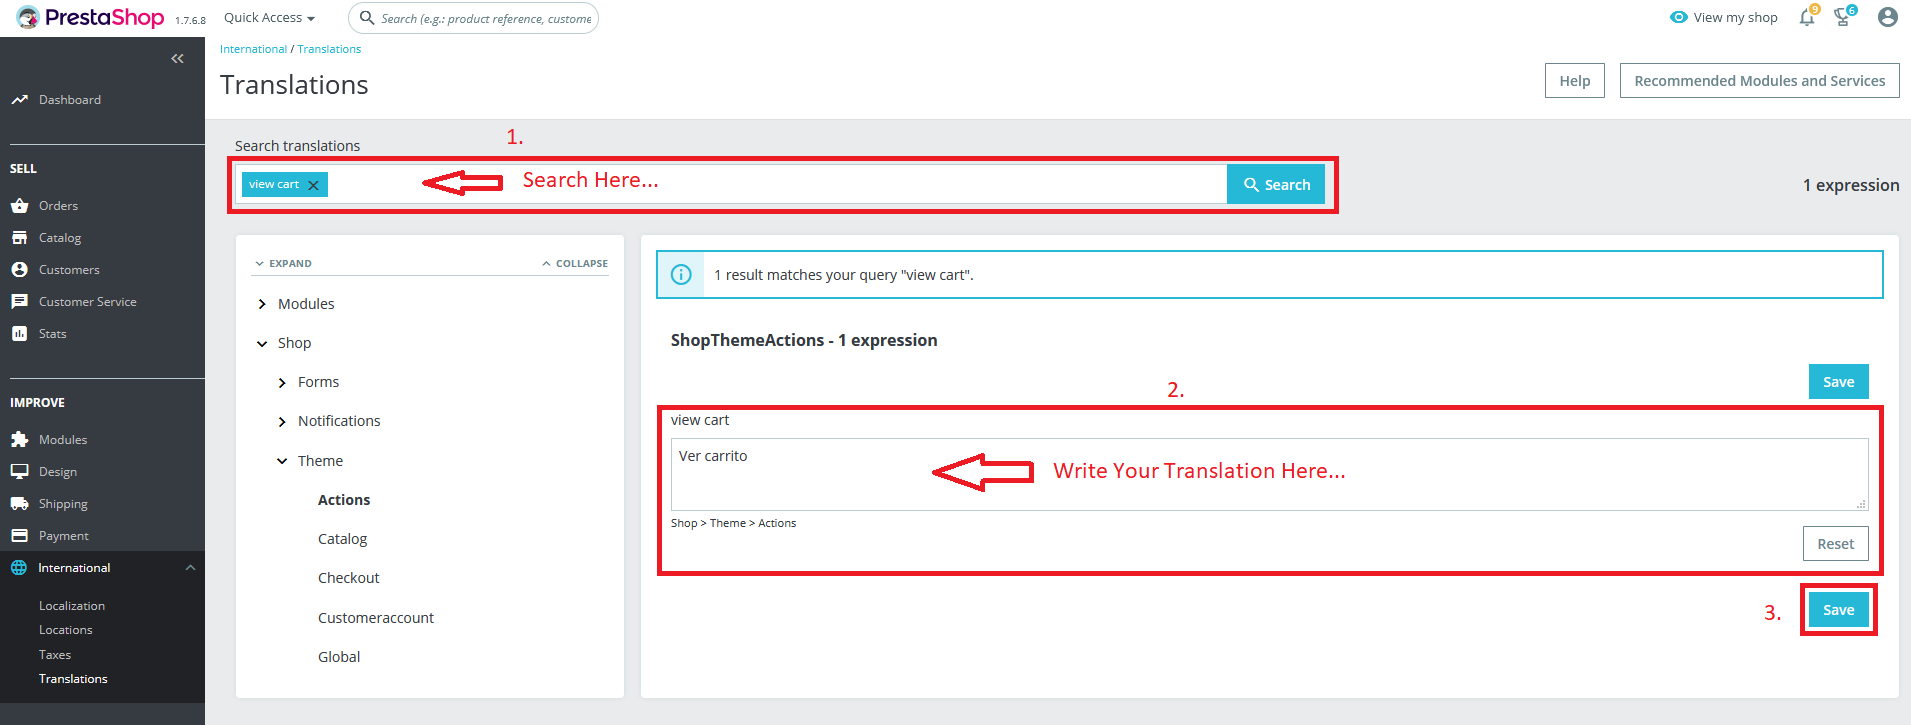
Step 8: Now click on, Save button.
Step 6: Clear/Flush the cache.
Now Theme Translations is added. You can check it on your Frontend Store view.
Module Translations
Let see how to add Module Translations.
How to add Module Translations to translate strings?Step 1: First login to your store back office.
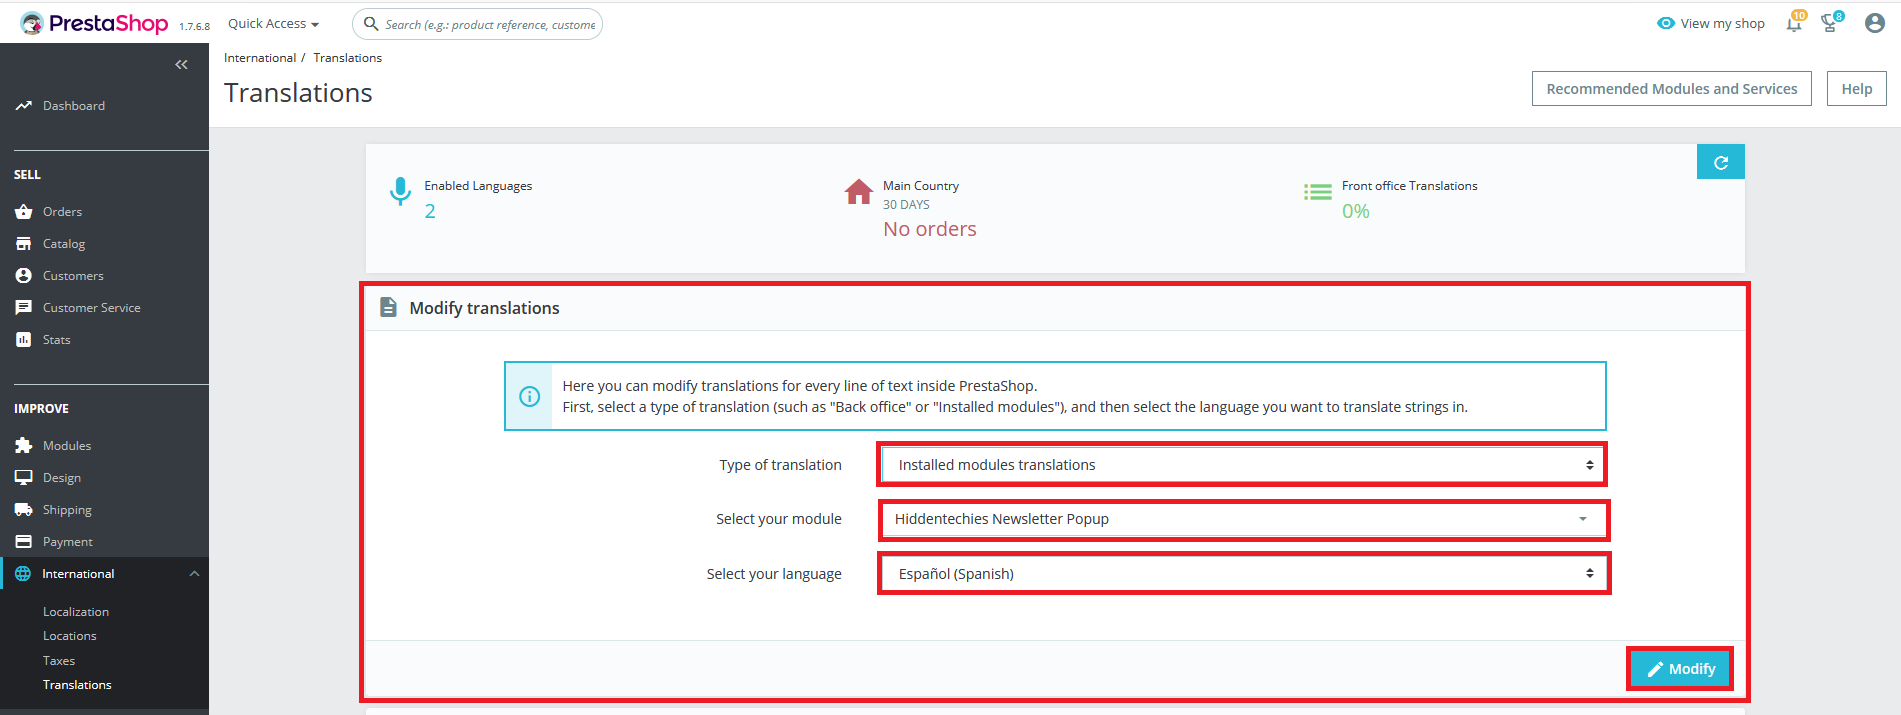
Step 2: On left side navigation panel select 'International -> Translation', You will see 'Modify translations' section.
Step 3: Then, select 'Type of translation' from dropdown > 'Installed modules translation' .
Step 4: Then, select 'Select your module' from dropdown > '(Module)' .
Step 5: Then choose your targeted language 'Select your language' from dropdown > '(Your Language)' .
Step 6: Click on Modify Button.
Step 7: Here we are, the translation page of module is loaded to start translating.
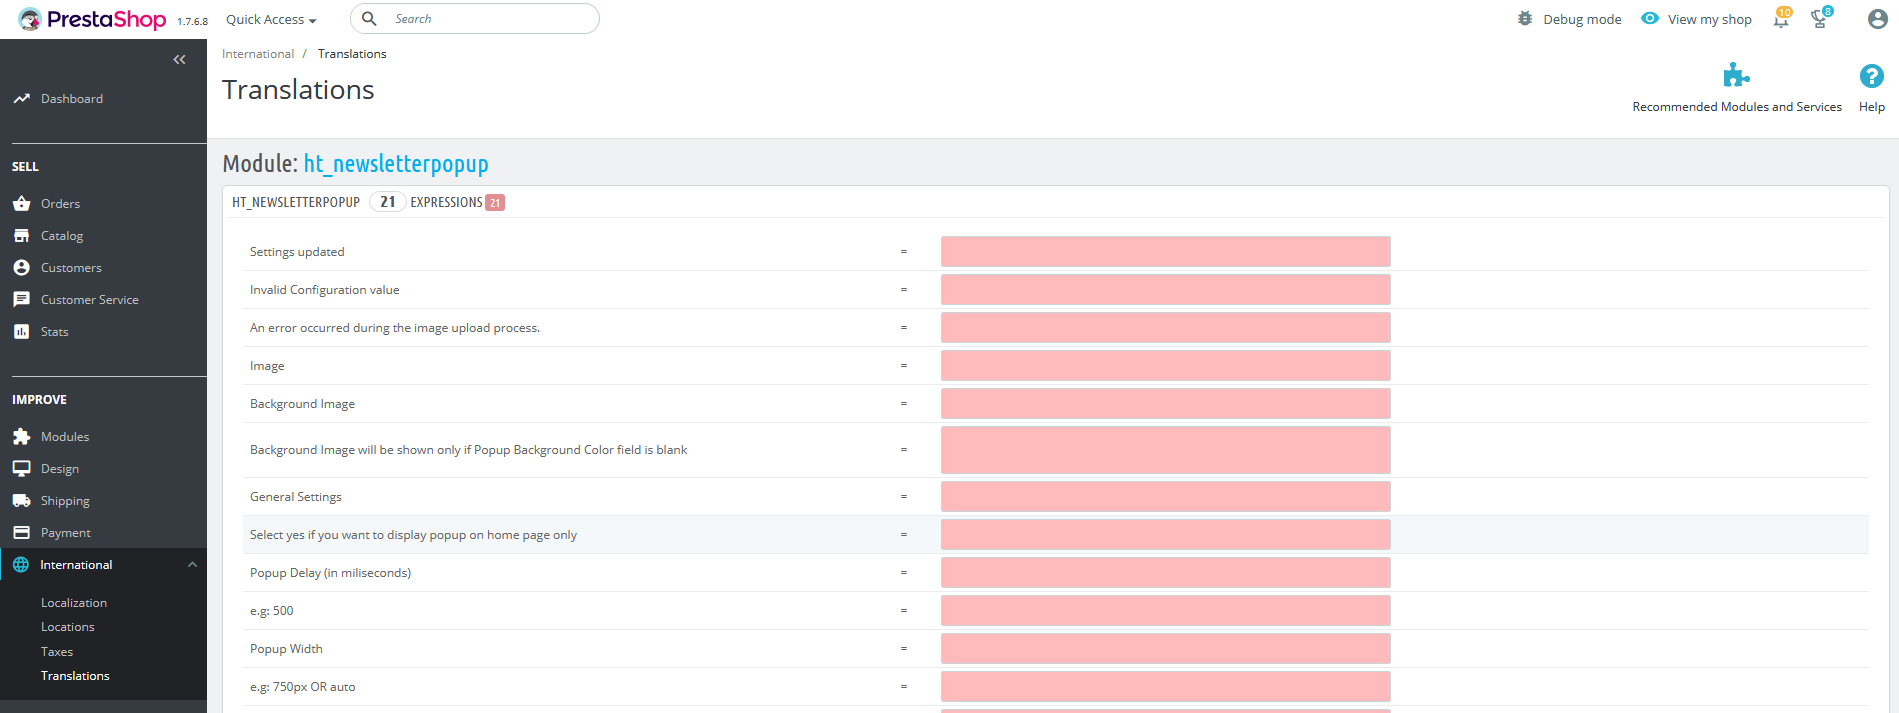
Please Note:
Notice one thing that's important to know, here we find many sections of the same module because Prestashop tries to load each files' translation in separate section.
Step 8: Now click on, Save button.
Step 9: Clear/Flush the cache.
Now Module Translations is added. You can check it on your Frontend Store view.
Product Reference Number
Let see how to add Product Reference Number.
How to add product reference number to appear on the product page?Step 1: Inside PrestaShop Root Directory, go to > ..\themes\{theme_name}\templates\catalog\product.tpl file.
( Example: {theme_name} = Consider your Purchase HiddenTechies theme.)
Step 2: Find -> "{block name='page_header_container'}", Block in that File (product.tpl) .
Step 3: Add Following Snippet After "{block name='page_header_container'}" This Block of the Product.
This is a HTML Code for Product Reference Number.
<p id="product_reference"{if empty($product->reference) || !$product->reference} style="display: none;"{/if}>
<label>{l s='Reference:'} </label>
<span class="editable" itemprop="sku"{if !empty($product->reference) && $product->reference} content="{$product->reference}"{/if}>{$product->reference|escape:'html':'UTF-8'}</span>
</p>
Step 4: After adding Snippet, Save the File.
Step 6: Clear/Flush the cache.
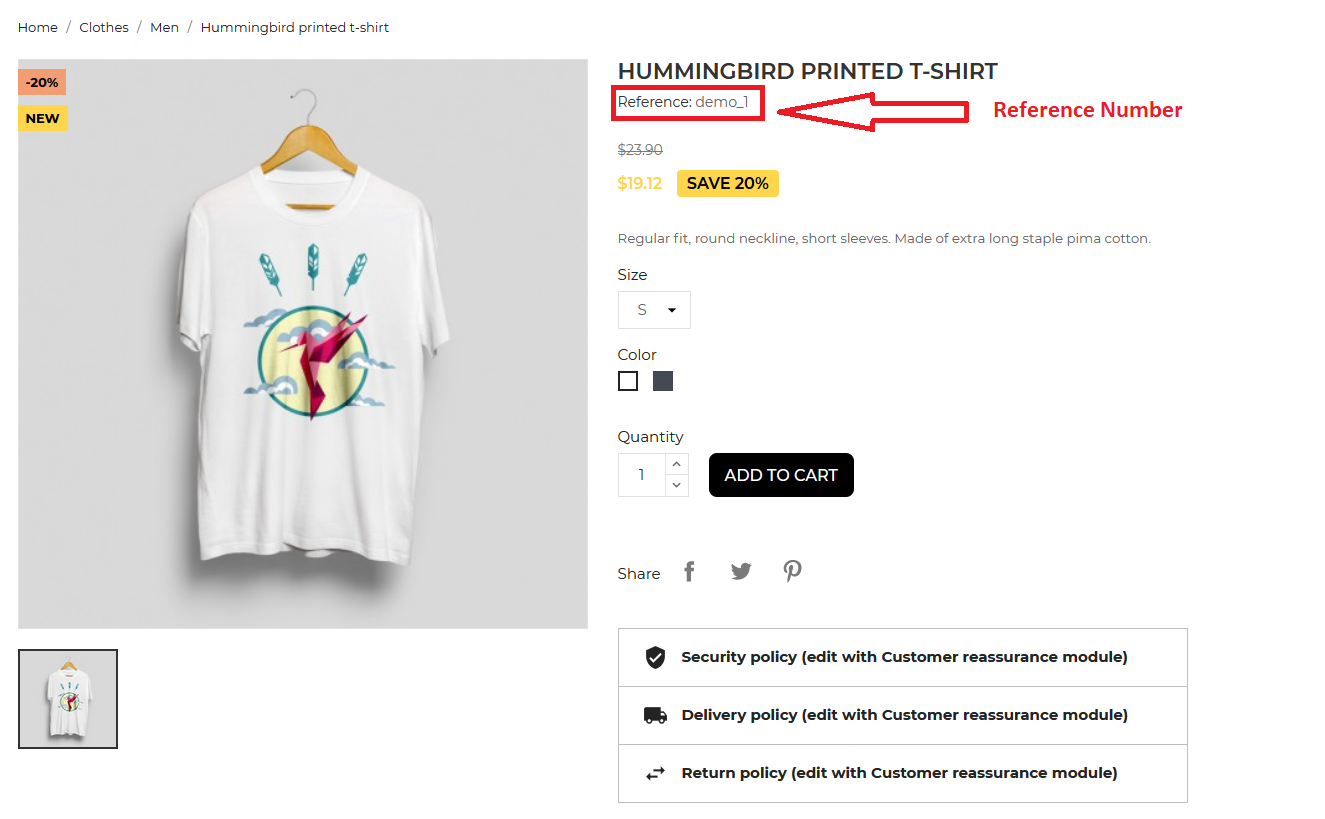
Now Product Reference Number is configured. You can check it on your Frontend Store view.
Category Sidebar Image
Let see how to change Category Sidebar Image.
How to change Category Sidebar Image?Step 1: First login to your store back office.
Step 2: On left side navigation panel select 'Modules -> Module Manager'section.
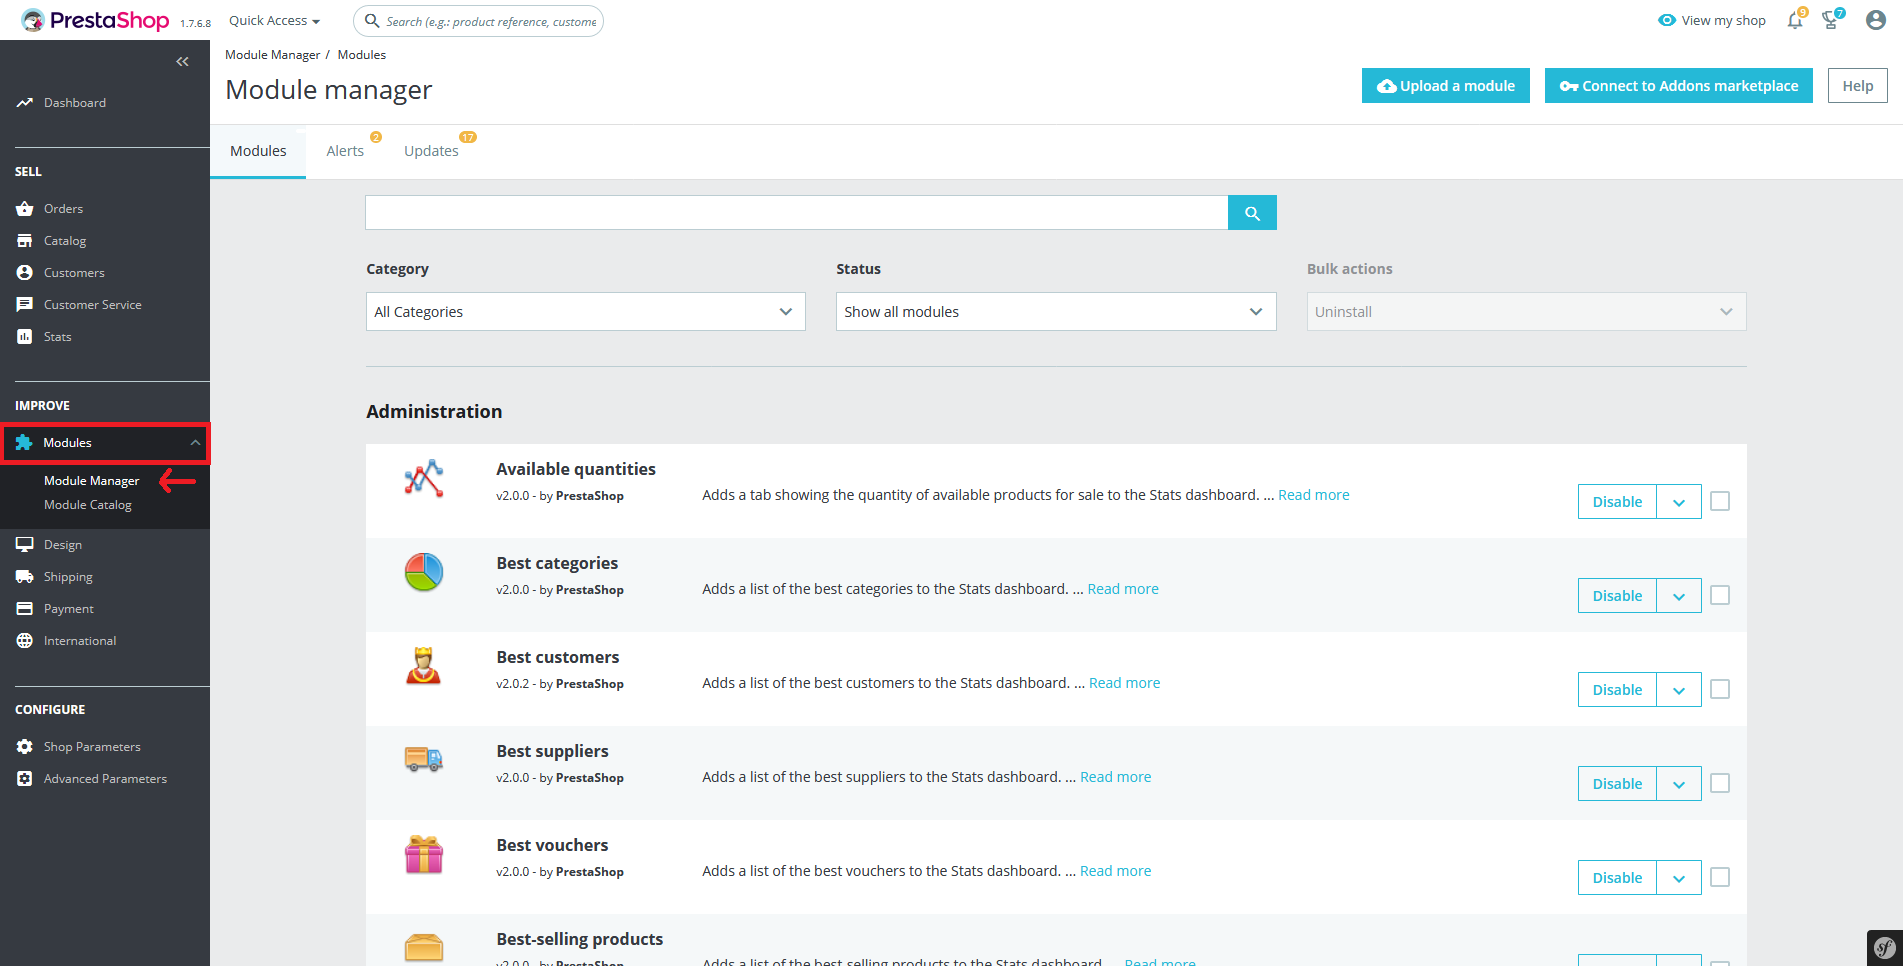
Step 3: Then, Search for the module name > 'Advertising block' .
Step 4: Here you will find module 'Advertising block', click on 'Configure' button.
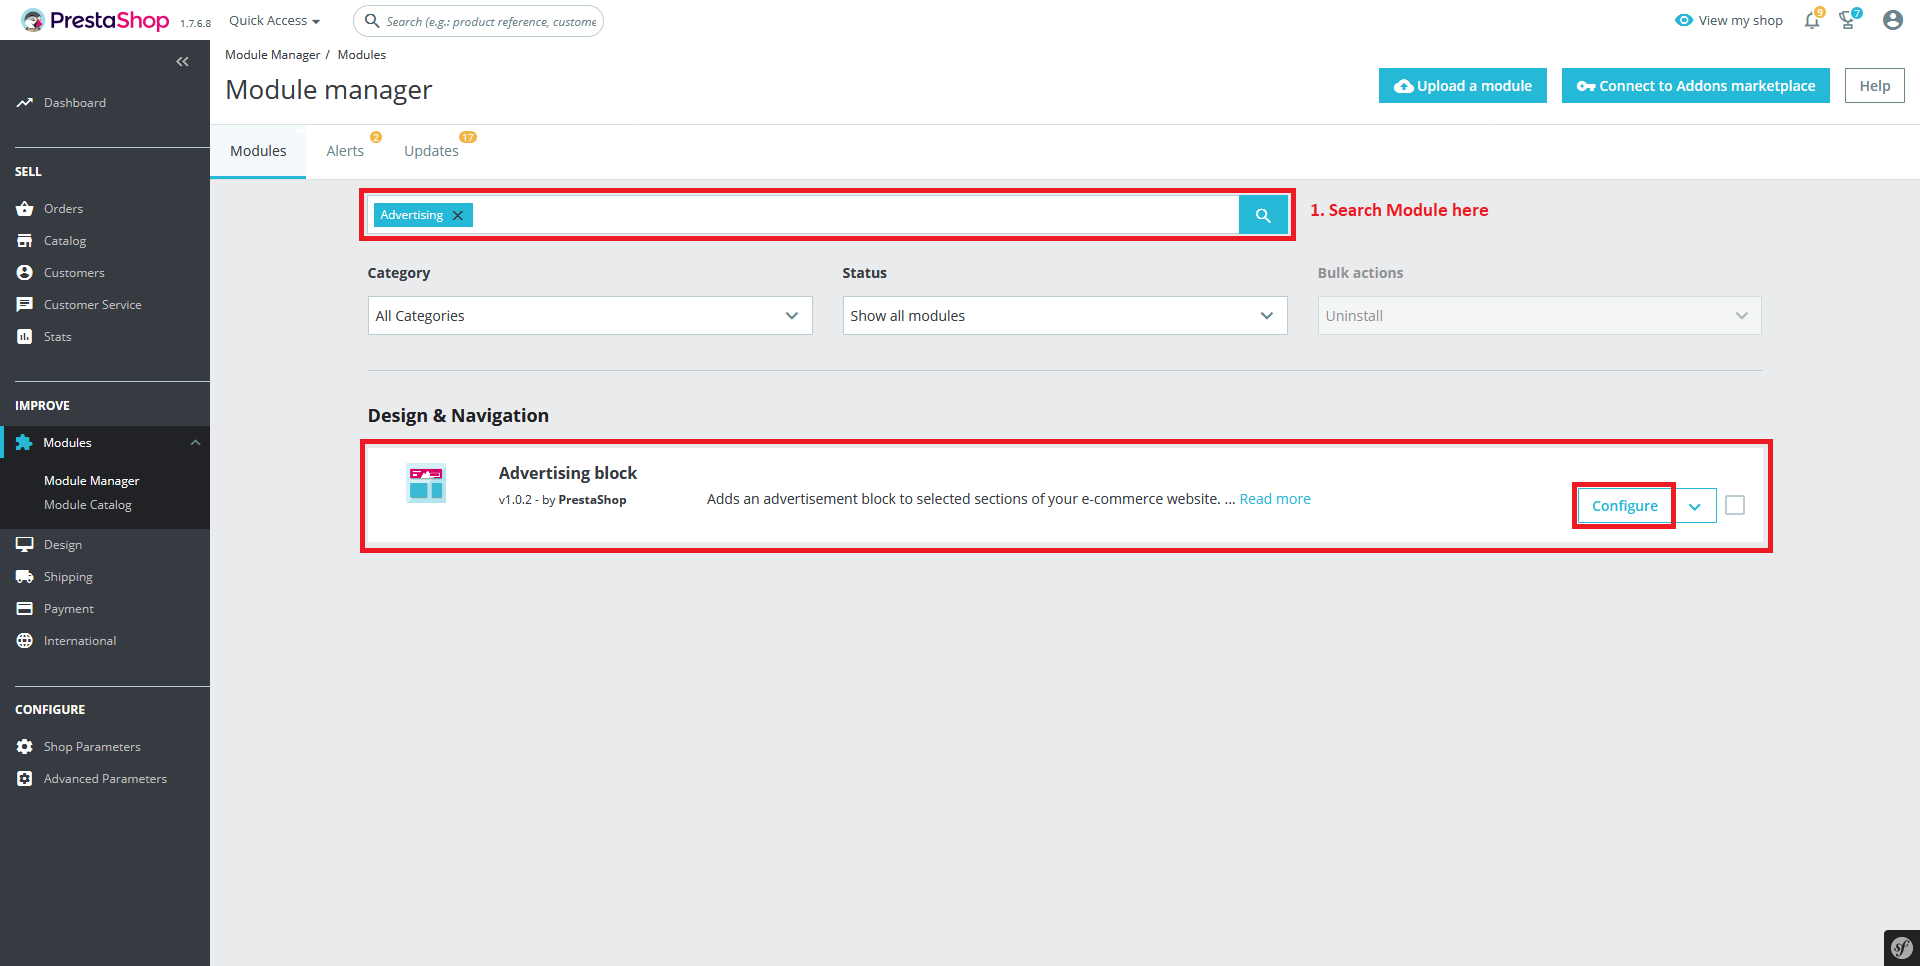
Step 5: It will open 'Advertising block' configure section, from here you can change category page sidebar advertising image as per your requirement.
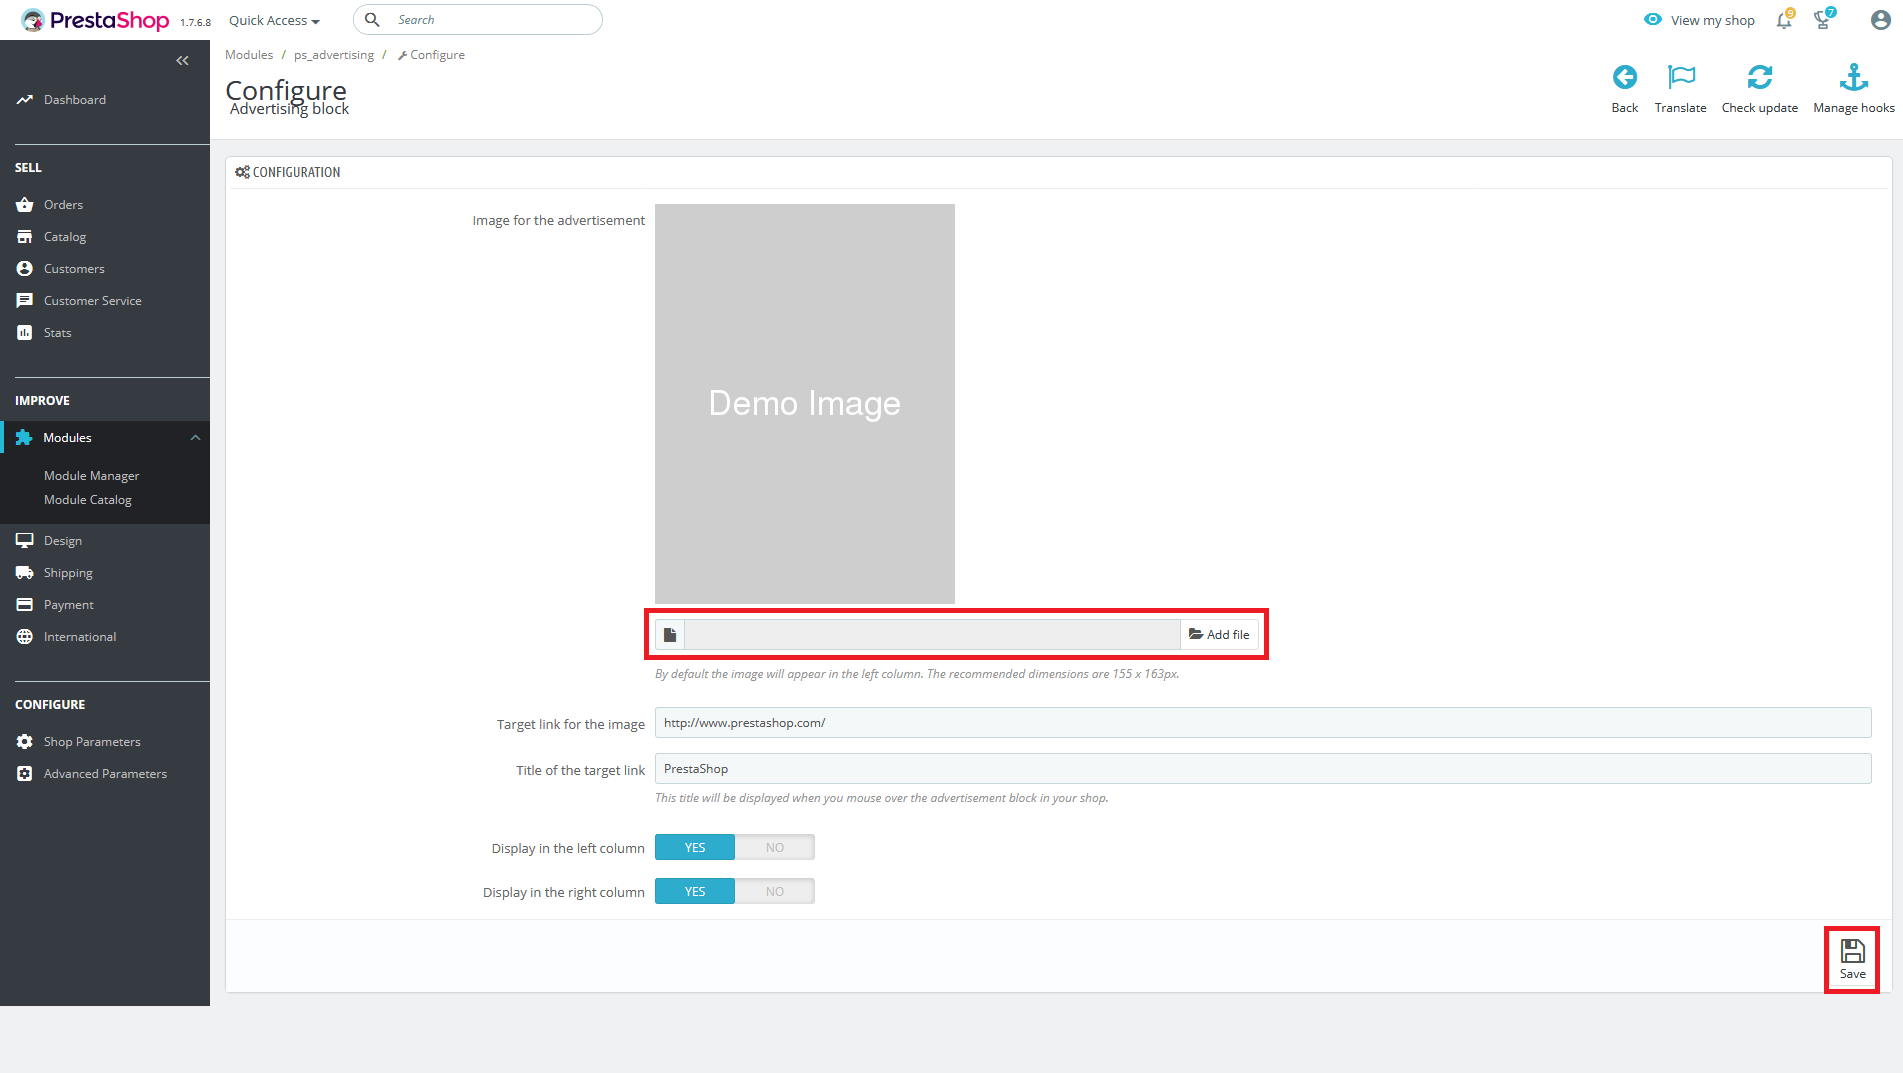
Step 6: Now click on, Save button.
Step 7: Clear/Flush the cache.
Now Advertising block is configured. You can check it on your Frontend Store view.
Google Analytics Code
Let see how to add Google Analytics Code.
How to add Google Analytics Code in your store?Step 1: Go to in your root directory > ..\themes\[your_theme]\templates\_partials\head.tpl file.
Step 2: Open this head.tpl file and add your Google Analytics Code (Refer below Screenshot).
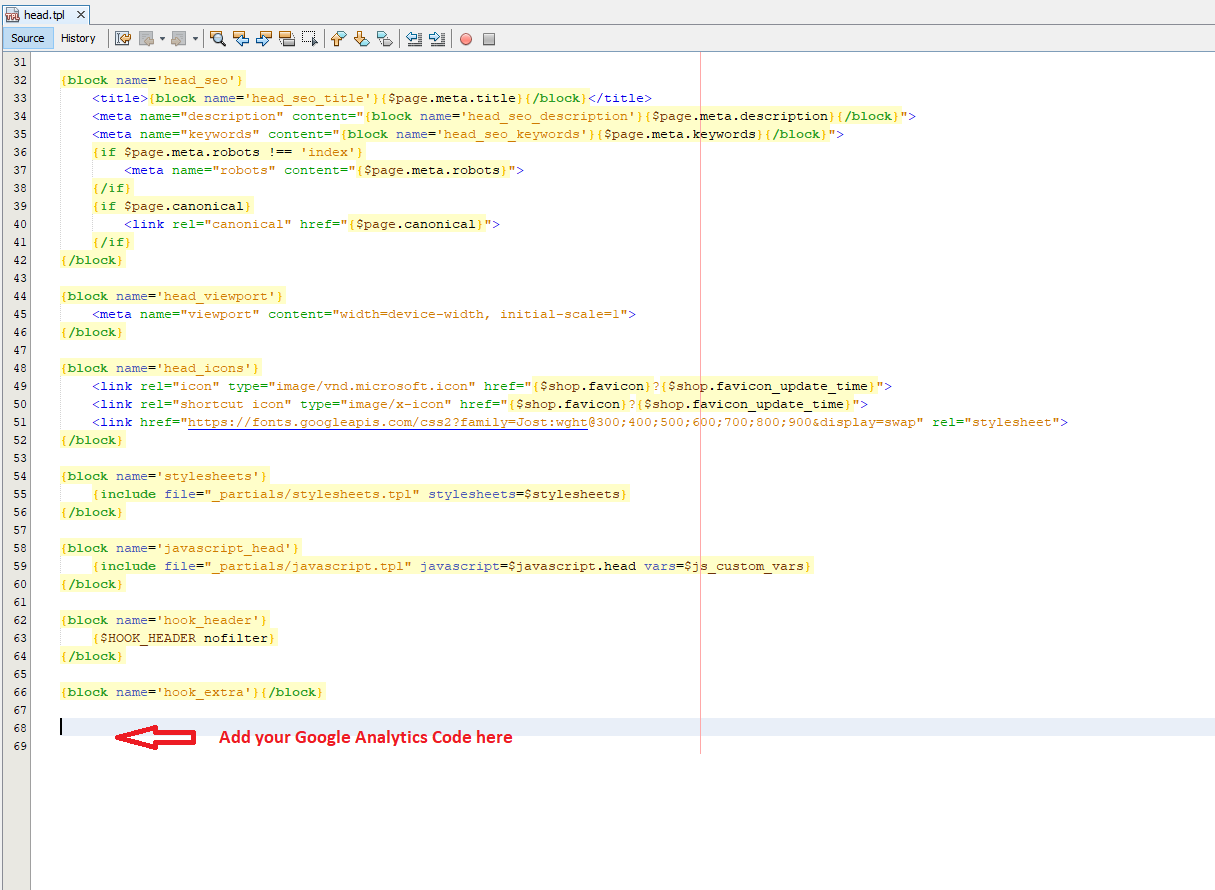
Step 3: Then, Save the changes.
Step 4: Clear/Flush the cache.
Now Google Analytics is configured. You can check it on your Frontend Store view.
Clear Cache
Let see how to Clear Cache.
How to Clear Cache?Step 1: First login to your store back office.
Step 2: On left side navigation panel select 'Advanced Parameters -> Performance'section.
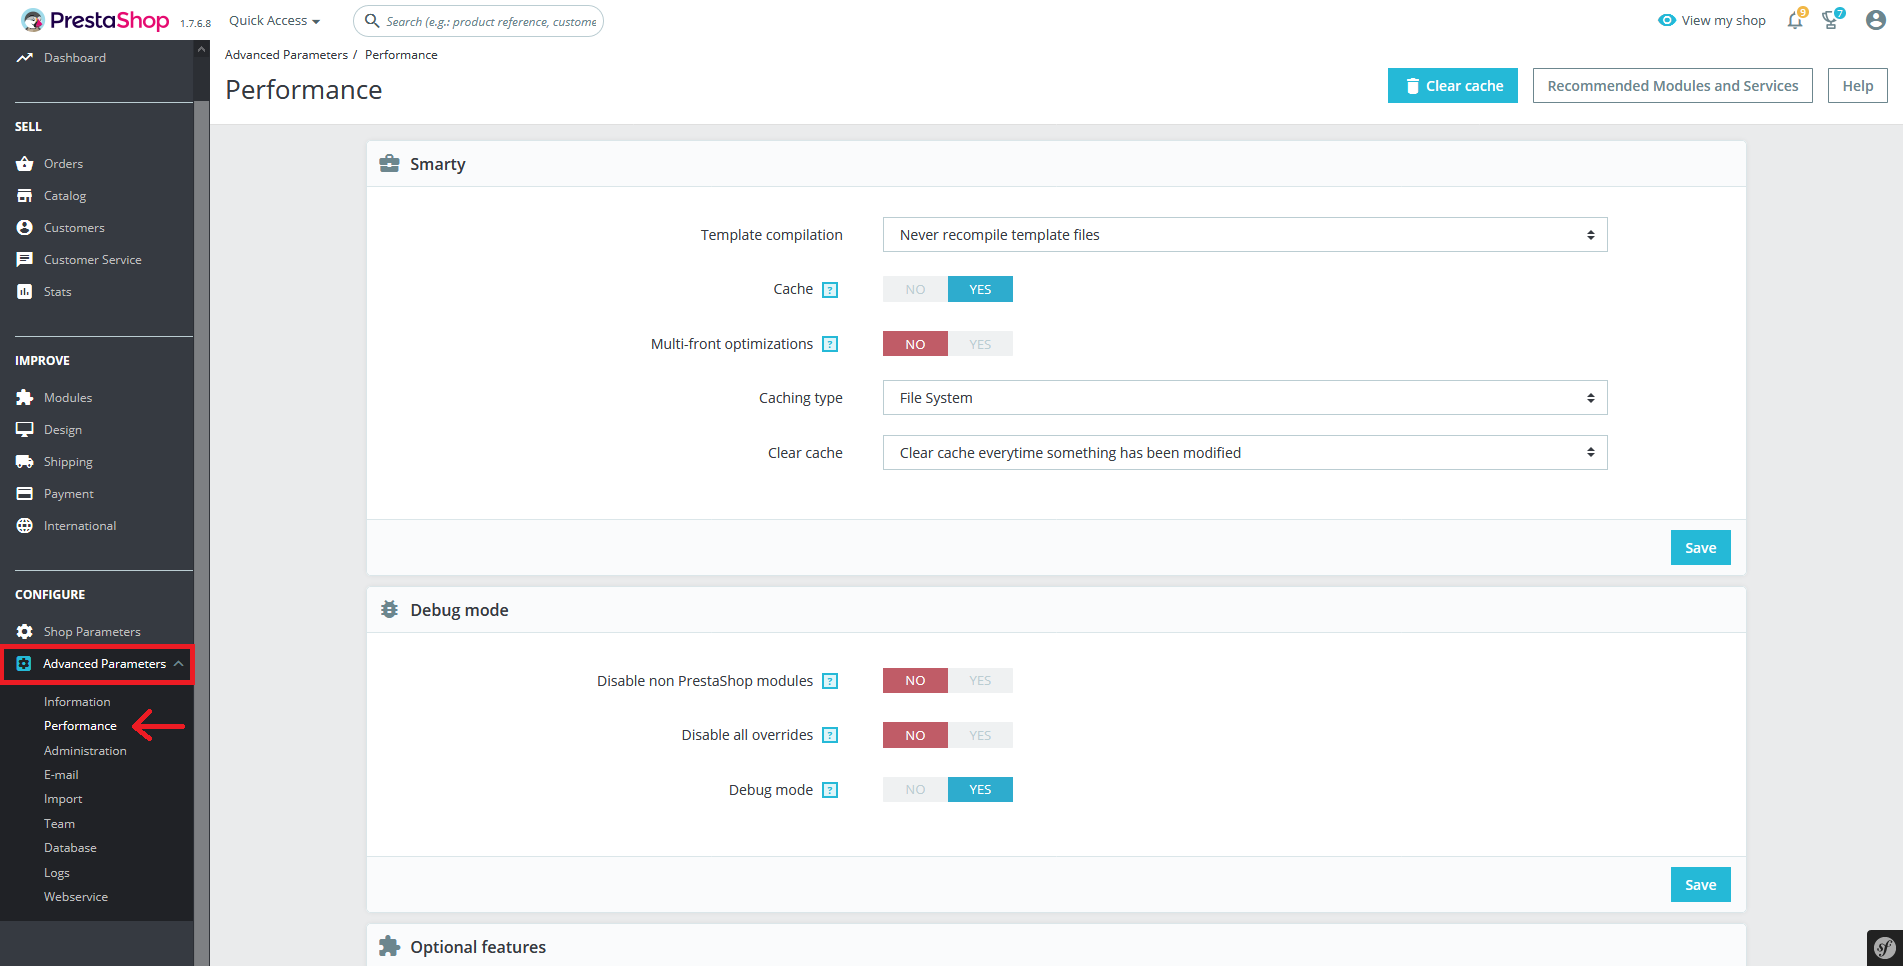
Step 3: In the upper right corner please find the 'Clear cache' button and click on it to clear cache.
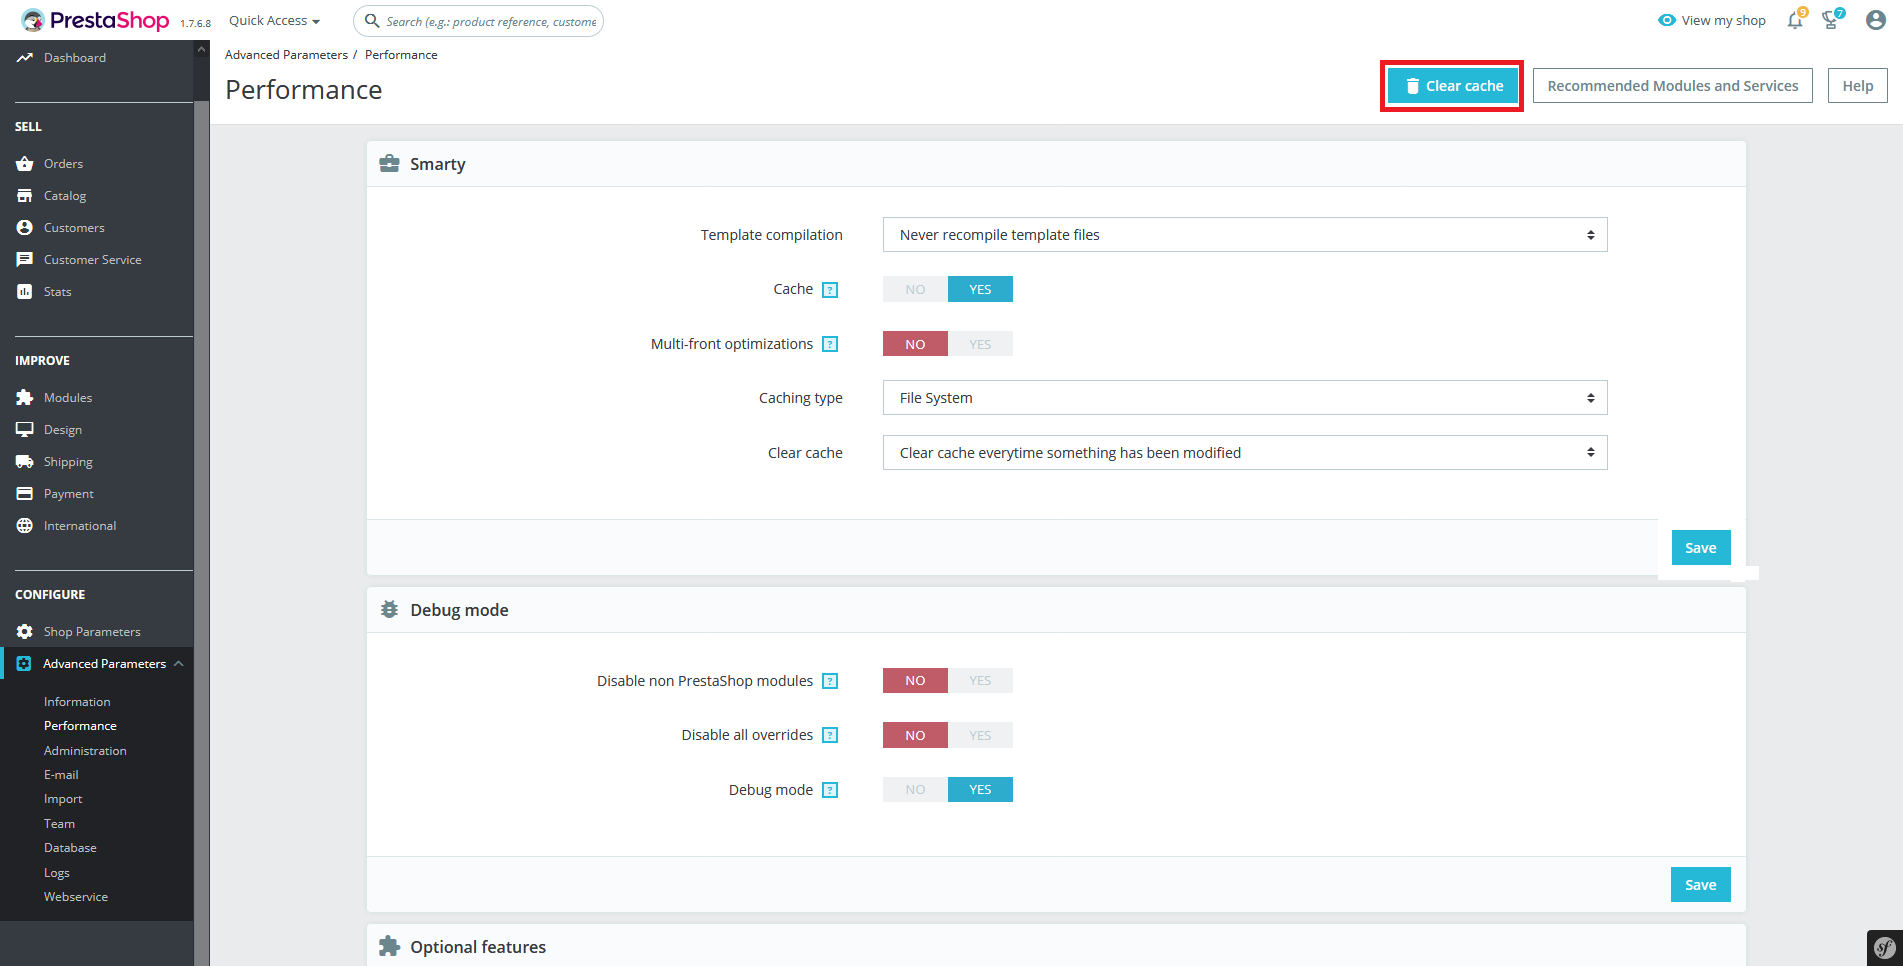
Step 4: Done! Check out Front-end now.
Now Cache is cleared. You can check it on your Frontend Store view.
Best Selling PrestaShop Themes


Help & Support
Please, if you have any questions, run into any issues or just need some help, do not hesitate to contact us via our Support Center. We believe in providing the best support possible, and we monitor our Support center just about 24/7.
Your feedback is absolutely welcome!