Getting Started
Welcome to Previous Next PrestaShop 1.7 Module! We would like to thank you for purchasing Previous Next PrestaShop 1.7 Module! We are very pleased you have chosen Previous Next PrestaShop 1.7 Module for your website, you will be never disappointed! Before you get started, please be sure to always check out this documentation.
Compatible with PrestaShop:
PrestaShop 1.7.x
PrestaShop 1.7 Help:
Introduction
Previous and Next product links PrestaShop module allows visitors to navigate between Product pages with a single click, by adding Previous and Next product links on the product detail page. The module will allow your customers to save time while browsing products within the same category. This module comes with lots of configuration options that help you to showcase the navigation links effectively.
Announcement:
Now all our themes comes with 5+ Booster Addons .
All our themes are compitable with PrestaShop 1.7.7 version.
Features
Key Features
- Easy installation & configuration
- Makes easier for customers to buy your product
- Add links to previous and next products at the product page
- Simple navigation through product's pages
- Increases time spend on site
- Displays thumbnails of previous and next products when a customer hovers cursor
- Options to change position of previous next product links
- Ability to write any title for both Previous and Next links
Module Installation
To install the module follow the instructions below:
Prepare InstallationWe recommend you to duplicate your live store on a development store and try installation on it in advance.
Backup PrestaShop files and the store database.
Disable all cache related section that you have in your PrestaShop.
Module Installation1. Download module package (ht_prevnext.zip) from your my account page
2. Go to the Back-Office: Module manager > Upload a module.
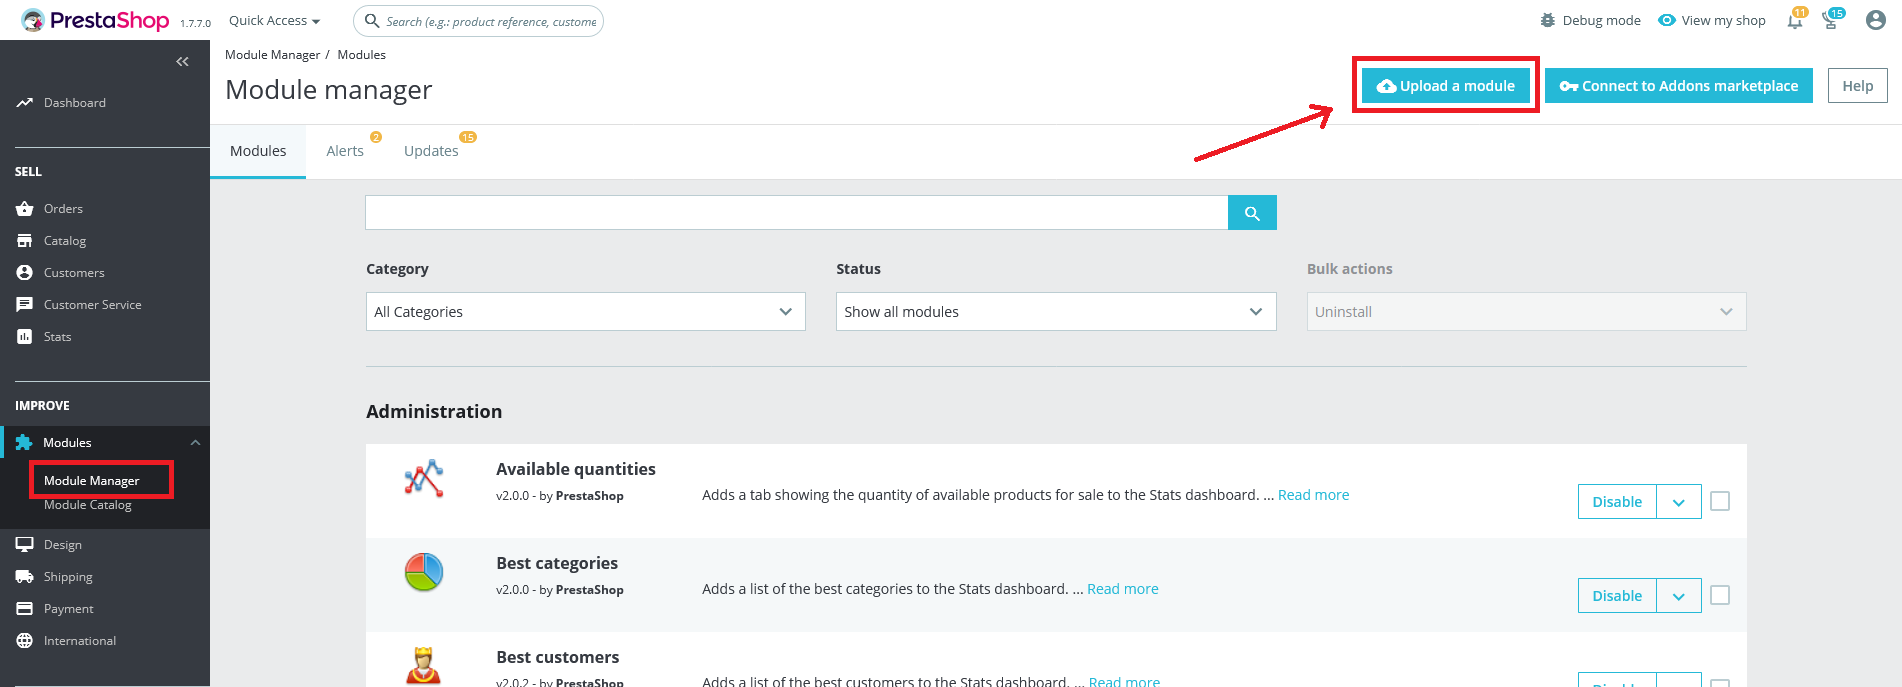
3. Drop the zip file or click on select file.

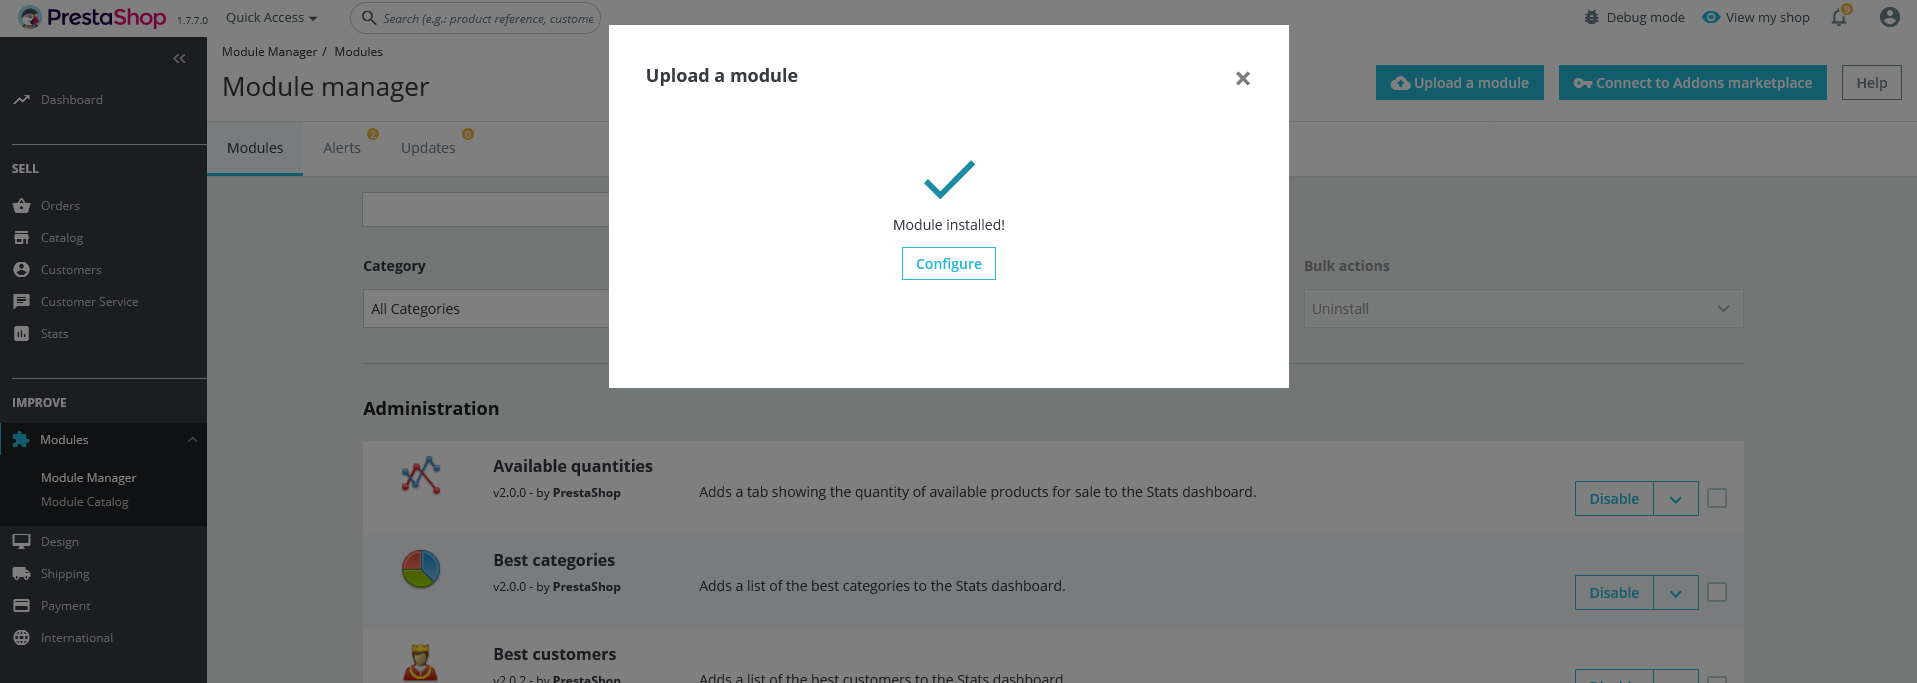
4. Go ahead wait for PrestaShop to complete the installation process. After a few seconds, that Configure button will be show.
5. Click on Configure button, and you will get configuration page for Previous Next.
Configuration Panel
Set the configuration options in the Configuration Page.
Settings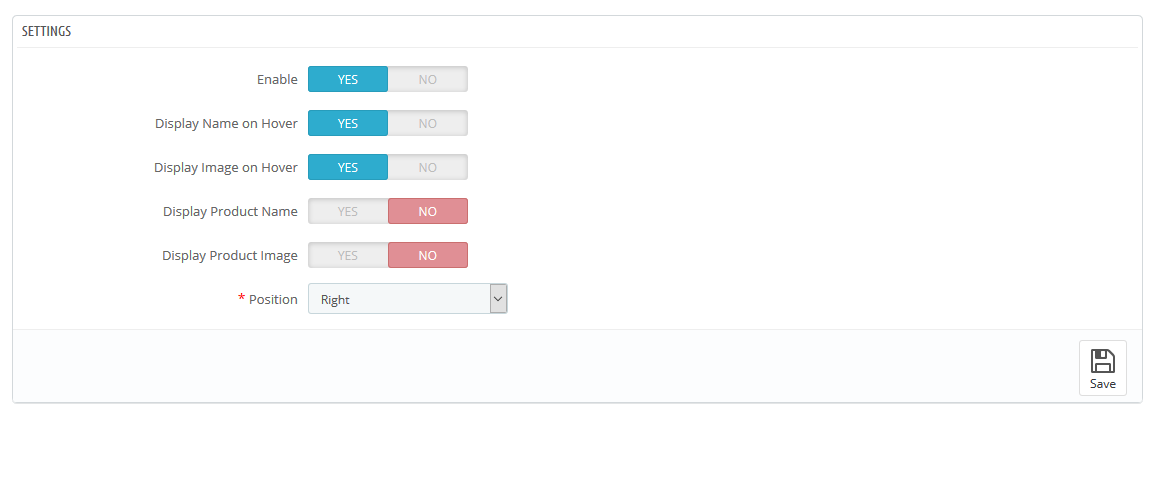
- Enable: Switch Yes/No to Enable/Disable it.
- Display Name on Hover: Switch Yes/No to Enable/Disable Product Name on Hover.
- Display Image on Hover: Switch Yes/No to Enable/Disable Product Image on Hover.
- Display Product Name: Switch Yes/No to Enable/Disable Product Name.
- Display Product Image: Switch Yes/No to Enable/Disable Product Image.
- Position: Enter the Form Message text.
- Now, Click the "Save" button.
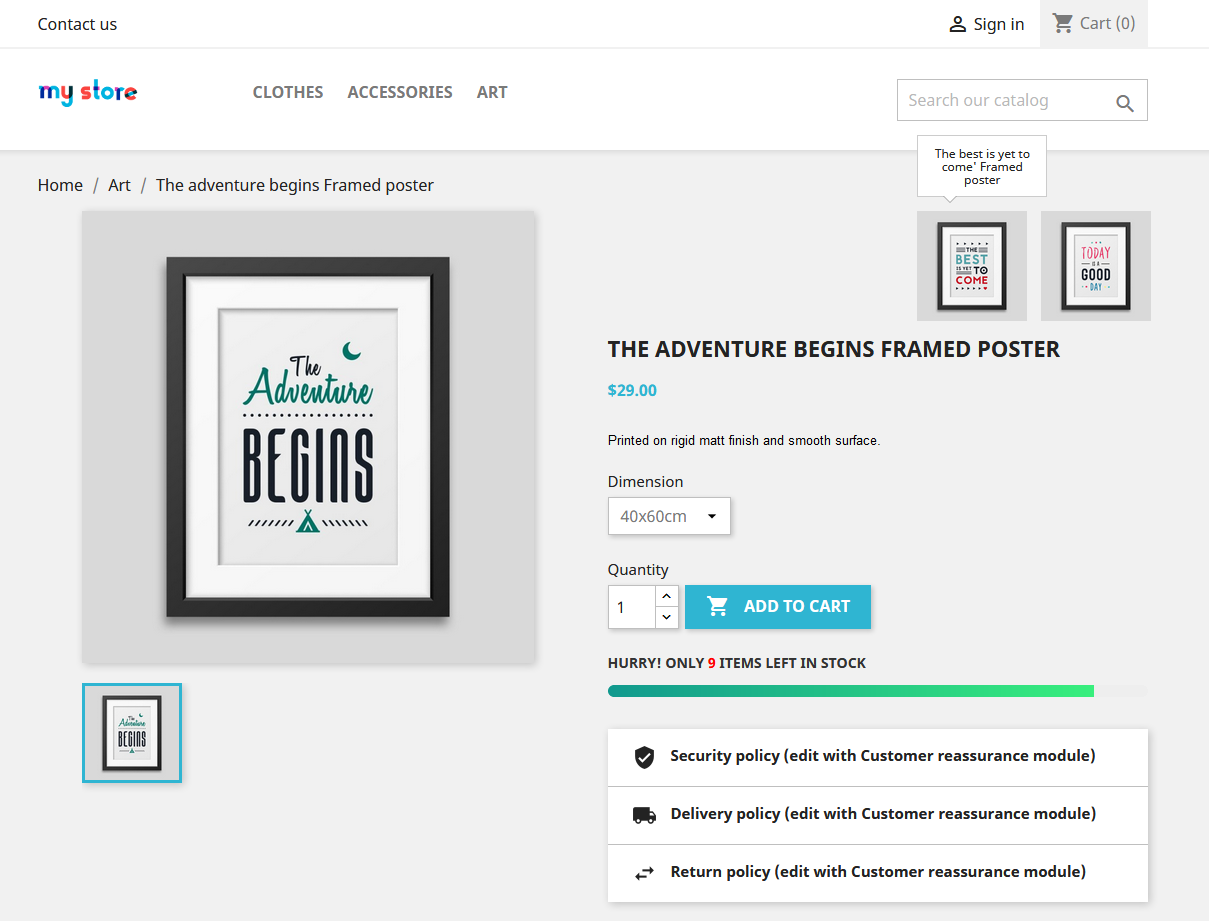
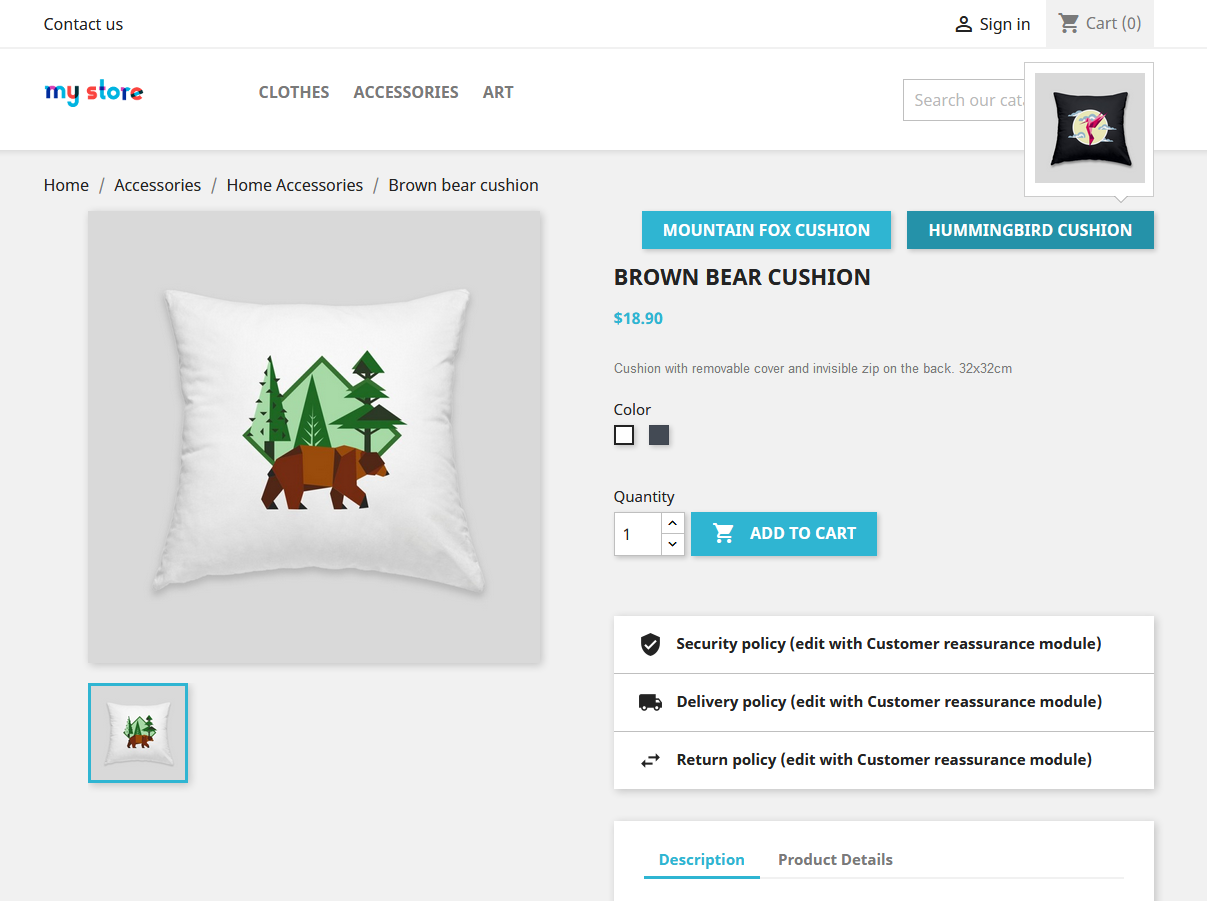
Demo view
See the screen-shot of our demo:
Demo view 1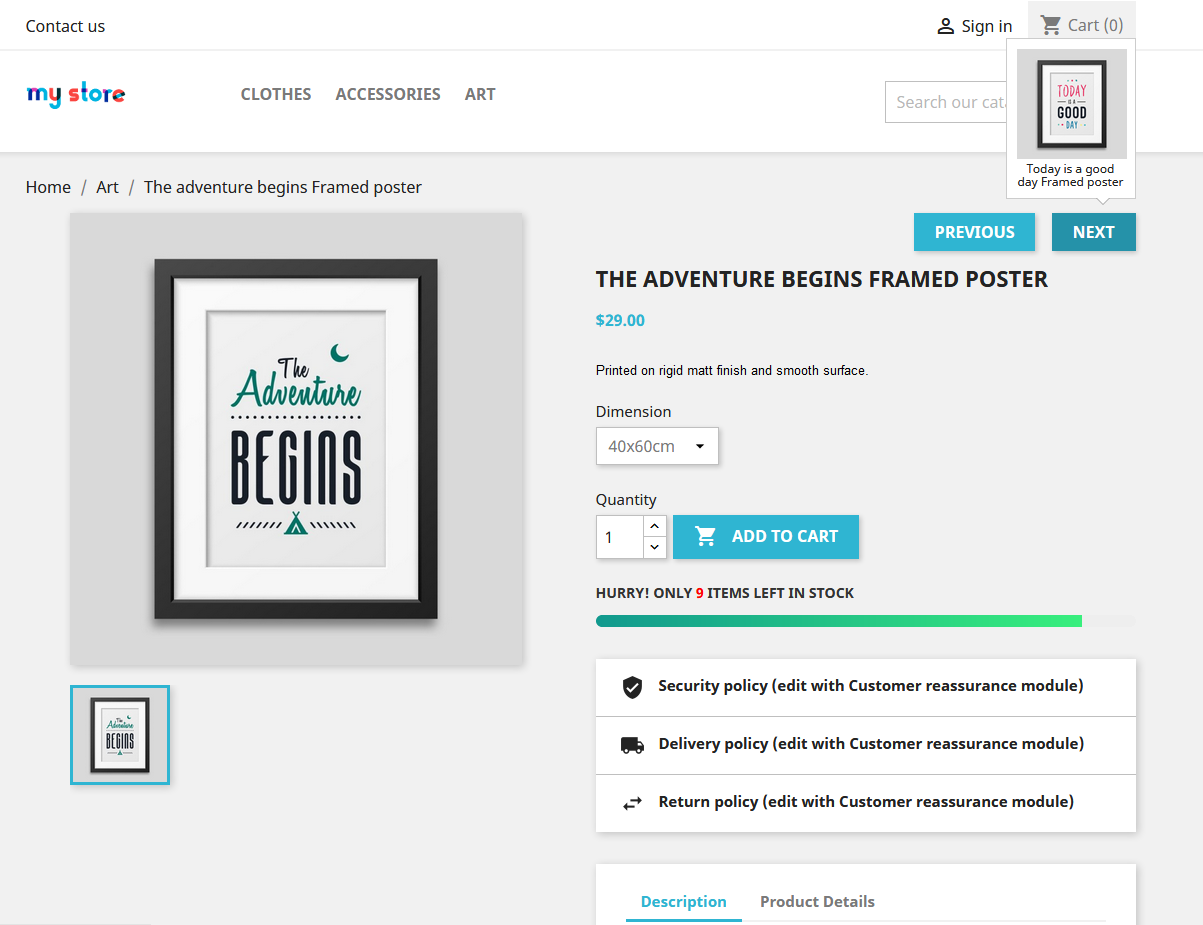 Demo view 2
 Demo view 3
Useful Technical Blogs
- How to Install a New Theme in PrestaShop
- How to Add a Product Feature in PrestaShop
- How to Create a Category in PrestaShop
- How to Create a Cart Rule in PrestaShop
- How to Configure Page Layouts in PrestaShop
- How to Add a New CMS Page in PrestaShop
- How to Import Categories in PrestaShop
- How to import products in PrestaShop
- How to add new store in PrestaShop
- How to add live chat code in PrestaShop 1.7?
Best Selling PrestaShop Themes


Help & Support
Please, if you have any questions, run into any issues or just need some help, do not hesitate to contact us via our Support Center. We believe in providing the best support possible, and we monitor our Support center just about 24/7.
Your feedback is absolutely welcome!