
In this post I am going to explain how to validate custom form in magento 2.
The data validation is the important step before the submission. The data needs to be checked for correct input and the validity of data can be checked via default Magento 2 validation rules.
Follow the steps to add validation inside your custom form.
Let’s first create a sample form with some fields. Add the following code inside it.
<form class="form" id="customForm" method="post" enctype="multipart/form-data" autocomplete="off" data-mage-init='{"validation":{}}'>
    <?= $block->getBlockHtml('formkey') ?>
    <fieldset class="fieldset">
        <h3 class="legend">
            <span>Contact Information</span>
        </h3>
        <div class="field name required">
            <label class="label" for="name"><span><?= $block->escapeHtml(__('Name')) ?></span></label>
            <div class="control">
                <input name="name" id="name" title="<?= $block->escapeHtmlAttr(__('Name')) ?>" value="" class="input-text" type="text" data-validate="{required:true}" />
            </div>
        </div>
        <div class="field email required">
            <label class="label" for="email"><span><?= $block->escapeHtml(__('Email')) ?></span></label>
            <div class="control">
                <input name="email" id="email" title="<?= $block->escapeHtmlAttr(__('Email')) ?>" value="" class="input-text" type="text" data-validate="{required:true, 'validate-email':true}" />
            </div>
        </div>
    </fieldset>
    <div class="actions-toolbar">
        <div class="primary">
            <button type="submit" class="action primary" title="<?= $block->escapeHtml(__('Submit')) ?>">
                <span><?= $block->escapeHtml(__('Submit')) ?></span>
            </button>
        </div>
    </div>
</form>
Now add following code snippet below the form.
<script type="text/x-magento-init">
    {
        "#customForm": {
            "validation": {}
        }
    }
</script>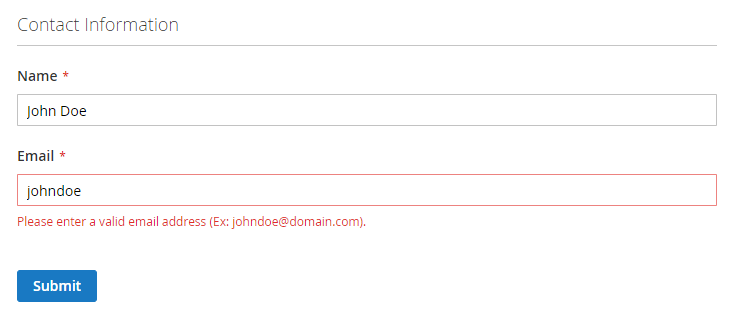
Thats it. Enjoy Magento 2!!

Write an article about ecommerce that help people to grow their ecommerce business. You’ll find best ecommerce guide, news, tips & more!


May 6, 2020 at 2:04 pm
Your content helped me a lot, Very useful and creative. Thanks!