
In this article we’ll show you, how to create a new category in Magento 2. Follow this simple guideline…
The category structure in Magento is like tree, with the root at the top. Each section of the tree can be expanded and collapsed. You can create as many additional subcategories as needed. Categories can be dragged and dropped to other locations in the tree.
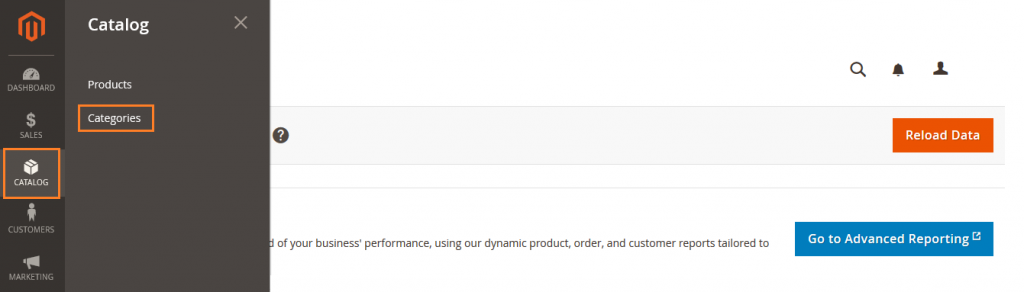
Step 1: Create a Category
Login into Magento Admin Panel and from sidebar go to, Catalog > Categories.
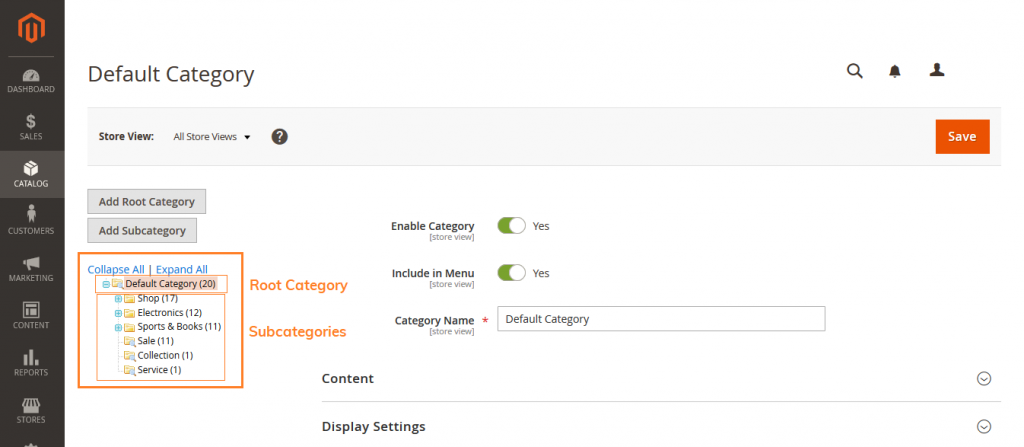
Magento Shows category in tree structure. The “Default Category” is a root category. Make sure that, All the categories you add is under the root category.
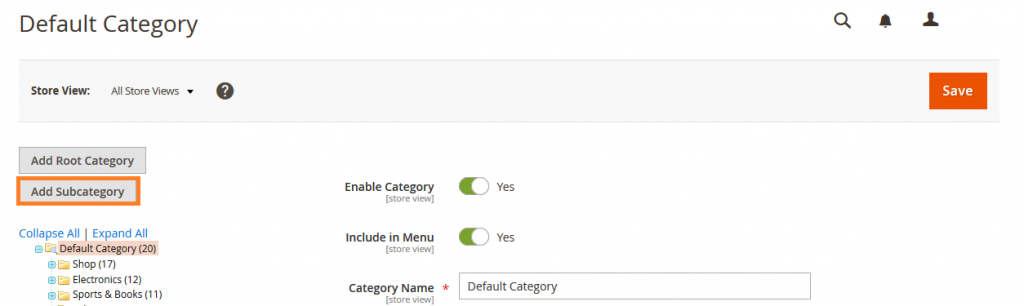
Step 2: Add Categories
Now just click on “Add Subcategory” button.
Step 3: Fill the Basic Information
Here you have to add basic info about Category.
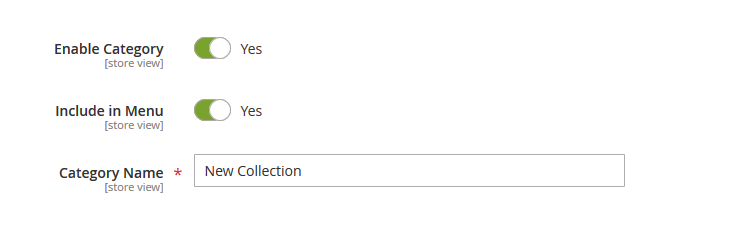
Enable Category: To Enable or Disable category, Set Enable Category to Yes.
Include In Menu: To include the category in the top navigation, Set Include in Menu to Yes.
Category Name: Add the Category name.
Step 3: Add Category Content
Expand the Content section.
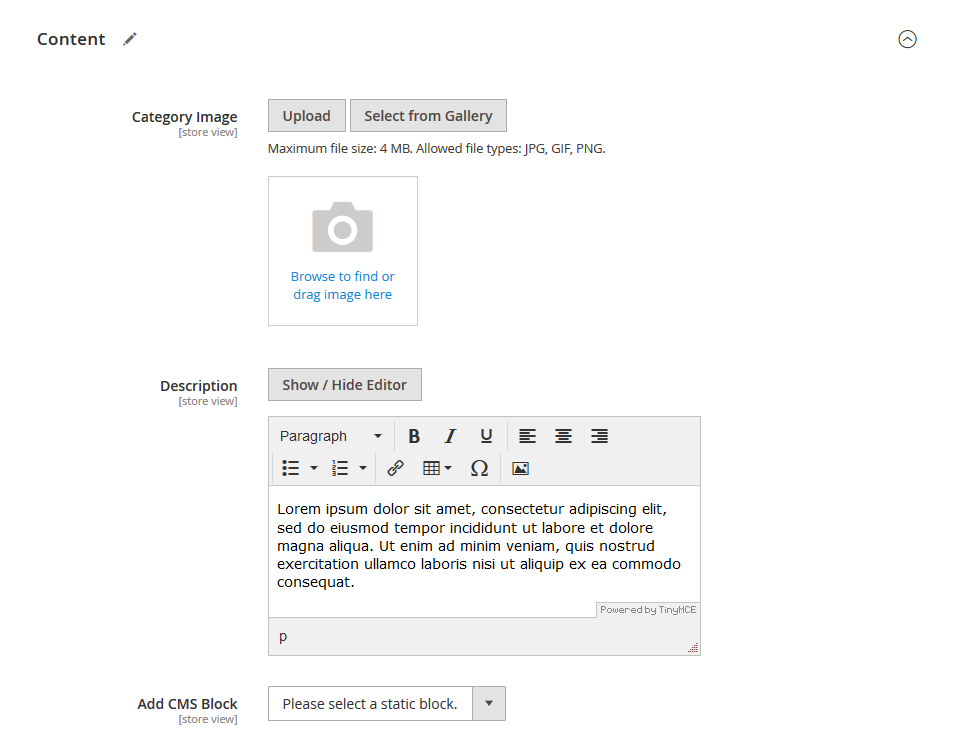
Category Image: To display a Category Image at the top of the page, click Upload. Then, choose the image that you want show on category page.
Description: Enter the text that you want to appear on the category landing page.
Add CMS Block: To include a content block on the category landing page, choose the CMS Block that you want to appear.
Step 4: Add Display Settings
Expand the Display Settings section.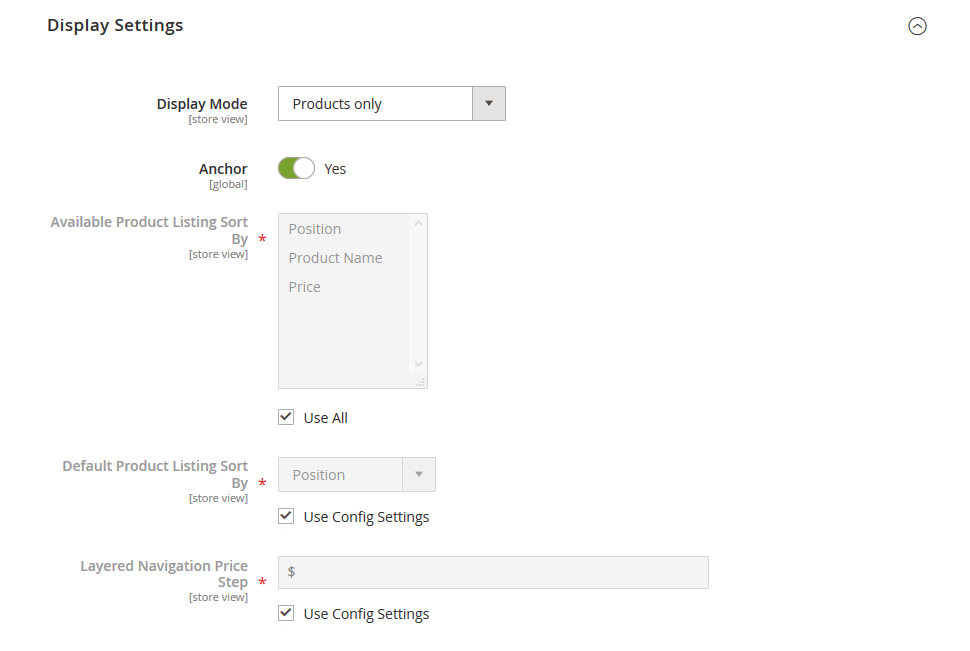
Display Mode: Set one of the display mode. Products Only, Static Block Only, Static Block and Products
Step 5: Add Search Engine Optimization Details
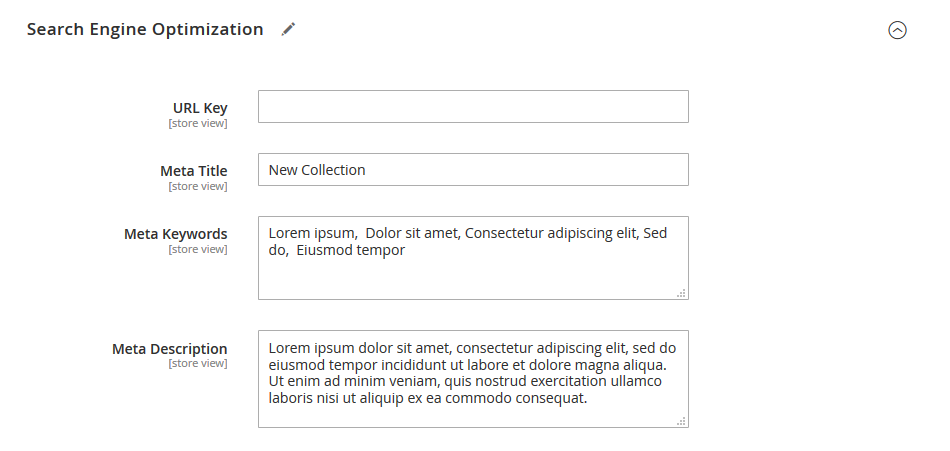
URL Key: The default URL Key is based on the product name. You can also change URL if you want.
Meta Title: The text that appears at the top of the browser tab. You can use the default, which is based on the Category Name, or you can also change it.
Meta Keywords: Add the high value keyword to gain more Category visibility in search engine.
Meta Description: The text that appears in search results listings. Enter a category description that is between 150-160 characters in length.
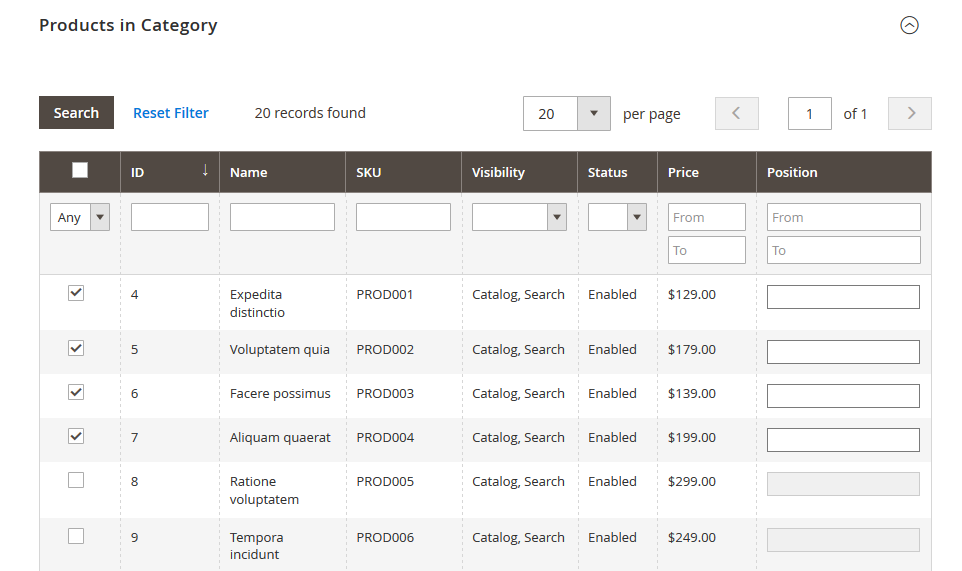
Step 6: Add Product In Category
Select the products that you want to display on this category.
Step 7: Complete Design Settings
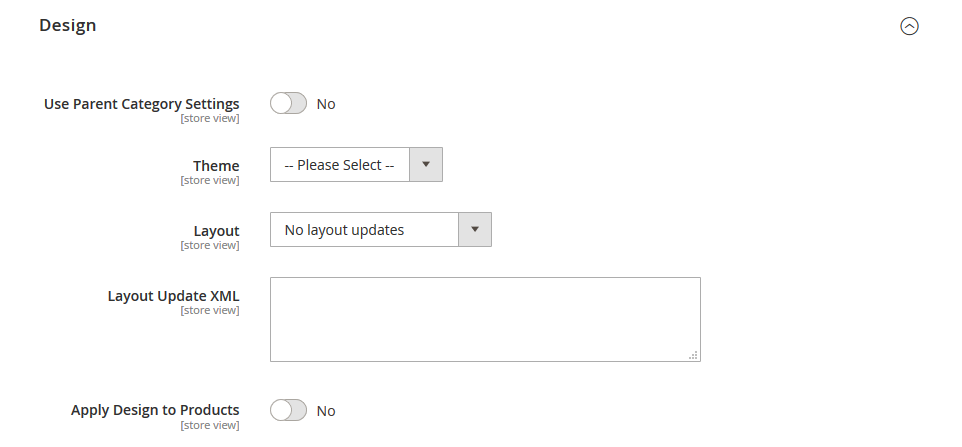
Theme: Choose the Theme that you want to apply.
Layout: To change the column layout of the category pages, choose the Layout that you want to apply.
Layout Update XML: To enter custom code, enter valid XML code in the Layout Update XML box.
Apply design to Products: To use the same design for product pages, set Apply Design to Products to Yes.
Step 8: Schedule Design Update

The Schedule Design Update section gives you the ability to make temporary changes to the appearance of the Category page.
Step 9: Save the Category
Click on save button and save the category and check on frontend.
Yeah Done! Let us know in the comment section below if you have any question. We are happy 🙂 to help you!

Write an article about ecommerce that help people to grow their ecommerce business. You’ll find best ecommerce guide, news, tips & more!

Leave a Reply