Here’s a step-by-step guide on how to setup your own theme with Shopify.
I’ll cover all the basics and a bit more, so you could get your online store up and running ASAP.
Shopify is the most popular choice among the customers to set up their online store. Here’s a few steps to set your theme with Shopify. Our articles has everything you need to start building amazing things with Shopify.
Shopify Theme Setup Guide
- Upload Theme
- Theme Action
- Customize your Theme
- Add Sections to your Theme
- Customize by Theme Settings
- Make your Shopify store Live
Get Started Setup your Theme in Shopify.
Here’s you learn how to setup your theme in Shopify. It’s easy to setup your theme in Shopify. Follow below steps…
Step One: Upload Theme.
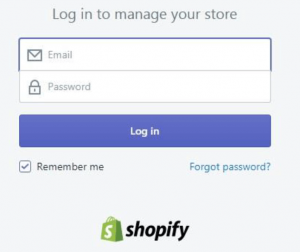
To setup your theme in Shopify you must complete the Admin Login in Shopify. Here’s a Login panel of Shopify.
After the successfully complete Login process, you are now able to setup your theme in Shopify.
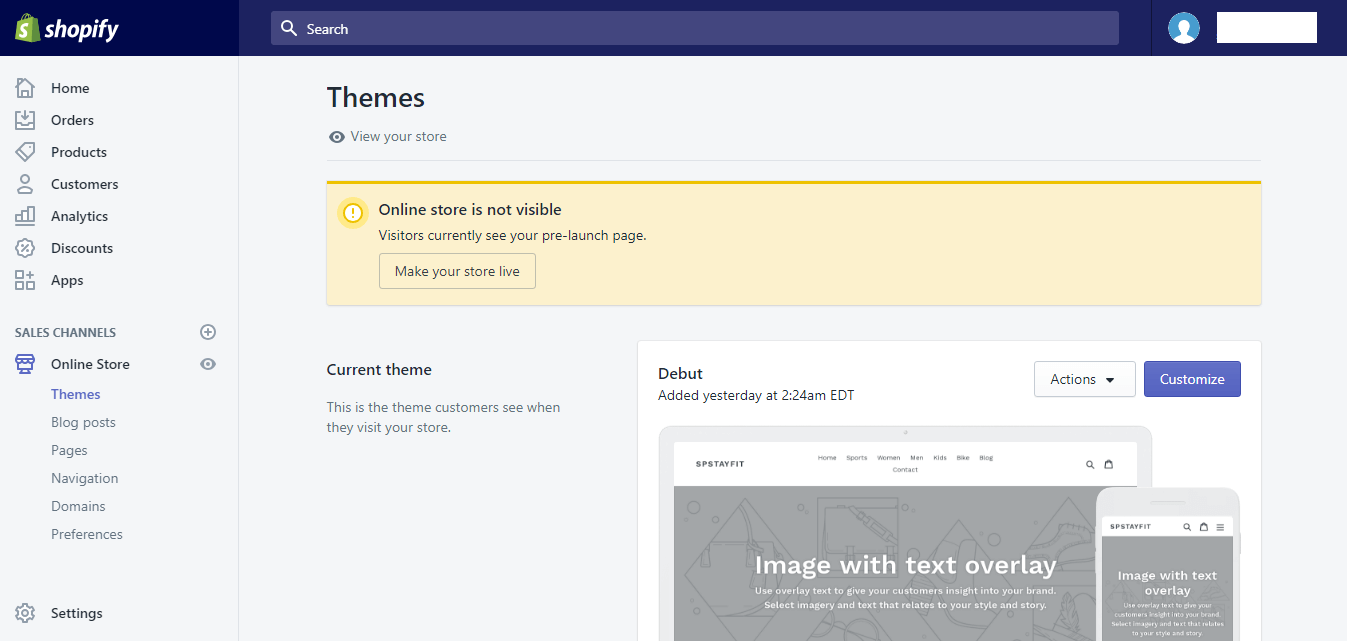
Now you see the Dashboard of Shopify Admin Panel

At left side you see the channels that allow to edit your theme. At Middle Section you get the Information of your live store. Such as Total Sales, Total Orders, Sessions of your live store.
Go to Left side Bar and Click on Online Store to setup your theme. Here we take example of default Shopify Theme (Debut).
When you click on Online Store button you get options panel to modify your store.
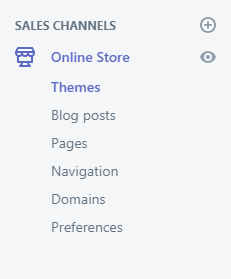
Now Click on Themes menu to manage your theme.
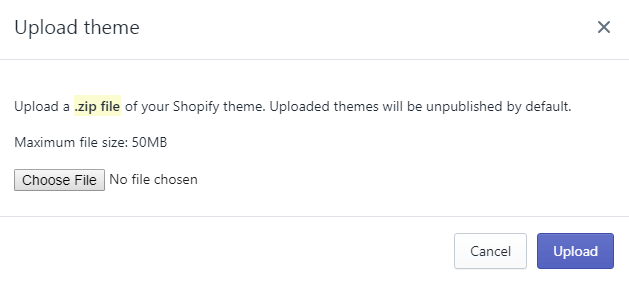
Just little scroll-down and select Upload Theme to upload your theme. When you click on Upload Theme one pop-up is open. You need to browse your theme from your computer here and then click on upload button and wait for it. Here’s the first step was successfully completed.
Step Two: Theme Action.
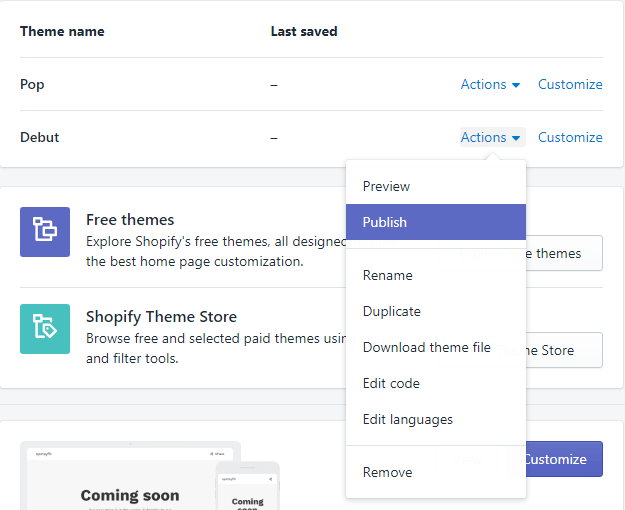
After uploading your theme, you can see new theme in theme list area.

Now you can see here your theme. Just example my theme is Debut. So now I click on Actions button and Publish my theme.
Step Three: Customize Your Theme.
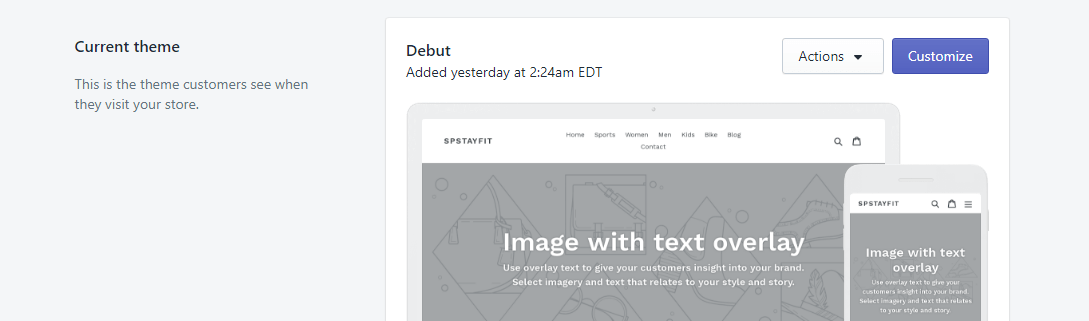
Now you can see your theme set as a current theme. In order to customize this theme you click on Customize button.
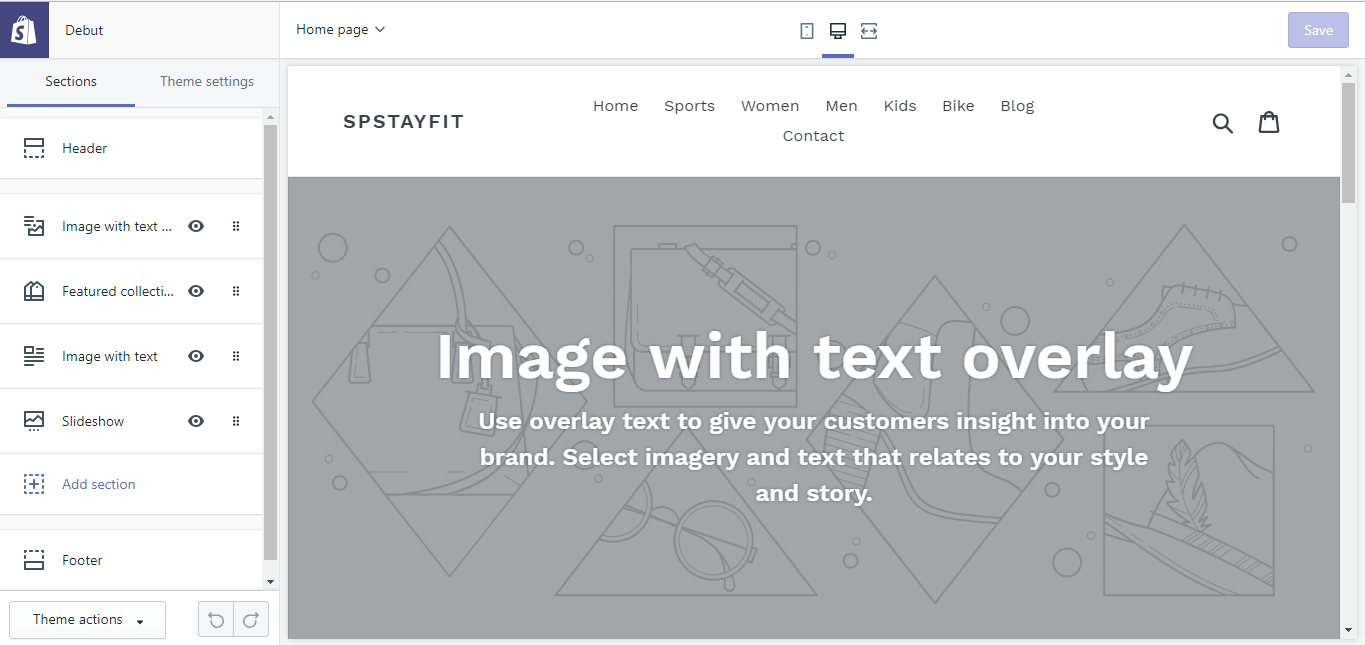
Now you able to see the below screen. Here you can customize the things with the live preview.
Step Four: Add Section To Your Theme.
This page shows the different sections of customizations. We understand by following explore view.
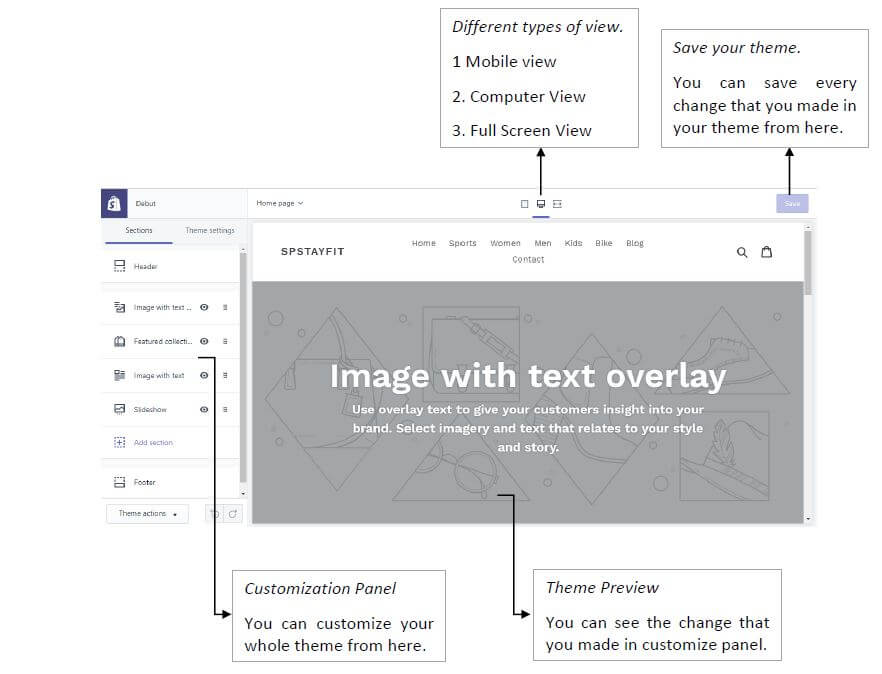
The explore view shows here because you better understand this customization process. These would lead to basic understanding of customization of your theme.
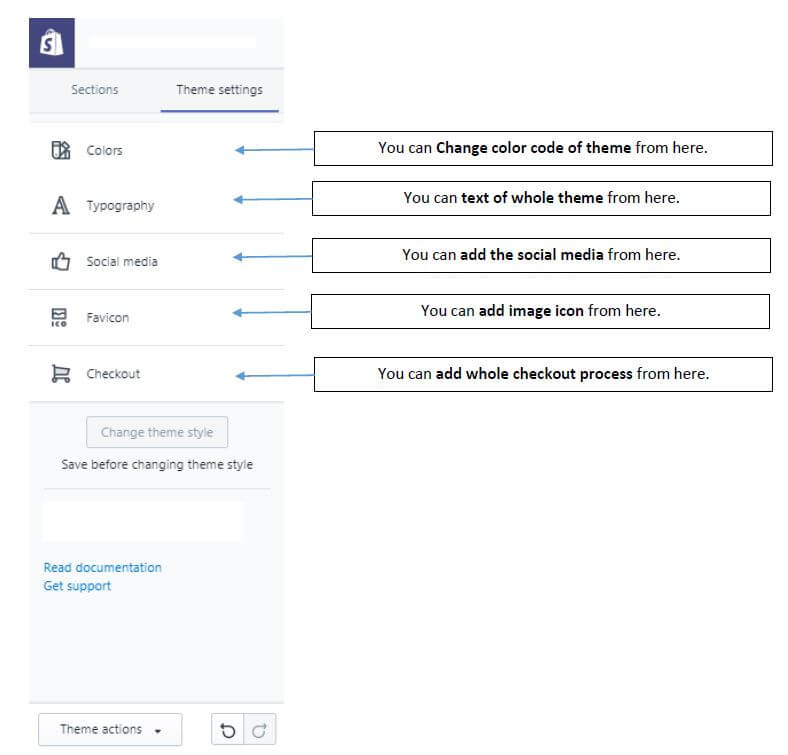
Step Five: Customize by Theme Settings.
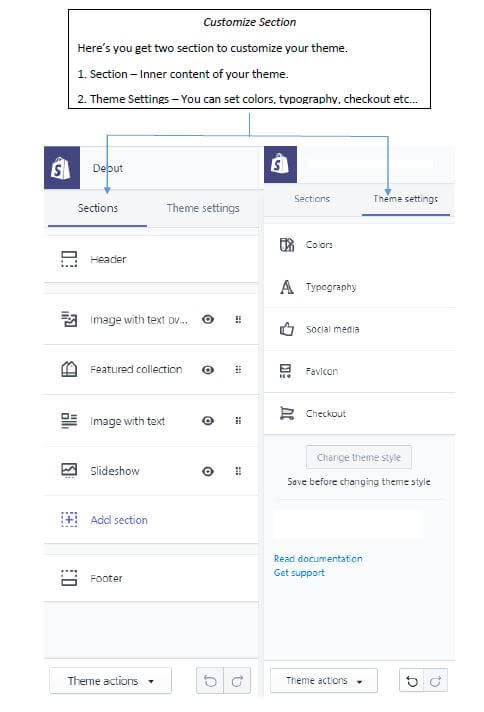
Now we take deep understanding of the Detailed Customization Section.

The below section gives you Basic Understanding of How Shopify Theme Setting Works.
The Basic Understanding of How Shopify Theme Action Works.
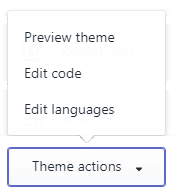
Here’s you can take action over theme like…
Preview Theme: By clicking on preview theme you can see your theme preview.
Edit Code: Shopify has amazing feature that you can edit code (Liquid File code) at a time with this feature.
Edit Languages: You can change language of the theme whenever you want.
– Add the Product to your Shopify Theme:
The product add to your Shopify store is very easy task to perform. There are two ways to add your product to your theme.
1. Manually add the product.
2. Import the product (With the help of CSV file).
First we understood how Manually Product added to the store.

Select PRODUCT from the menu. Here’s you see the ADD PRODUCT button. By clicking this button we can add manually product. Let’s learn how to add product manually.
Click ADD PRODUCT button, and one window open like below.
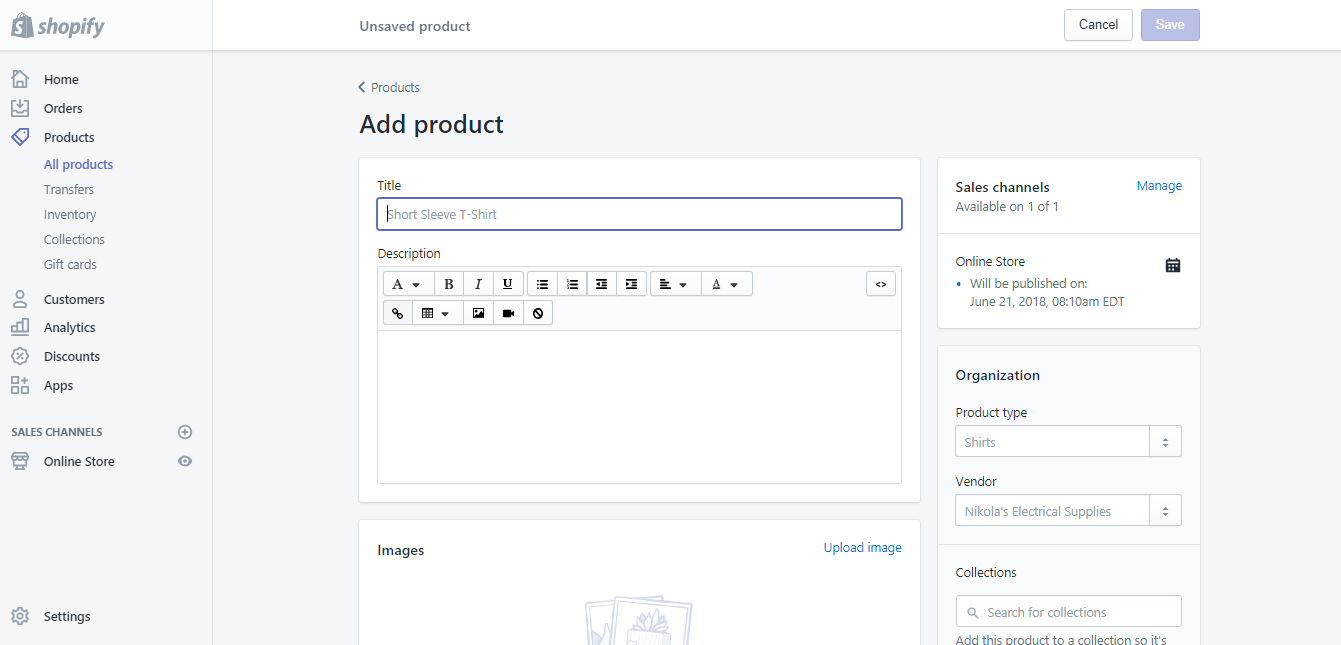
The following things to be add to the Add Product page.
- Title – Add title of the product.
- Description – Add description of the product.
- Image – Add image of the product.
- Pricing – Add Pricing of the Product.
- Inventory – Add Inventory (Stock) of the product.
- Weight – Add the weight of the product.
Also fill the organization value to the product.
- Product type – Add product type.
- Vendor – Add product vendor.
- Tags – Add tags to the product.
Once you filled all the value just click on SAVE PRODUCT button and save your product. These is the manual way to add the product.
Now we see how product can be added by IMPORT PRODUCT.

At the upper side of product page you see the import icon shows above. By clicking on IMPORT button one dialog box open like these
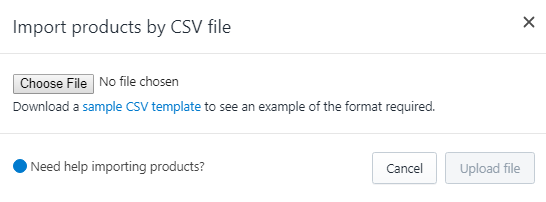
You can import by adding CSV file here. Here we complete the import of the product.
6. Make your Shopify Store Live:
To make your store live follow the basic steps.
Go to your Shopify Admin Dashboard. Then click on HOME button placed on left navigation menu. You will see the below screen.
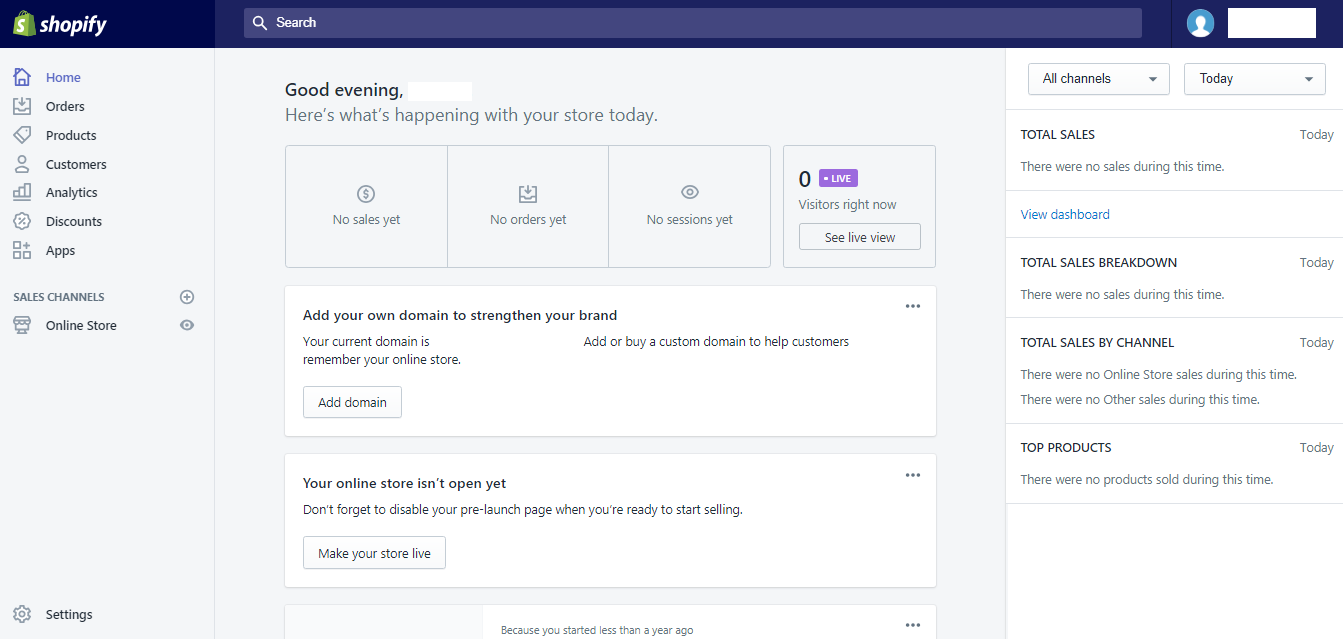
Click on the button of MAKE YOUR STORE LIVE. Just click on these button and make store live to your valuable customers.
Conclusion.
In theory, you can have a great looking, unique and fully-functioning shopify store in less than half an hour without having to be a web expert. This way you can spend most of your time marketing your products rather than having to maintain the site.

Write an article about ecommerce that help people to grow their ecommerce business. You’ll find best ecommerce guide, news, tips & more!

May 7, 2020 at 1:07 pm
Excellent work, that’s very helpful for us. Thanks team!