
Here’s I give step-by-step guide on how to build your own online shop with Shopify.
I’ll cover all the basics steps and a bit more, so you could get your online store up and running ASAP (We’re all busy, I know).
It’s also best to know that Shopify is the best platform for this because Shopify receives an average of 5.9 billion visits per month. A great platform to expose your shop as a seller.
If you get stuck (I doubt you will), leave a comment or get in touch with us via the Contact Form
Here’s we explain the seven basic step to get your own online shop with Shopify.
Let’s get started…
How to Set up Your Online Shop with the Shopify.
Here’s you must Signing up with Shopify and starting your online store. Shopify provides a 14 Days Free Trial to moves you ahead.
To launch your own Shopify Store, first you must sign up for an account.
1. Sign up with Shopify:
In the first step you learn how to Sign up with Shopify.
Visit Shopify.com

This screen will appear. You must click on Get Started button to start your 14 Days Free Trail on Shopify.
When you click on Get Started buttons the below screen will open.
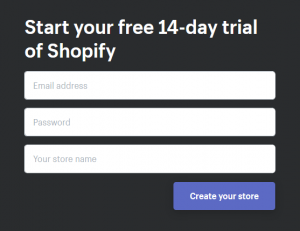
Enter the required detailed and click on Create Your Store button. Your store name needs to be unique or Shopify will ask you to choose something else. After complete this step you need to fill few detail. See in the below screen.
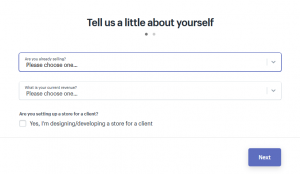
Fill the above form and click on Next button. Then Shopify asked for your address detail. Below screen will appeared.
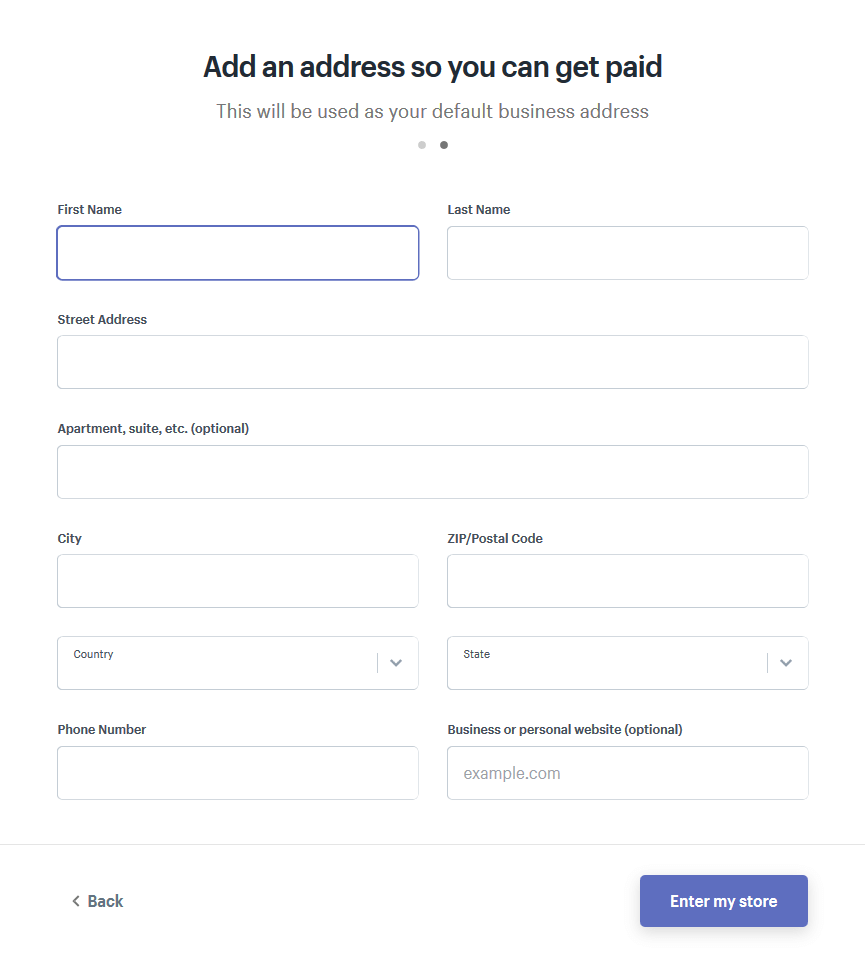
Fill the detail carefully. Then click on Enter my store button. Then you will directed to Shopify Dashboard.
Here’s we successfully complete 1st step of creating your online Shopify store.
2. Start Setting-up Your Shopify Store:
After the successfully complete the signed up procedure, you will be directed to your store admin screen.
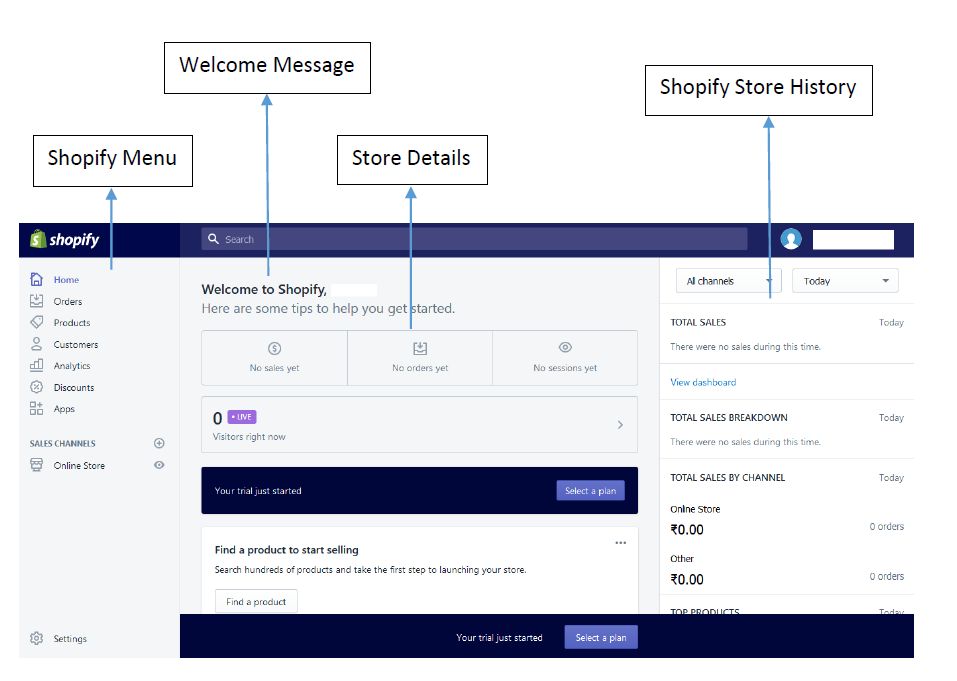
The above image describe the different section of the Shopify Dashboard.
Here’s we successfully complete 2nd step of creating your online Shopify store.
3. Choose a “Theme” :
Shopify has its officials theme store. Have many theme are in the Shopify store. Some themes are free or some are paid, you choose any theme from the store.
These all themes are great compatible with Shopify store because these themes are all guaranteed to have full support from the designers so you know that your store is in good hands.
To find a theme that best suits your Shopify store, follow some basic step.
1. Browse the Shopify Theme store.
On your Shopify dashboard you can choose best theme for your store. Here’s a tip how to browse Shopify theme store.
Just little scroll over a dashboard you show below screen.
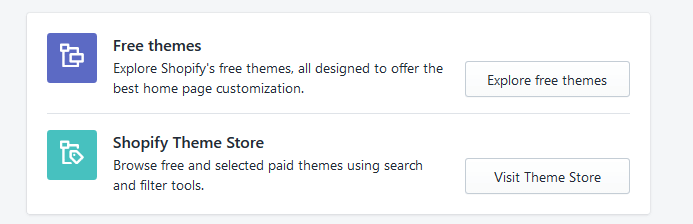
Now click on Visit Theme Store button and get reservoir of theme. Shopify provides filter such as browse Free themes or Paid theme. Here you can choose theme for your Shopify store. When you click on VISIT THEME STORE button the below screen appeared.

Just little scroll down and you see the below screen.
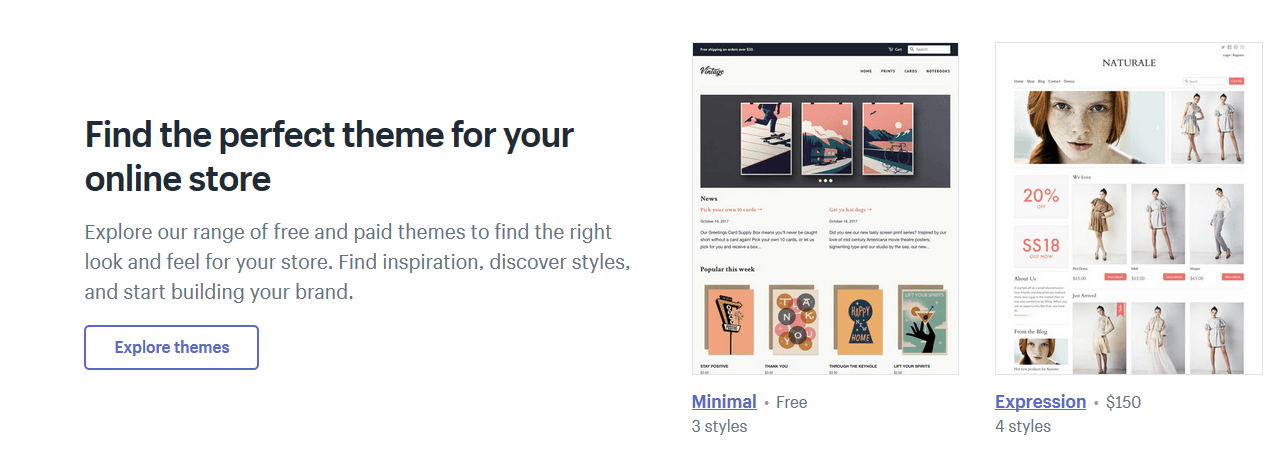
Now click on Explore Theme button and explore Shopify theme. You will see below screen.
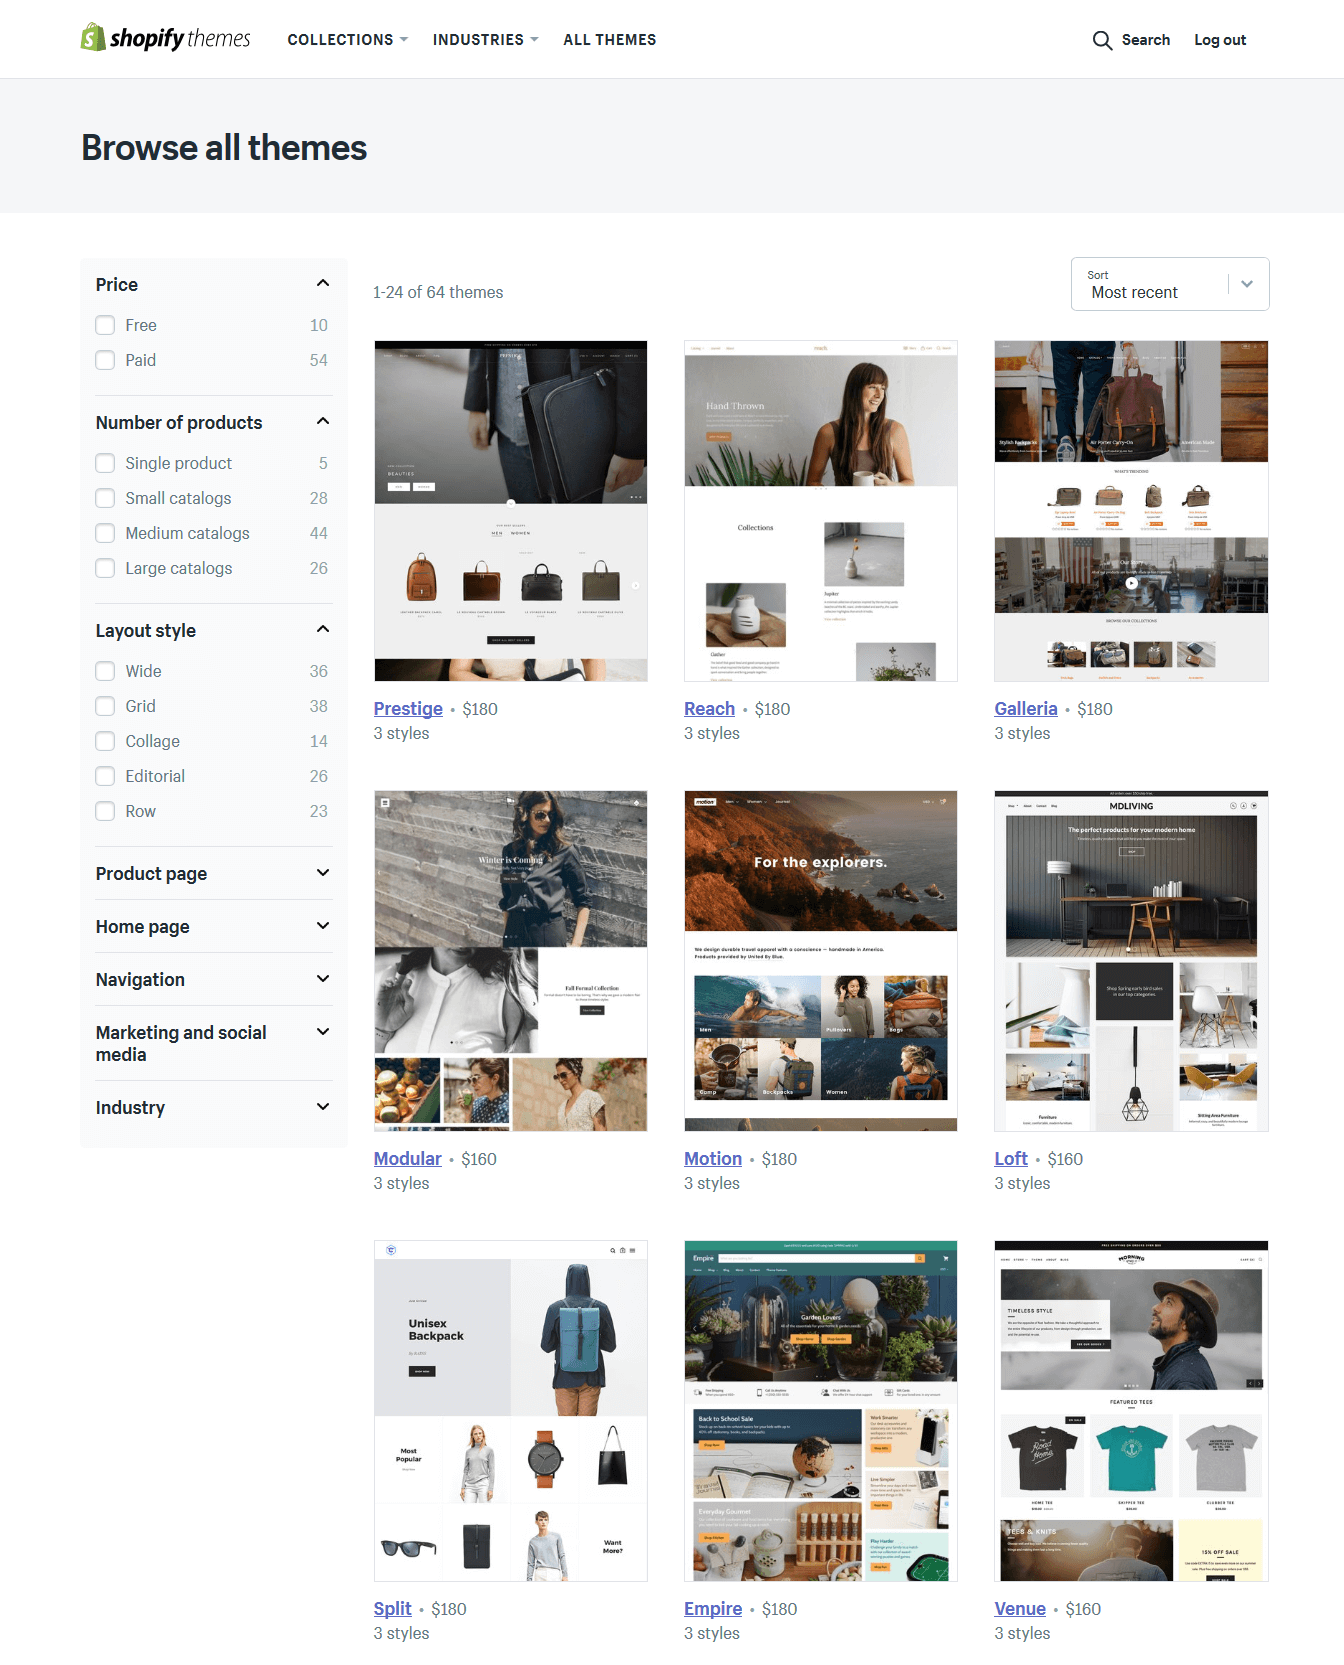
At left side you can see the category. You can select category that you want.
The Filter list for choosing a theme
- Price
- Number of product
- Layout style
- Product page
- Home page
- Navigation
- Marketing and social media
- Industry
Shopify provides that much option to choose the best theme for your online store. Choose the theme that relates your store.
2. Check Testimonial of Browse Theme.
Once you found best theme that suits to your Shopify store, just click on sample page. To see the different sample page of your theme. also you can check the theme is responsive or not and also check that all function are well working on mobile.
Just little scroll for read the testimonial about the theme. The testimonial gives you, ideas about the theme.
3. Preview the Theme.
To see the theme in action, you can click on VIEW DEMO. You will see the demo of the theme.
If the theme comes in a range of styles, you can also view demos of the different styles by clicking on them.
4. Get the Theme.
Once you choose the theme from Shopify theme store. Click on button ADD THEME.
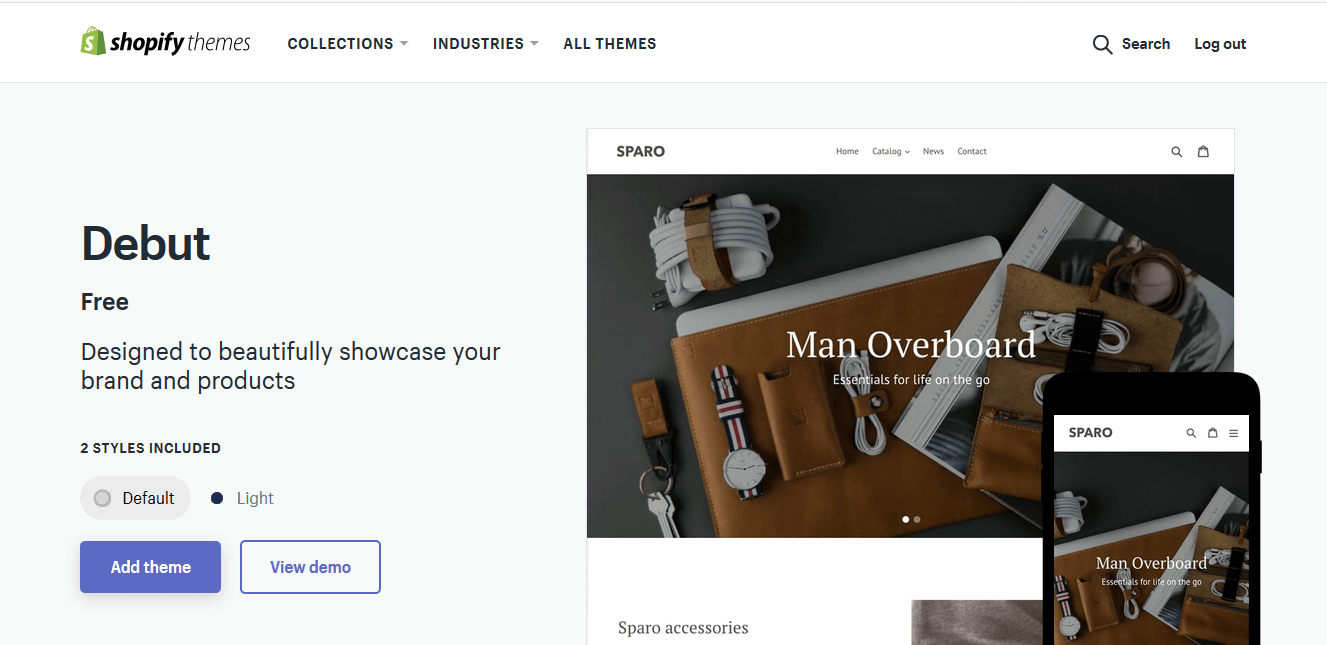
When you click the ADD THEME button that theme is added to your Shopify dashboard.
The below screen was appeared. Here’s you can see the list of theme that you added to your dashboard.
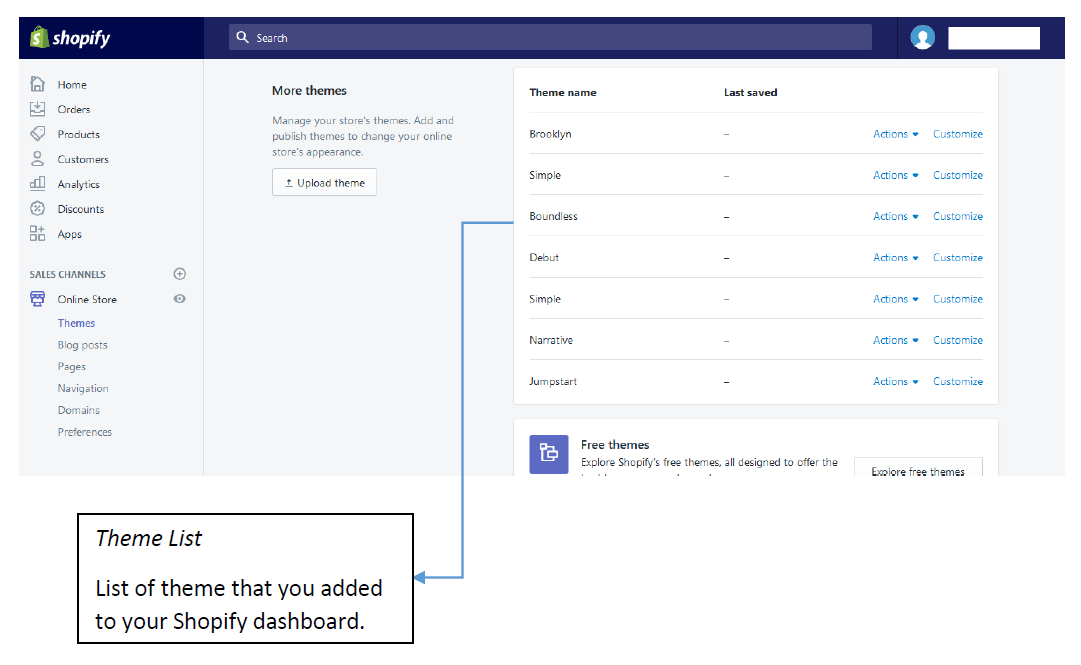
Here’s we successfully complete 3rd step of creating your online Shopify store.
4. Edit Shopify Store Settings.
The majority of Shopify themes allow you to make some changes that can make big change the appearance of your Shopify store. So now we learn how to Customize Shopify theme.
Shopify Theme Setup Guide
- Go to the Theme
- Theme Action
- Customize your Theme
- Add Sections to your Theme
- Customize by Theme Settings
Step One: Go to the Theme.
To setup your theme in Shopify you must go to the Dashboard of Shopify Admin Panel.
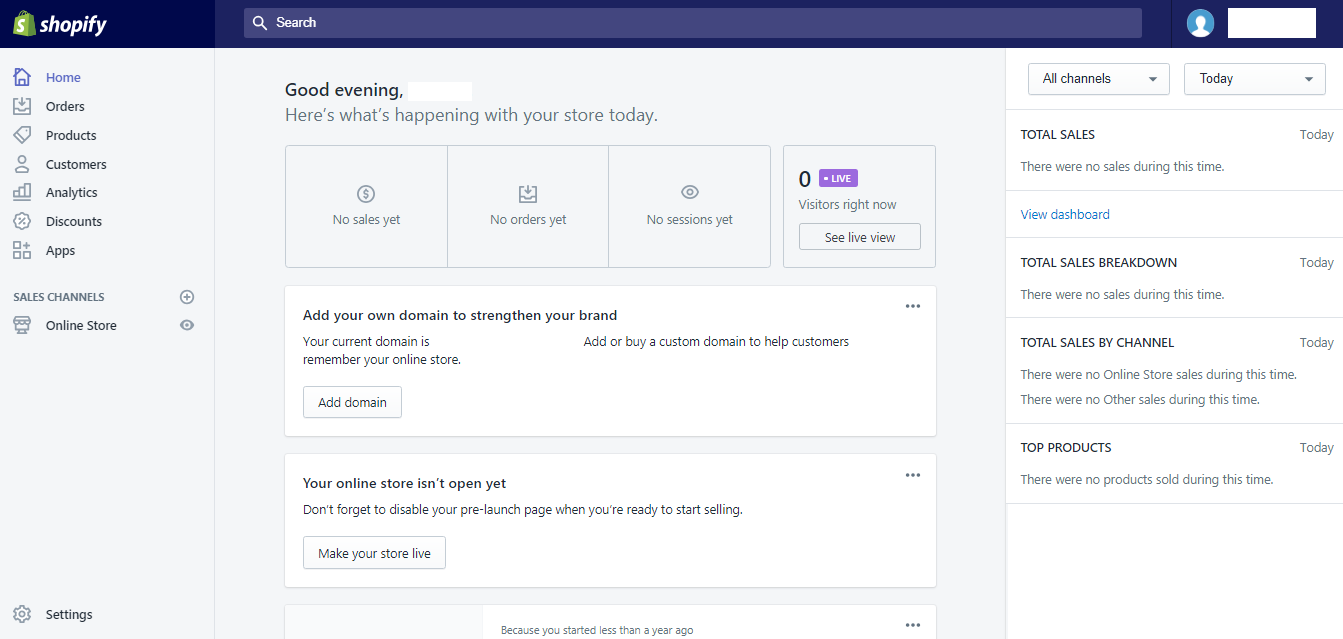
At left side you see the channels that allow to edit your theme. At Middle Section you get the Information of your live store. Such as Total Sales, Total Orders, Sessions of your live store.
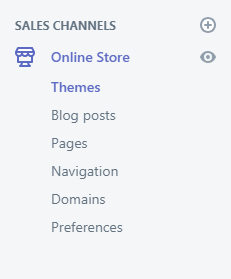
Go to Left side Bar and Click on Online Store to setup your theme. Here we take example of default Shopify Theme (Debut).
When you click on Online Store button you get options panel to modify your store.
Now Click on Themes menu to manage your theme. Then, just little scroll down and you will see a list that you choose from Shopify Theme Store.
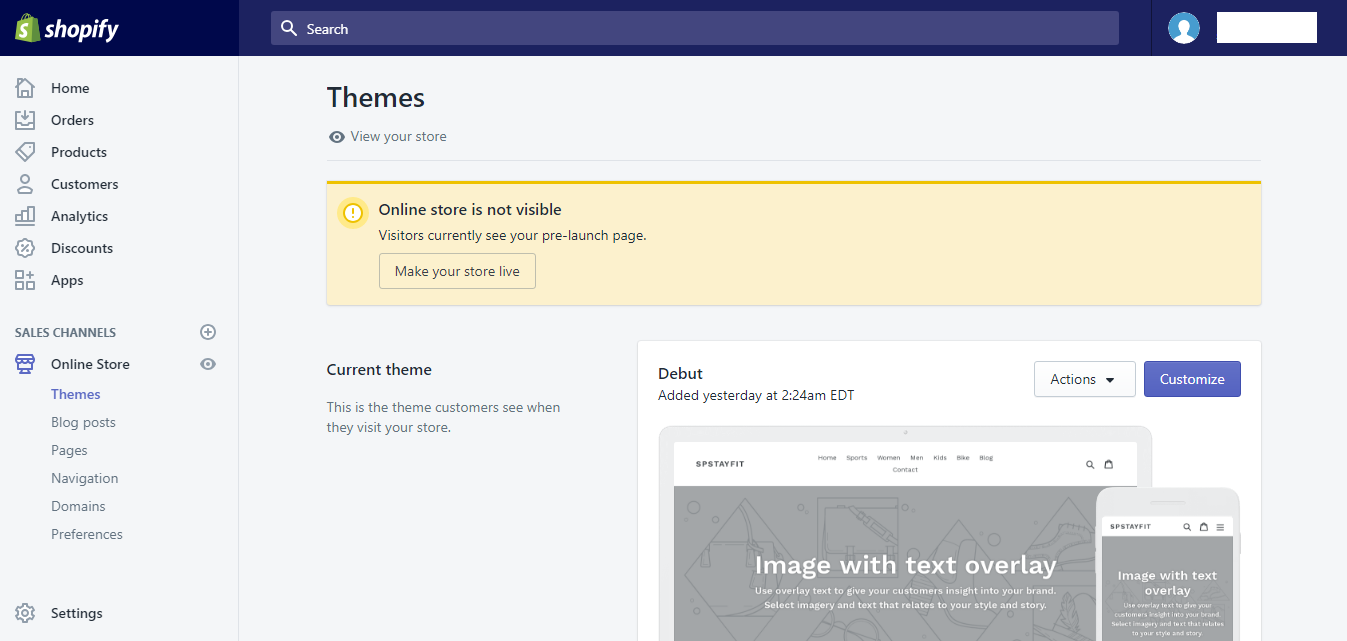
The below screen shows the theme list area in your dashboard.
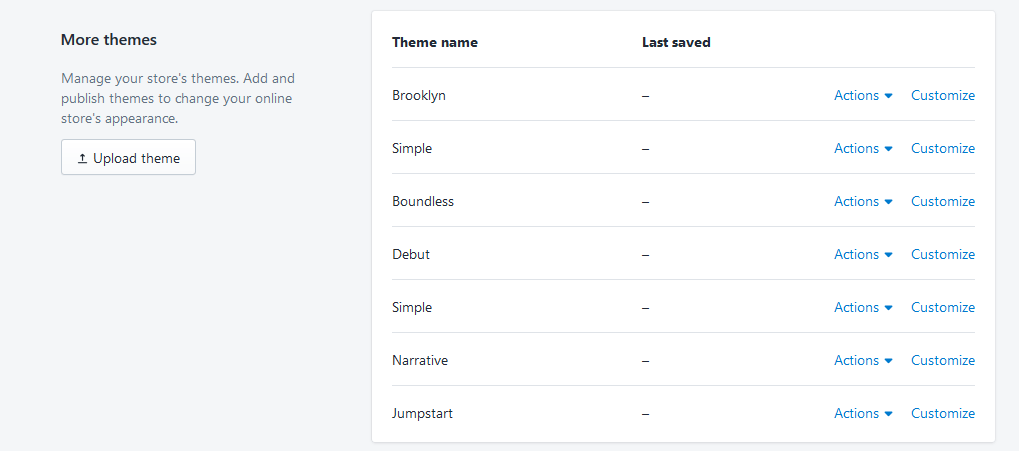
Or if you have a Shopify theme in your PC and want to upload this theme to Shopify dashboard, just follow below steps.
Upload Theme from PC
Just little scroll-down and select Upload Theme to upload your theme. When you click on Upload Theme one pop-up is open.
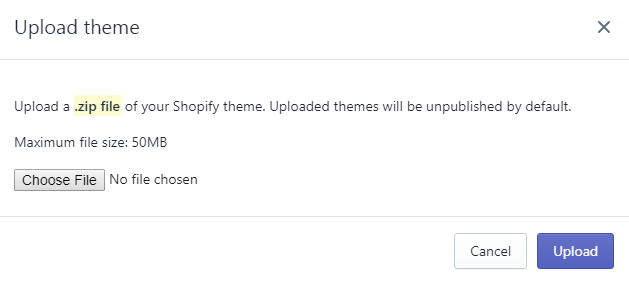
You need to browse your theme from your computer here and then click on upload button and wait for it. Here’s the first step was successfully completed.
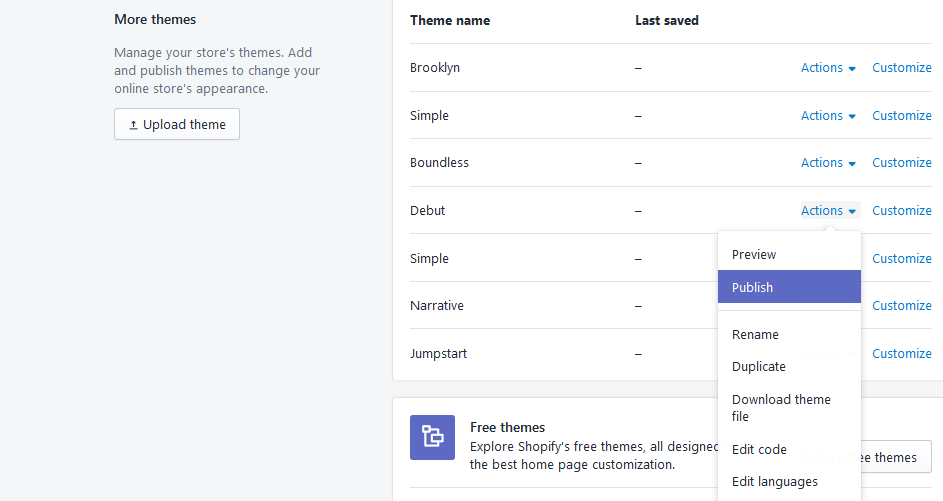
Step Two: Theme Action.
After uploading your theme, you can see new theme in theme list area.
Now you can see here your theme. Just example my theme is Debut. So now I click on Actions button and Publish my theme.
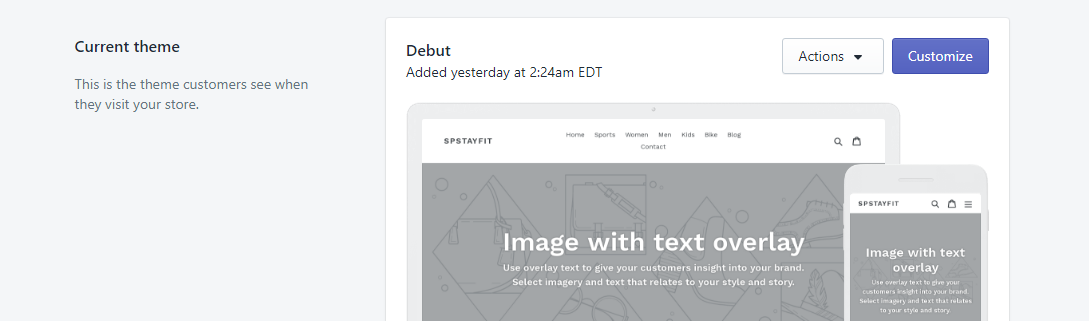
Step Three: Customize Your Theme.
Now you can see your theme set as a current theme. In order to customize this theme you click on Customize button.
Now you able to see the below screen. Here you can customize the things with the live preview.
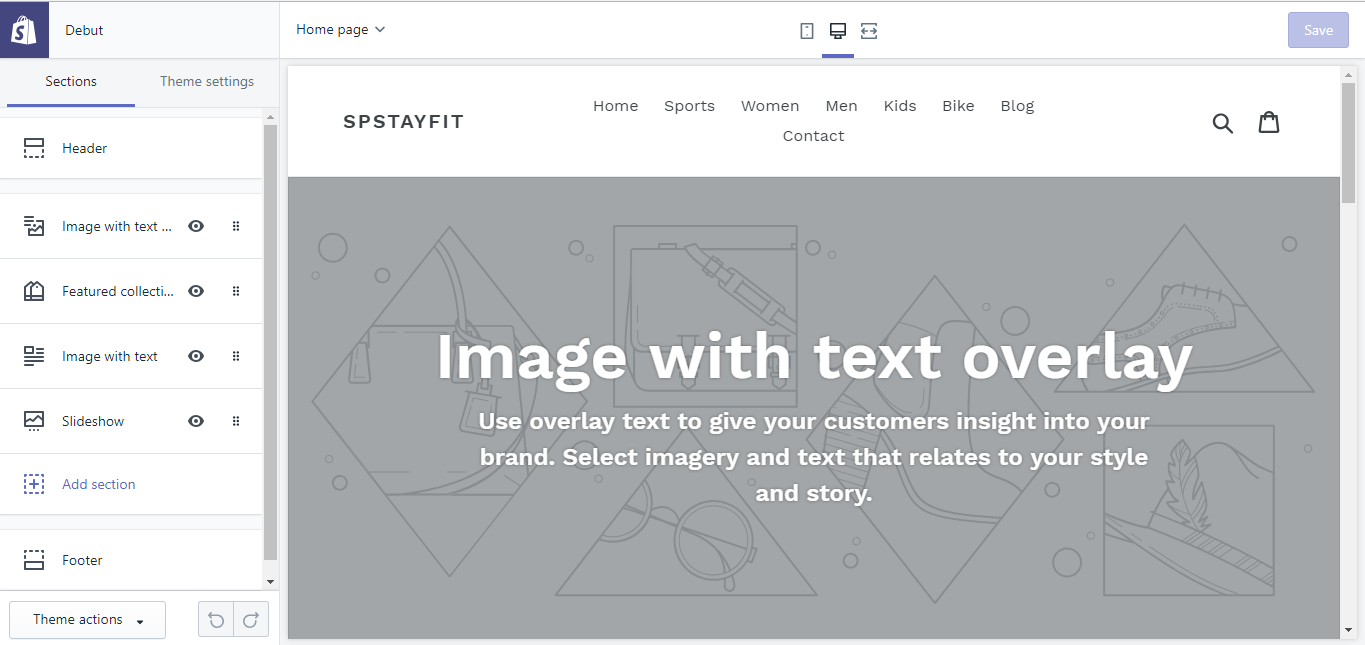
Step Four: Add Section To Your Theme.
This page shows the different sections of customization. We understand by following explore view.
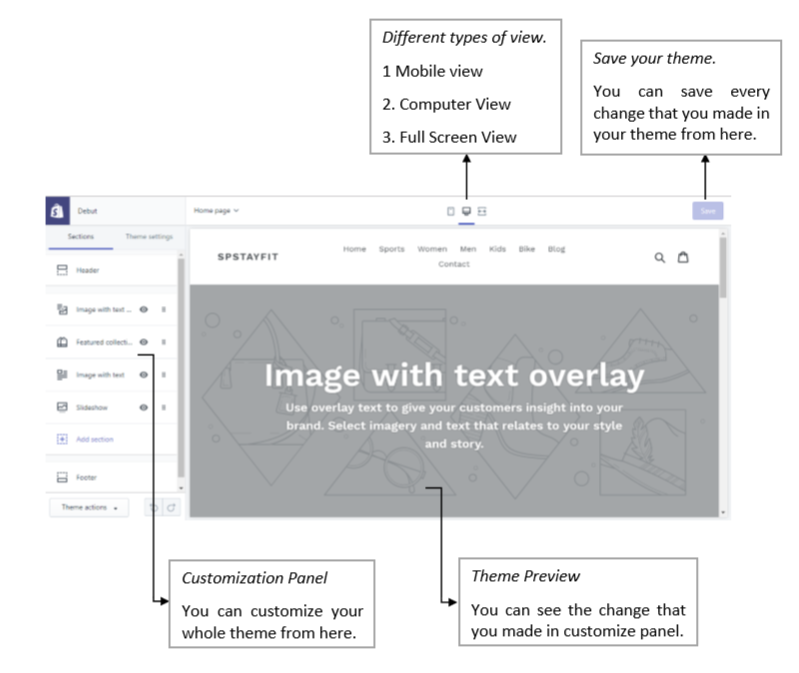
The explore view shows here because you better understand this customization process. These would lead to basic understanding of customization of your theme.
Step Five: Customize by Theme Settings.
Now we take deep understanding of the Detailed Customization Section.
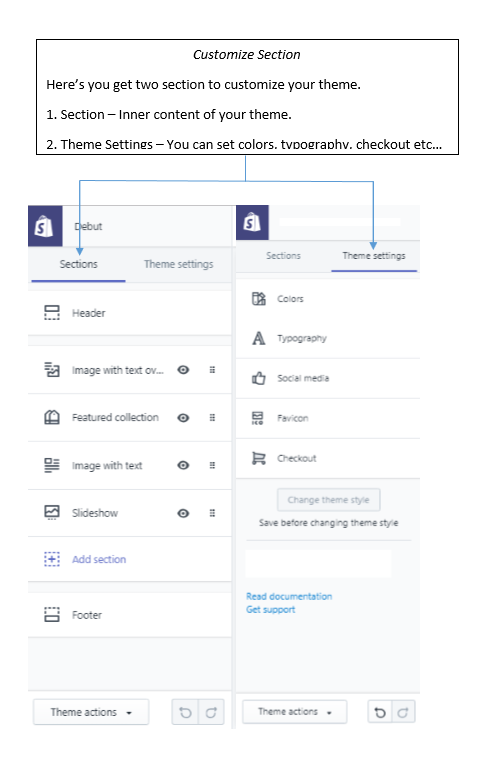
The below section gives you Basic Understanding of How Shopify Theme Setting Works.
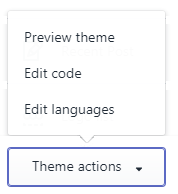
The Basic Understanding of How Shopify Theme Action Works.
Here’s you can take action over theme like…
Preview Theme: By clicking on preview theme you can see your theme preview.
Edit Code: Shopify has amazing feature that you can edit code (Liquid File code) at a time with this feature.
Edit Languages: You can change language of the theme whenever you want.
Here’s we successfully complete 4th step of creating your online Shopify store.
Looking forward to Part 2
Well done for making it this far! Now that we’ve got the fundamentals out of the way we can look forward to digging into the heart of Beginner’s Guide to the Shopify Store – stay tuned for Part 2 which is coming real soon ?

Write an article about ecommerce that help people to grow their ecommerce business. You’ll find best ecommerce guide, news, tips & more!

Leave a Reply