Prestashop released 1.7.4 version to provide complete new way to deal with theme customization. So, let’s talk about one of most important child theme feature and how you can use it to customize themes more easily in brief.
What is child theme feature?
A child theme is a theme that inherits the functionality and styling of another (parent) theme and edit the properties according to your needs.
Child themes are the recommended way of updating an existing theme. This feature enables you to customize only the parts of the theme you want to alter, leaving everything else to be handled by the existing parent theme. If the parent theme gets upgraded the changes won’t be overwritten.
What’s the benefit?
You might be wondering why a child theme feature is worth the trouble if you can just edit your theme directly. Of course, you could also apply each change manually on your theme. Which isn’t convenient at all. Using a child theme actually comes with many advantages:
- Before you create a child theme, you will need to make some preparations. First, it’s very important that you create a backup of your site before you do anything else.
- You make sure that your parent theme must be placed in /themes PrestaShop folder.
- Now create one new folder in same prestashop (/themes) directory and it should be contain following files only.
.
├── config/
│ ├── theme.yml
└── preview.png
- Once you created theme.yml file, you need to add following lines in your theme.yml file:
parent: classic
name: childtheme
display_name: My first child Theme
version: 1.0.0
assets:
use_parent_assets: true
Where,
1. Parent:
- Your parent theme name as mentioned in themes folder of prestashop directory.
2. Use_parent_assets:
- true : if you want to use the CSS and JS files from the parent theme
- false : if you don’t want to use the CSS and JS files from the parent theme
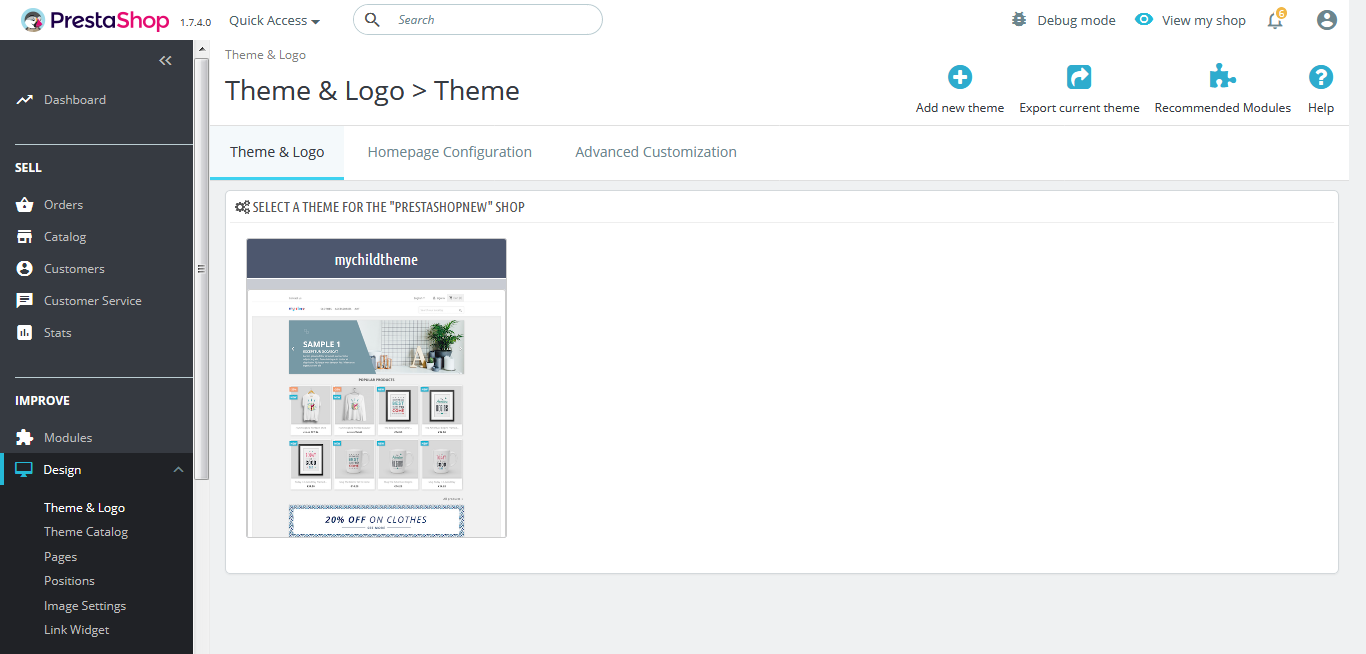
You can now use this theme in your back office and edit it as you wish.
Overriding templates
In the theme.yml config file, the child theme uses every template from the parent theme. There are two ways for extending templates from another theme:
- Override some parts of the template.
- Modifying the whole template structure.
Before this you have to create category template file in child theme at the same prestashop directory:
templates/catalog/listing/category.tpl
Override some parts of the template.
Here, you have to extend the template which is you want to update in your parent theme and also you have to determine block that you need.
To specify that the template comes from the parent theme, you have to add parent: keyword as shown in below example
{extends file='parent:catalog/listing/category.tpl'}
Modifying the whole template structure
Here, you can do whatever you want in this template but most likely you will still want to extend the product-list template. If so, you don’t have to copy that product-list template in your child theme, because prestashop will use the parent file.
Just extend product-list in a normal way and just override the block you need. In below example, I have changed product_list_header block:
{extends file='catalog/listing/product-list.tpl'}
{block name='product_list_header'}
<div class="title">{$listing.label}</div>
{/block}
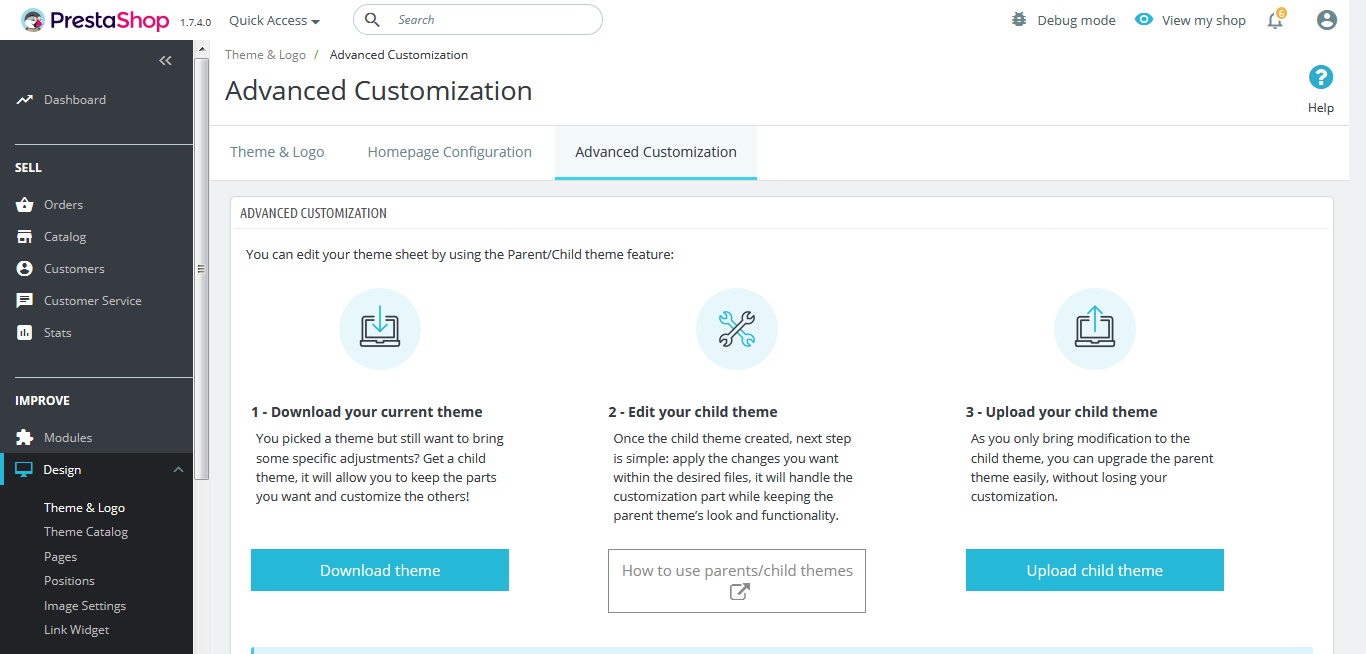
Advanced Customization:
Here you can customize your theme using the Parent/Child theme feature. By clicking on “Download theme”, the merchant will be able to get a zip of the current theme.
1- Download your current theme
2- Edit the child theme
3- Upload the child theme
This is all about how to create child theme in prestashop 1.7.4 version. If you still have any doubts, feel free to ask in comments and we’ll reply as soon as possible.


Write an article about ecommerce that help people to grow their ecommerce business. You’ll find best ecommerce guide, news, tips & more!

March 22, 2019 at 12:24 pm
Wonderful, good job& thank you. Verry useful
May 7, 2020 at 1:04 pm
I love to read your blog! Thanks for posting some valuable posts.