
In this article, we’ll show you, how to import categories in PrestaShop. Follow this simple guideline as shown below.
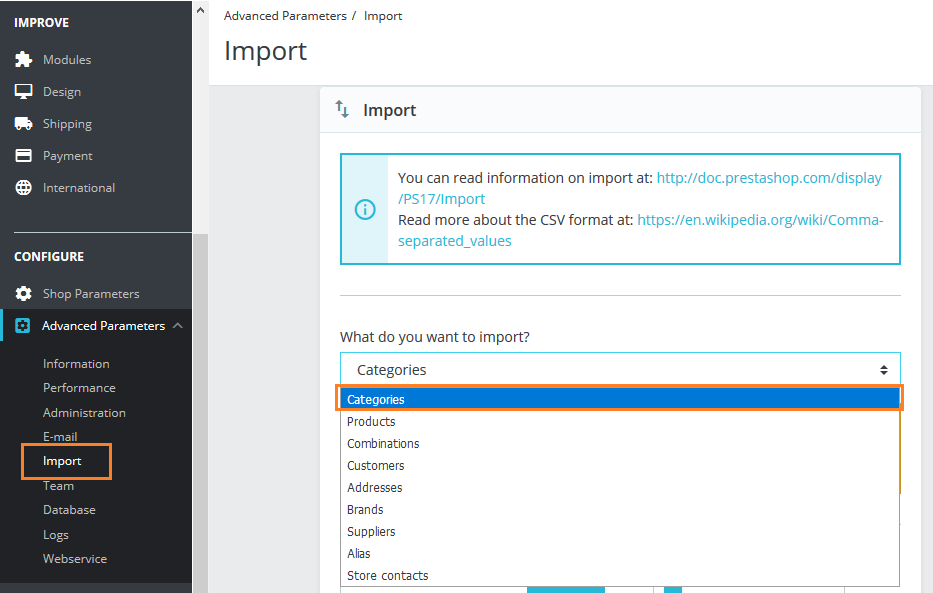
Step 1: To import categories, Login into PrestaShop Back-Office and navigate to Advanced Parameters > Import.
Step 2: Choose the Categories option from the drop-down list of What do you want to import?
Step 3: Now, upload a file for importing your categories using the Browse button or choose files already available from your history / FTP.
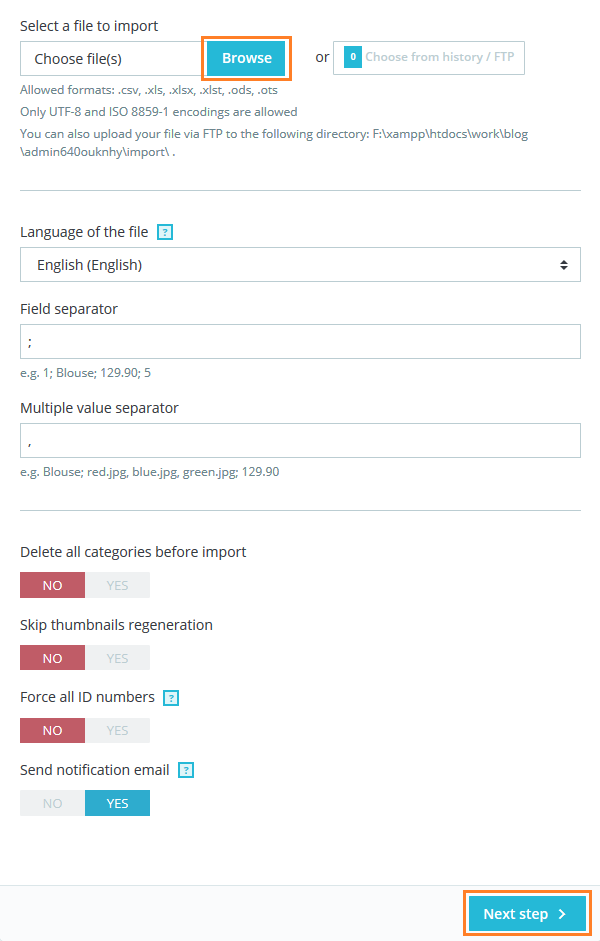
You can download sample files from the “Download sample CSV files” section on the right side.
- Language of the file. You can import categories for a single language at a time.
- Field separator. You can indicate what your files use in this field.
- Multiple value separator. You can indicate what your files used for multiple values.
- Delete all categories before import. This option will erase all existing categories.
- Skip thumbnails regeneration. You can choose to have PrestaShop regenerate the thumbnails that are linked from your CSV file.
- Force all ID numbers. You can either keep the imported IDs or let the importer auto-increment them.
- Send notification email. Enable this option to receive an email when the import is complete.
Click the Next step button to confirm the action.
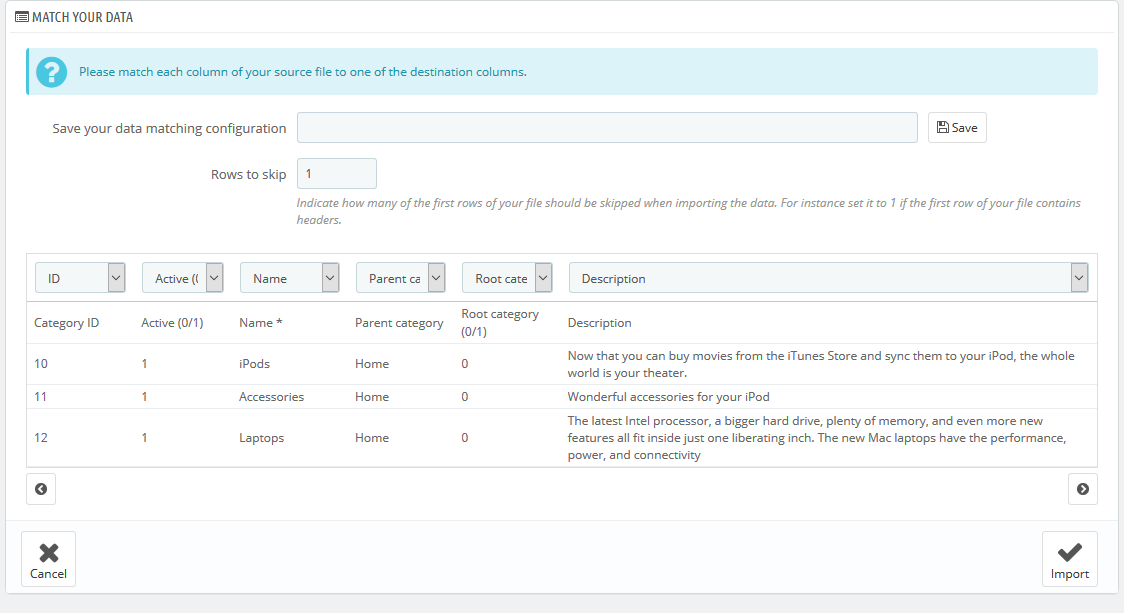
Step 3: Once you are done matching your columns, click the “Import” button to start the importing process.
Once the process is done, it will indicate “100% validated” and “100% imported”. After closing this pop-up, you will be sent to the main screen. That’s it. Your categories are imported successfully! Check out Best PrestaShop Tutorials here!


Write an article about ecommerce that help people to grow their ecommerce business. You’ll find best ecommerce guide, news, tips & more!

November 8, 2020 at 10:53 pm
Hi,
my categories are already imported, is there a way to import category images ? I have around 10,000 category.
How to mass import image category ?
Thanks you