One of the great features of the PrestaShop e-commerce platform is the ability to create and manage multiple stores within one installation. In this tutorial, we will guide you to how to setup Multi-store in PrestaShop 1.7.
Please follow the steps below to create and manage Multi-store in PrestaShop 1.7.
Log-in to your PrestaShop Back-Office.
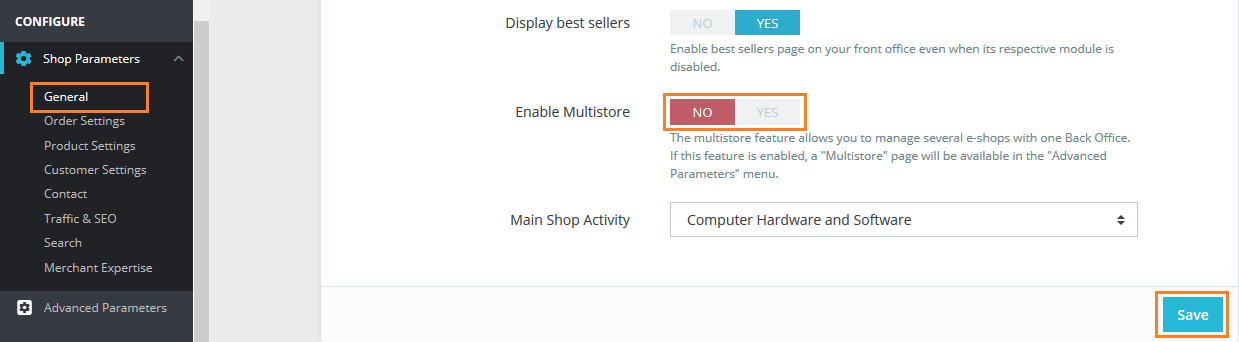
Go to: Preferences > General
Find the Enable Multistore option. Just switch it to Yes and don’t forget to press Save button.
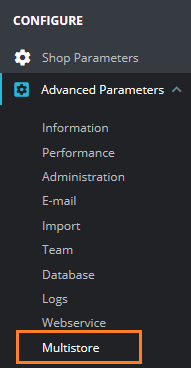
Now, You’ll find a new Multistore option in the Advanced Parameters menu, Click on it.
In the upper right corner please find the Add a new shop button and click on it to create new Multistore group.
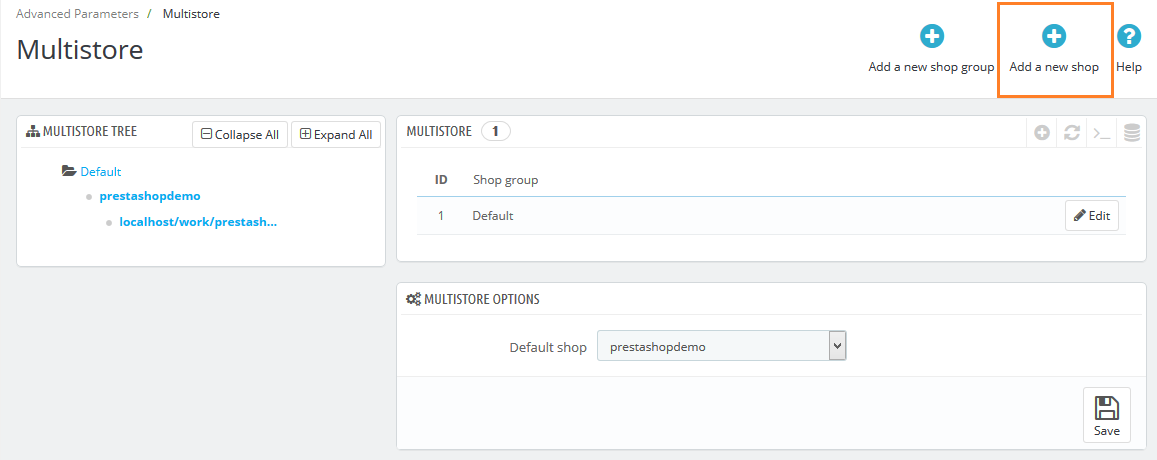
You’ll be taken to a new screen to add the new shop details.
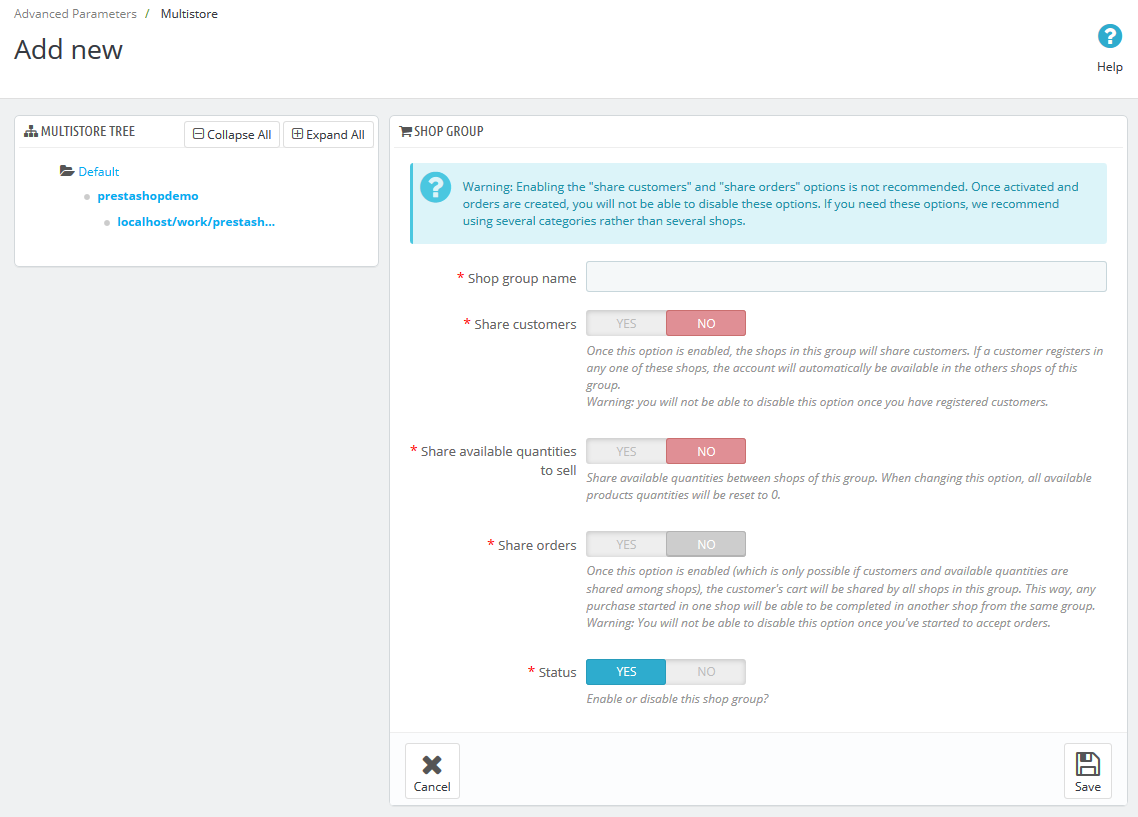
- Shop Name – Add your new shop name here.
- Shop group – Choose shop group for new shop.
- Category root – You can either use the same root or use any category of the catalog as its root.
- Associated categories – Choose which categories you want to associate with your new shop from default store.
- Theme – You can choose any of the available themes as the theme for this new shop.
- Now click the Save button.
Another section is Import data from another shop, where you need to choose which data and from which store you want to import.
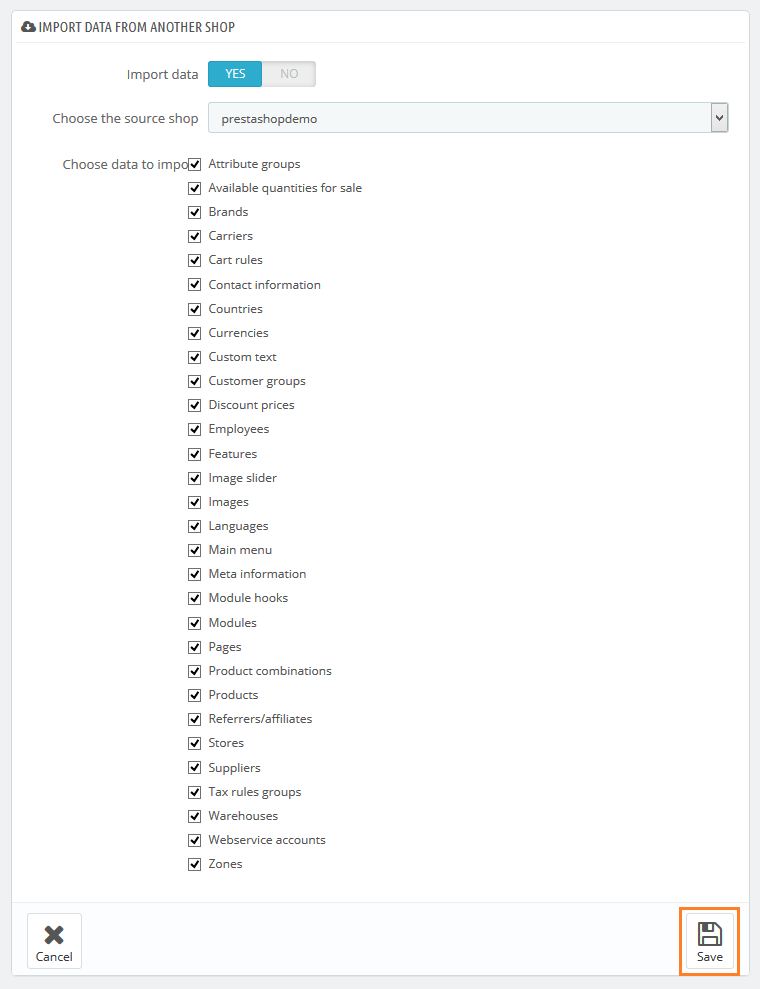
- Import data – Switch it to Yes in case you want to Import Date from the main shop.
- Choose the source shop – Choose from which of the existing shops you want to import that data.
- Choose data to import – Select what kind of data you want to import from the source shop.
- Now click the Save button.
You’ll find a new shop in the list of shops, Click on Click here to set a URL for this shop it.
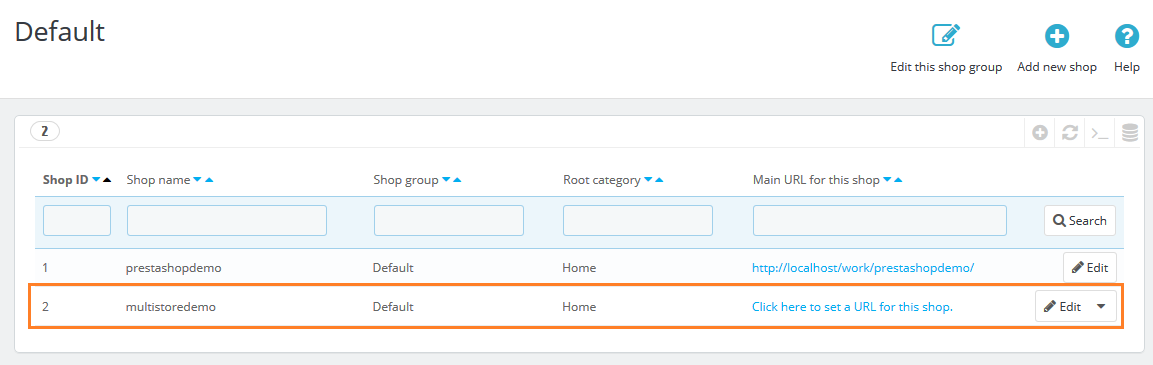
Here, you’ll need to specify a new URL for this new shop. Click the Save button, after you’ll be able to manage it

We hope this tutorial will be helpful for you.


Write an article about ecommerce that help people to grow their ecommerce business. You’ll find best ecommerce guide, news, tips & more!

Leave a Reply