In this article we’ll show you, how to setup the basic Customer Account Options in Magento 2. Follow this simple guideline…
Step 1: Get Started
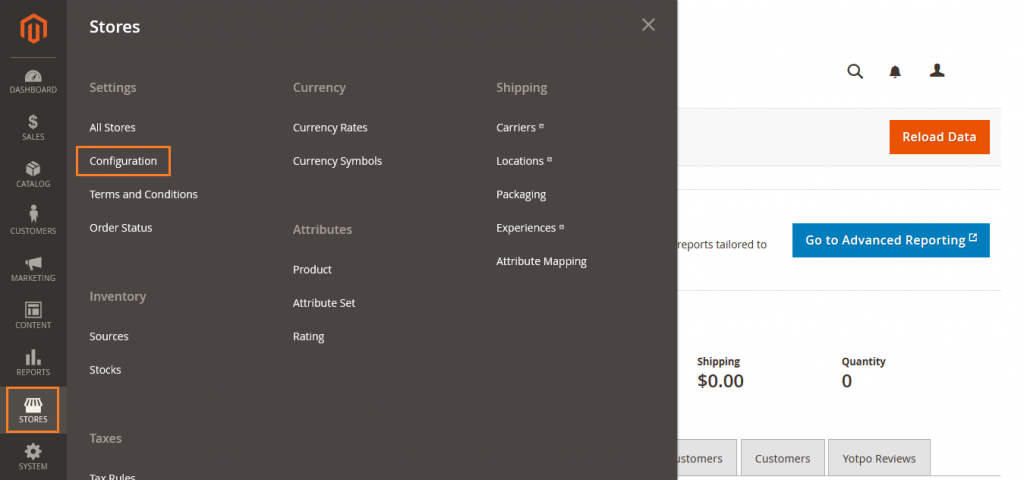
Login into Magento Admin Panel and from sidebar go to, Store > Settings > Configuration
Step 2: Setup Customer Account Options
Now from sidebar go to, Customers > Customers Configuration
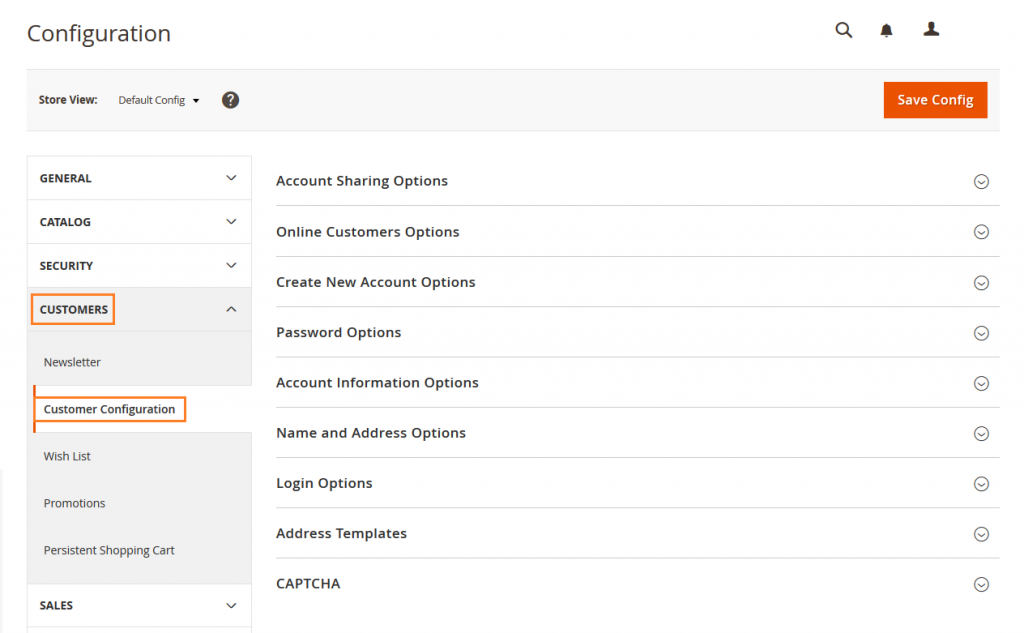
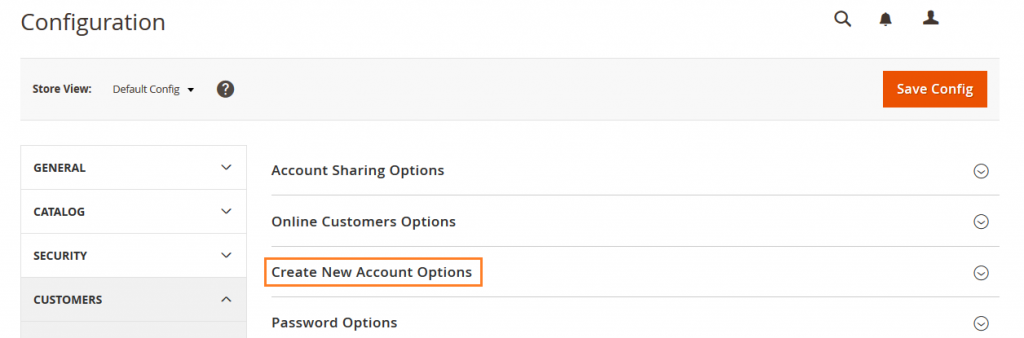
Now Expand “Create New Account Options”
Make the settings as needed.
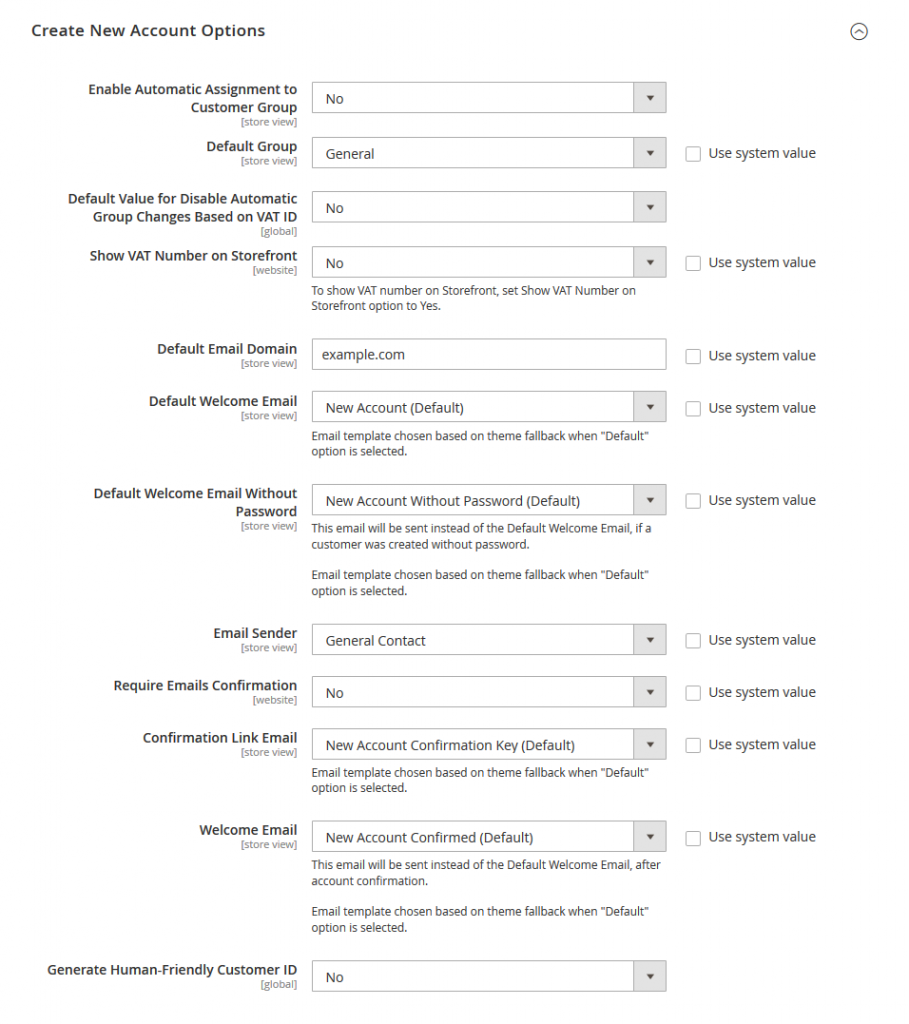
Enable Automatic Assignment to Customer Group: Choose Yes or No as needed.
Default Group: Set Default Group that is assigned to new customers when an account is created.
Default Value for Disable Automatic Group Changes Based on VAT ID: Choose Yes or No as needed.
Show VAT Number on Storefront: If you have a VAT number and want it to be visible to customers, set Show VAT Number on Storefront to Yes.
Default Email Domain: Enter the Default Email Domain for the store.
Default Welcome Email: Select the template that is used for the Welcome email sent to new customers.
Default Welcome Email Without Password: This email will be sent instead of the Default Welcome Email, if a customer was created without password.
Email Sender: Set Email Sender to the store contact that appears as the sender of the Welcome email.
Require Emails Confirmation: Choose Yes or No as needed.
Confirmation Link Email: Set Confirmation Link Email to the template that is used for the confirmation email.
Welcome Email: Set Welcome Email to the template that is used for the Welcome message that is sent after the account is confirmed.
Generate Human-Friendly Customer ID: Choose Yes or No as needed.
Now click on Save Config button.

Yeah Done! Let us know in the comment section below if you have any question. We are happy 🙂 to help you! So this way you can setup the basic Customer Account Options in Magento 2. Check out Best Magento Tutorials here!


Write an article about ecommerce that help people to grow their ecommerce business. You’ll find best ecommerce guide, news, tips & more!

Leave a Reply